Getting Started with Flask: A Python Flask Tutorial
 Mukul Khanna
on
February 08, 2023
Mukul Khanna
on
February 08, 2023

Flask is Python’s most popular web application framework. Using Flask, you can establish a strong foundation for a full-stack application, opening up frontiers for a more extensive, feature-rich website and allowing you to exercise full control over serving your web pages and over the internal data flow. At the end of this post, you will know enough to be able to create a basic web application using a Flask server. Let’s get started!
What is Flask?
Flask is a light-weight, modular, server-side Python framework that allows you to develop web applications.
Frameworks like Flask come with a library of modules and functions with which you can create backend systems for your own web applications. It helps you to create custom endpoints that serve (respond to) the requests from the front-end of your website without having to worry about the lower-level implementations of thread management, data transfer protocols, etc.
Compared to the extensive full-stack frameworks available, Flask is a micro-framework that is compact, easy to understand and the perfect go-to for beginners. It provides a neat API with some excellent documentation and lots of community support.
The widespread community has contributed in developing handy extensions for Flask that help with many functionalities like connecting to a database (eg. SQLAlchemy) or sending emails (eg. flask-mail).
With hardly any dependencies and project layout required, Flask allows you to get a web server running in less than 3 lines of code. Not only is Flask a convenient option for compact personal projects, but it can also scale up well for relatively bigger and more complex industry-level applications.
1.1 Flask vs. Django
If you have just started to explore web development options in Python, it is likely that you have seen Flask and Django.
Among the many web application frameworks available for Python (Flask, Django, Web2py, TurboGears, Bottle, CherryPy, etc), Flask and Django are the most popular ones. Both are used extensively by the Python community for building applications ranging from small scale pet projects to more complex web apps for the masses.
Here's a list of companies that use Flask in web development:
- Netflix
- Lyft
- Uber
- MIT
- Banksalad
- Zalando
- Zillow
And here are just a few of the companies that use Django in web development:
- Coursera
- Udemy
- Robinhood
- Sentry
- Delivery Hero
Here's an important distinction between Django and Flask:
Django is a more extensive full-stack framework that expects some boiler-plate code along with a specific folder structure for developing the application. Even though the prerequisite template is a constraint over convenience and quickly running things, it presents a more organised and modular approach by default.
Flask, on the other hand, being a micro-framework, is more like a breezy plugin that you can import into your code and get a simple web app up and running. This is the primary reason why it’s advisable for beginners to start with Flask to get an understanding of how backend systems can be developed, and then move to Django as per their requirements.
Flask Installation in Python
2.1 Setting up the virtual environment
To set up the environment, we’ll create a virtual environment using virtualenv and then install Flask using Python’s PIP package manager.
Using a virtual environment is always a good practice as it keeps your project dependencies cleanly managed, segregated from the global Python modules.
Installing virtualenv (optional) -
python3 -m pip install virtualenv
Creating a new directory for this tutorial -
mkdir flask-tutorial
cd flask-tutorial
Creating a virtual environment, and activating it -
virtualenv .
source bin/activate
2.2 Installing Flask
Now that our virtual environment is ready, let’s install Flask.
python3 -m pip install FlaskLet’s create a new file, app.py, and write some code.
Hello World in Flask
‘Hello World’ in Flask would be equivalent to getting a simple Flask server up and running.
# app.py
from flask import Flask

app = Flask(__name__) # name for the Flask app (refer to output)
# running the server
app.run(debug = True) # to allow for debugging and auto-reload
You can see that the server is running on port 5000 of your localhost. This means everything is working and we can start writing some server-side code.
Note: You can also run your app by executing the module’s run command through your terminal -
python3 -m flask runor
flask runWhen running the server using the ‘flask run’ command, you don’t need to call the run() method in your code.
After running the server, if you try to open the server URL in your browser, it will give an error message because you haven’t declared or defined any routes for your application.

Output:
Let’s see what a route or an end-point actually is, and create some of our own.
Routes (end-points) in Flask
3.1 What is an end-point?
An API end-point is a resource that you can programmatically create for serving content as per your requirements. End-points can be created for many purposes, for example -
- Serving JSON data
- Catering to authentication (validating user tokens)
- Serving HTML web pages
- Sending and receiving HTTP requests and responses
- Serving RSS feed of a blog
End-points of most servers (HTTP-based) conventionally communicate through a request-response based client-server paradigm. The client sends a request to the server on a specific route, to which the server replies with a response. Most of the whole internet works on such request-response interactions.
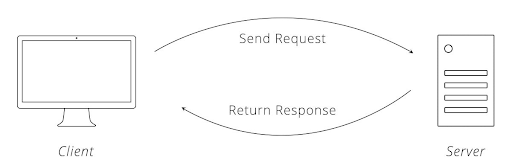
Using Flask we can program such routes for data transfer between the client and the server.
3.2 HTTP Methods
The HTTP protocol has defined certain methods that represent the kind of operations that can be performed through HTTP requests. Some of these are -
- GET - ideal for retrieving data
- POST - ideal for submitting data, resulting in modification of state
- PUT - for replacing server’s target resource with request resource
- DELETE - for deleting a server resource
The most commonly used HTTP methods across the internet are - GET and POST. They are used to fetch data from the server and to submit data to the server correspondingly. The other resource-specific operations in the backend are usually implemented through server-side logic rather than by relying on specialized HTTP methods.
3.3 Creating our own routes
Let’s create a static route in Flask and see how we can serve content through such channels.
We define the route using a Python decorator that helps us to define the route handler as a function in the next line. When creating a route, we can also specify the kind of HTTP method(s) that the route supports.
# app.py
from flask import Flask

app = Flask(__name__)
# defining a route
@app.route("/", methods=['GET', 'POST', 'PUT']) # decorator
def home(): # route handler function
    # returning a response
    return "Hello World!"

app.run(debug = True)
When we navigate to the server’s URL in the browser, it essentially makes a GET request to the server at the default home route “/”. In the above case, we have programmed the server to respond with a ‘Hello World’ string every time there is a request at the home route.
Note that this is an example of a static route as we do not use any information from the request to manipulate the response of the server. The server’s response, in this case, is always the same, regardless of the request payload.
Output:
Serving web pages
Like we saw above, when we visit a website on the internet, it makes a GET request to a server connected to the internet. This server is nothing but a computer somewhere in the world that contains the website content in the form of some HTML, CSS, and JS files.
This means that through server-side scripting, we can exercise control over the web page being rendered for each URL. Let's render some HTML templates and see how we can also serve corresponding CSS and JS files.
4.1 Rendering HTML content
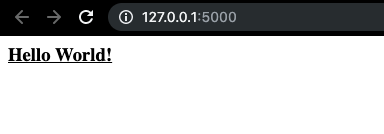
Our browsers are smart enough to parse HTML content returned as a string from the server. The string message returned in the below code will be rendered as HTML content by the browser.
# app.py
from flask import Flask

app = Flask(__name__)
# home route
@app.route("/")
def hello():
    # returning string
    return "<html>\
                <body>\
                    <h3><u>Hello World!</u></h3>\
                </body>\
            </html>"

app.run(debug = True)
Output:
But this method of returning web pages using strings would very obviously be inconvenient and impractical for almost any web page. A more structured and organized approach would be to store HTML templates in separate files and use them for rendering web pages.
We can use Flask's render_template function for the same.
First, we'll write the HTML code in a separate file. The render_template() function takes the name of the HTML file as an argument. It looks for the files in a directory called 'templates'.
So we'll create a 'templates' directory and write the HTML code in an index.html file inside the directory
<!-- /templates/index.html -->
<html>
    <body>
        <h3><u>Hello World!</u></h3>
    </body>
</html>


Using render_template()  -
# app.py
from flask import Flask, render_template # importing the render_template function
app = Flask(__name__)
# home route
@app.route("/")
def hello():
return render_template('index.html')
app.run(debug = True) Output:
4.1.1 Dynamic data for our templates
Using render_template(), you can also pass data variables from the server to the HTML template, thanks to the Jinja2 template engine used by Flask.
app = Flask(__name__)
# home route
@app.route("/")
def hello():
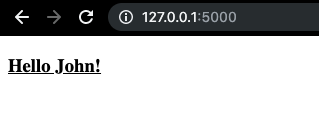
return render_template('index.html', name = 'John') # sending a variable to the template
app.run(debug = True) We can directly use the received data variable by printing it using the {{ }} operator.
<!-- /templates/index.html -->
<!DOCTYPE html>
<html>
    <body>
    <!-- name variable populated before rendering-->
        <h3><u>Hello {{name}}!</u></h3>
    </body>
</html>
Output:
Other than using the {{ }} operator for printing passed variables, there are other ways also to inject dynamic behavior in the HTML templates. For example -
Let's send one more variable from our server to the template and implement some logic around that.
# app.py
from flask import Flask, render_template
app = Flask(__name__)
# home route
@app.route("/")
def hello():
return render_template('index.html', name = 'Jane', gender = 'Female')
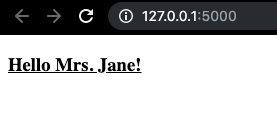
app.run(debug = True) In our HTML template, we’ll put an if condition based on the gender data that we receive.
<!-- /templates/index.html -->
<!DOCTYPE html>
<html>
    <body>
        {% if gender == "Male" %}
            <h3><u>Hello Mr. {{name}}!</u></h3>
        {% else %}
            <h3><u>Hello Mrs. {{name}}!</u></h3>
        {% endif %}
    </body>
</html>
Output:
This web templating system, plugged with the Jinja2 template engine allows us to insert logic and some level of dynamic nature into our HTML templates. This is achieved through Jinja2's delimiters, some of which we used above. Here is a list of all the delimiter options -
- {% ... %} for code statements
- {{ ... }} for printing an expression to the template
- {# ... #} for comments not included in the template output
- # ... ## for line statements
For more information about default, Jinja2 delimiters look here.
4.2 Serving static assets
CSS and JS files that complement the HTML code of your website conventionally need to be in a directory named 'static.' Let's write some CSS for our Hello World page and save it in the 'static' directory.
/* /static/style.css */
body {
background: lightblue;
}
h3 {
color: purple;
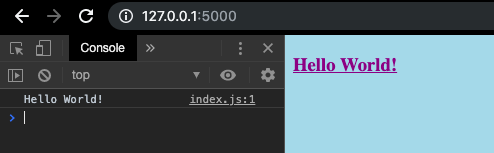
}Now we’ll import this CSS file into our HTML code.
<!--index.html-->
<!DOCTYPE html>
<html>
    <head>
        <link rel="stylesheet" href="/static/style.css">
    </head>
    <body>
        <h3><u>Hello World!</u></h3>
    </body>
</html>
Output:

Similarly, we can add JS code to our website too.
// /static/index.js
console.log('Hello World!')
<!-- /templates/index.html-->
<!DOCTYPE html>
<html>
<head>
<link rel="stylesheet" href="/static/style.css">
<!-- importing JS code -->
<script src="/static/index.js"></script>
</head>
<body>
<h3><u>Hello World!</u></h3>
</body>
</html>Output:
Similarly, we can also use the static folder to serve other static assets like images, gifs etc that can be used in our web pages.
Dynamic routes
URLs can carry much information about the corresponding web page. This information is useful not only for the server to decide which HTML template to serve but also for segregating the pages based on the content that populates the template.
For example - for a company that has hosted the details of their employees on their website (www.company.com), the employee-detail web page would consist of one HTML template page populated with that employee's information. For every employee, the same HTML template would be reused, with only the employee data differing.
A prevalent scenario like this can be achieved by passing information through URLs. The employee-detail page can show at a URL such as -
www.company.com/employee/<employee-id>
Thanks to the employee-id provided in the URL as an identifier, the server now has the information it requires to populate the template and render the web page. This dynamic approach can help in reusing templates on-the-fly and can help in saving resources, also making way for more related URLs.
Let's see how we can pick up such request URL variables using Flask.
# app.py
from flask import Flask, render_template

app = Flask(__name__)
# <id> allows us to capture corresponding characters from the URL
@app.route("/employee/<id>")
def employee_details(id):
    return render_template('index.html', id = id)

app.run(debug = True)
In the above code, take note of the URL and the handler function's parameter.
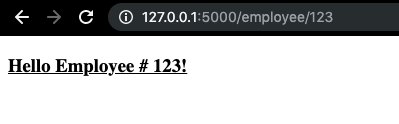
Making corresponding changes to the HTML template -
<!-- /templates/index.html-->
<!DOCTYPE html>
<html>
    <body>
        <h3><u>Hello Employee # {{id}}!</u></h3>
    </body>
</html>
Output:
Dealing with requests and responses
Now before we wrap up, it is essential to get a sense of the request-response based interaction between the client and the server - something you'll spend most of your time on when designing backend interfaces. To be able to understand better let's break down the client-server communication steps -
5.1 Client makes a request
The client or the front-end of your website can make an HTTP request to the server using HTML or JS. The easiest way to create and send a request from your HTML is to use the form action attribute.
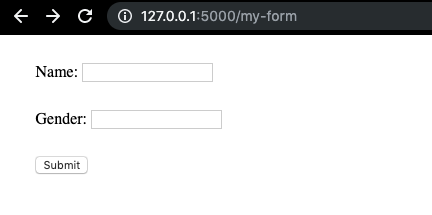
Let's create an HTML form element with two input fields, and one submit button.
The 'action' parameter of the form element declares the URL of the route that handles the request, and the 'method' parameter defines the HTTP method executed corresponding to the request. We'll create a new HTML file for our form.
<!-- /templates/my-form.html-->

<html>
    <body>
        <form action="/form-handler" method="POST">
            <div>
                Name: <input type="text" name="name"><br>
            </div>
            <div>
                Gender: <input type="text" name="gender"><br>
            </div>
            <input type="submit" value="Submit">
          </form>
    </body>

    <!-- minimal styling -->
    <style>
        form {
            margin: 2%;
        }

        div {
            margin: 2% 0;
        }
    </style>
</html>
Now that we have our form template ready, we'll serve this web page on a different URL, and therefore create a route for that.
# app.py
from flask import Flask, render_template
app = Flask(__name__)
# home route
@app.route("/")
def hello():
return render_template('index.html', name = 'Jane', gender = 'Female')
# serving form web page
@app.route("/my-form")
def form():
return render_template('form.html')
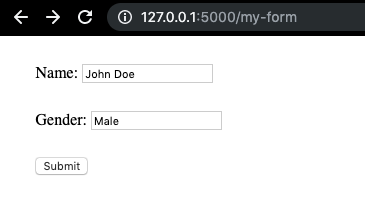
app.run(debug = True) After the server restarts, we should see the form served at /my-form.
The submit button initiates a POST request to the route /form-handler. But since we haven't created the end-point and its handler till now, the POST request would fail.

5.2 Defining the end-point
We need to create an end-point in the app.py file to capture the form request.
# app.py
from flask import Flask, render_template

app = Flask(__name__)


# home route
@app.route("/")
def hello():
    return render_template('index.html', name = 'Jane', gender = 'Female')

# serving form web page
@app.route("/my-form")
def form():
    return render_template('form.html')

# handling form data
@app.route('/form-handler', methods=['POST'])
def handle_data():

    return "Request received successfully!"

app.run(debug = True)
Our end-point /form-handler is ready and now we can test the form request.

On submitting the form, the URL changes to the new route and we can see the message returned.
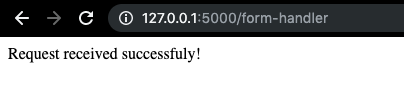
Note that we didn't define a template for the form-handler page. The response string is parsed as HTML content by the browser.
So far, we used the request as just a trigger and returned a dummy message from the server. But this is not very useful as we are not utilizing the information we received as a part of the request. Let's see how we can unpack the request object.
5.3 Inspecting the request object
To play around with the request object, we need to import the request module from Flask. Each handler function can then access the methods and attributes of the client request and use that information to process the data and accordingly deliver a response.
Some of the commonly used request attributes are -
- request.form: key/value pairs of data sent through POST
- request.args: key/value pairs of data from the URL query string (through GET)
- For example, using request.args, the key/value pairs retrieved from the GET request URL https://company.com?name=abc&id=123 are name=>abc and id=>123.
- request.values: generic key/value pair extraction (for both GET, POST)
- request.files: to obtain the sent files
- request.json: to obtain parsed JSON content
- request.method: HTTP method used by the request
All but the last two attributes return dictionary data. Therefore we can extract the values as such-
request.form['key_name']Let’s unpack the request object from our previous example and capture the form-data sent from the client.
# app.py
# also importing the request module
from flask import Flask, render_template, request
app = Flask(__name__)
# home route
@app.route("/")
def hello():
return render_template('index.html', name = 'Jane', gender = 'Female')
# serving form web page
@app.route("/my-form")
def form():
return render_template('form.html')
# handling form data
@app.route('/form-handler', methods=['POST'])
def handle_data():
# since we sent the data using POST, we'll use request.form
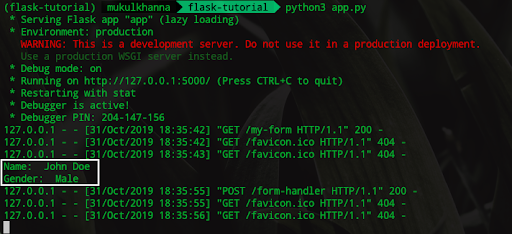
print('Name: ', request.form['name'])
# we can also request.values
print('Gender: ', request.form['gender'])
return "Request received successfully!"
app.run(debug = True) On submitting the form now, we should see the form data values logged in our terminal.
Output:
5.4 Sending back a response
Here we are only printing the request form-data in the server logs. Route handler functions are more likely to process this data and accordingly serve an appropriate response.
Let's use some basic if conditions to implement a logic for the response to be sent.
# handling form data
@app.route('/form-handler', methods=['POST'])
def handle_data():
welcome_msg = 'Hello '
name = request.form['name']
if request.form['gender'] == 'Male':
welcome_msg += 'Mr. ' + name
elif request.form['gender'] == 'Female':
welcome_msg += 'Mrs. ' + name
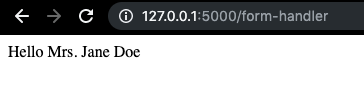
return welcome_msgHere, the server responds with a welcome message based on the gender of the user.
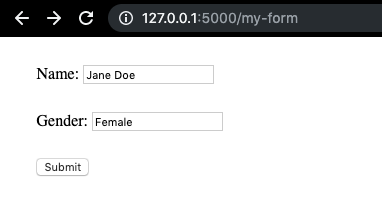
On submitting the form, we see the below output.
In most cases, the response from the server is captured by a JS callback function on the client's side, and not directly used in the HTML template. In such cases, the responses from the server are more structured, commonly JSON formatted.
For example, when the client requests a list of employees from the server to show on a web page, after retrieving and processing the data from the database the server, sends a JSON array to the client. This JSON array is captured in the JS-based client-side code that captures the server response and fills the HTML template in the required places.
Handling the response object using JS code is out of the scope of this tutorial, so let's focus on sending a JSON response from the server. Sending the response is possible using Flask's jsonify function.
#app.py
# importing jsonify
from flask import Flask, render_template, request, jsonify
After importing the library function, we can use the function to encode our data in the JSON format.
# app.py

# handling form data
@app.route('/form-handler', methods=['POST'])
def handle_data():
    return jsonify(request.form)
Here we are just jsonifying the data we received from the form-request and serving that as the response.
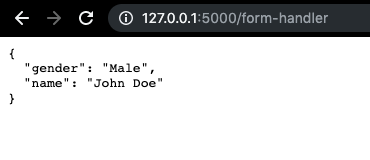
This is the JSON encoded server response. JSON makes developers happy. JSON stands for Javascript Object Notation and is, therefore, the most preferred and prevalent way of communicating through HTTP requests.
Wrapping it up
In this post, we learned about Python's most popular web application micro-framework, Flask. We set up a virtual environment, installed the package, and learned how to create a basic server with routes. We learned about HTTP methods, serving web pages, and dynamic routes. By implementing the concepts, we also learned how the request-response based communication happens between the client and the server.
All in all, we learned the basics of creating a website with a Flask backend. Now that you have all the information go ahead and build something - a personal portfolio, a website for your dog, anything, and test your knowledge by doing it yourself.