Alerting
Slack
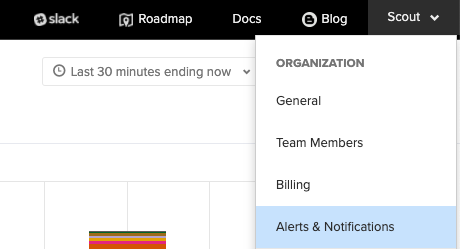
To integrate with Slack, head to the notification channels page via the following URL, or by heading to the Alerts & Notification dropdown tab and heading to Notification Channels on the left sidebar:
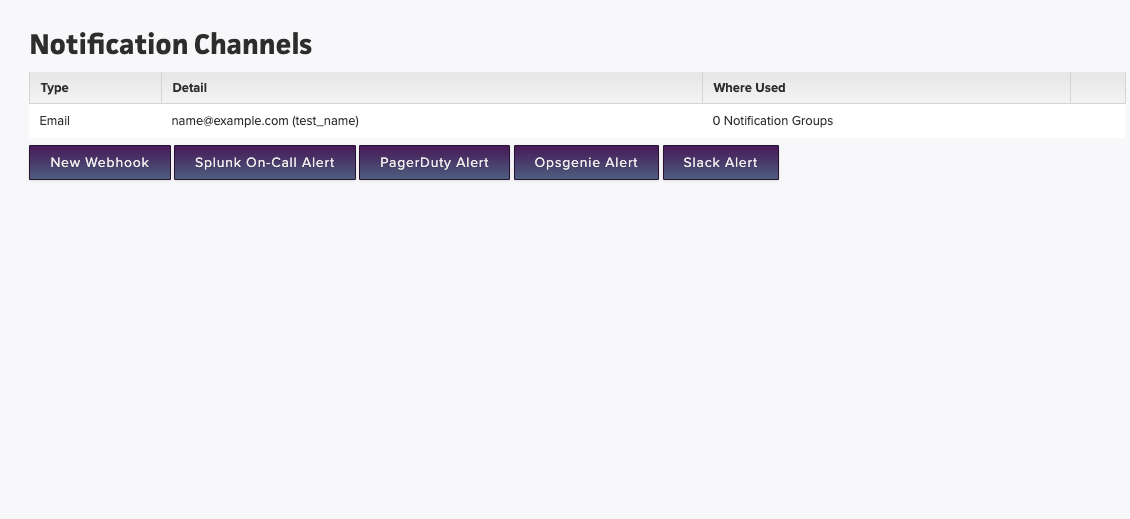
Then select Slack Alert button in the bottom right:
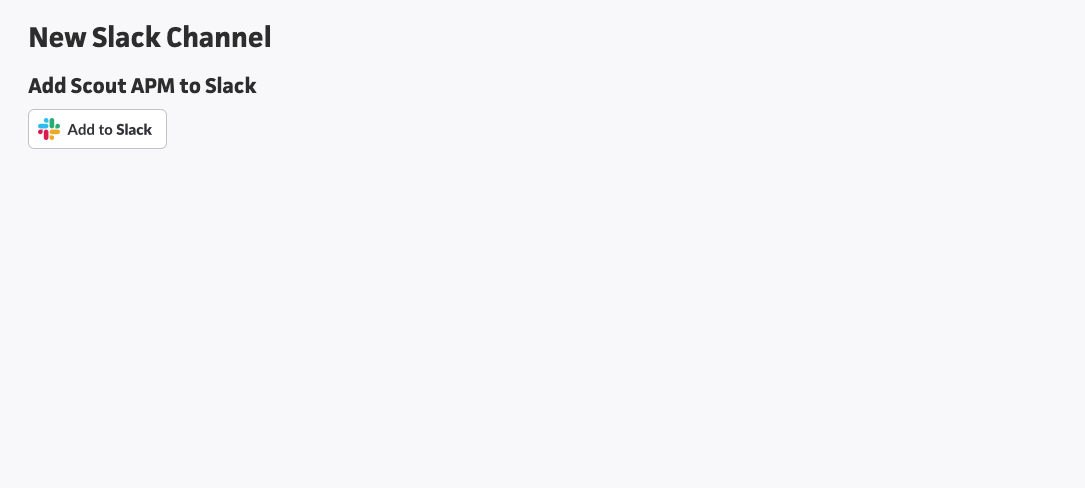
Once on the “New Slack Channel” page, click the “Add to Slack” button. This will redirect you to Slack
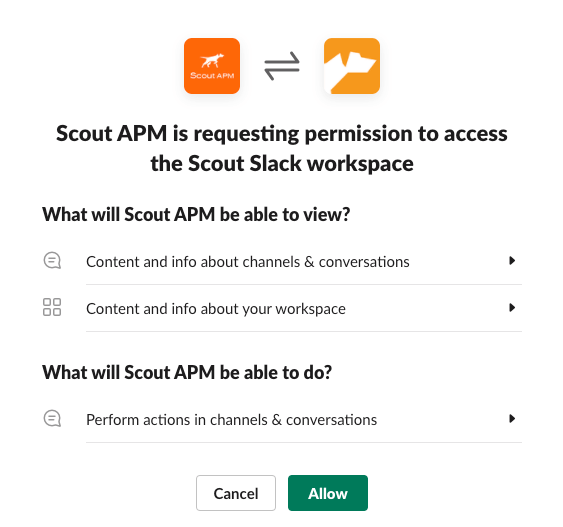
Once on Slack, you will need to give Scout authorization to your workspace
Once you have given Scout authorization, you will be redirected to scoutapm.com, and a “Slack Integration Successful” message should be shown. Click on the “Create a Slack notification channel” to be brought back to the “New Slack Channel” page.
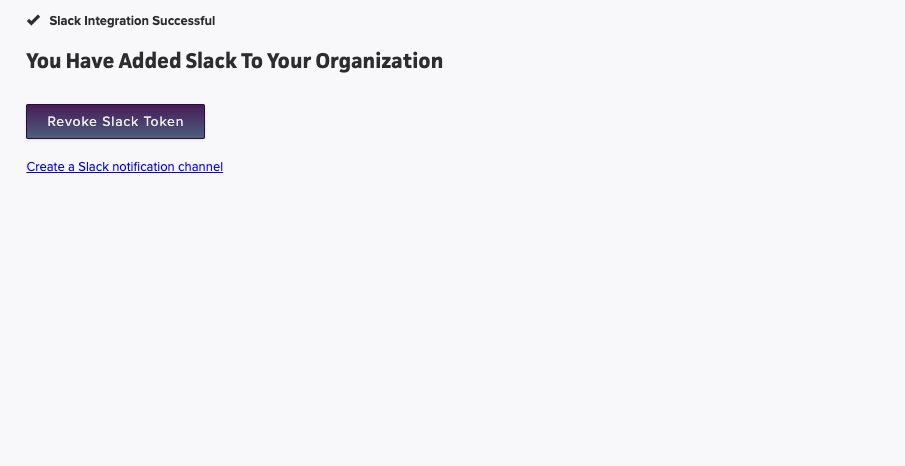
Give the channel a name, and select the channel from the datalist that you would like to send Slack alerts to.
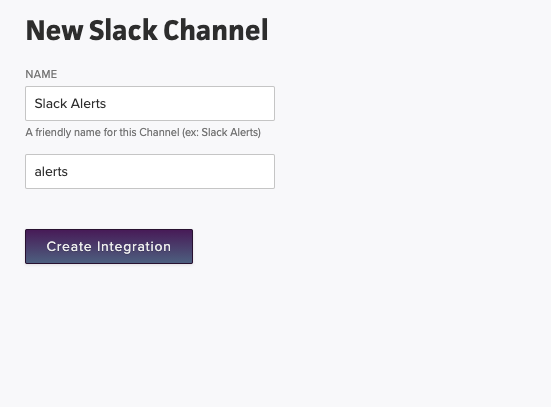
Test it out! You can now test out the Slack integration via clicking the “Send test alert” button. Once you have set up alerts, you will see messages similar to:
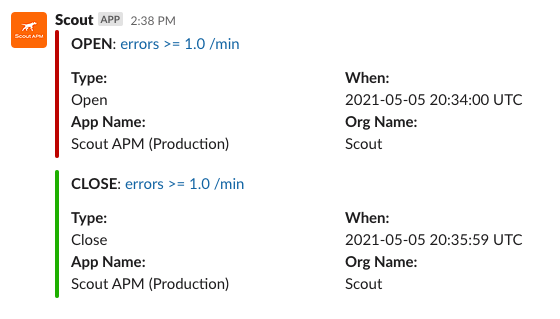
Once you have created the integration/channel, you can now add the channel to a (or multiple) notification group(s). When you create alerts, you assign a notification group to alert. That way when an alert occurs all of the channels in that group get notified:
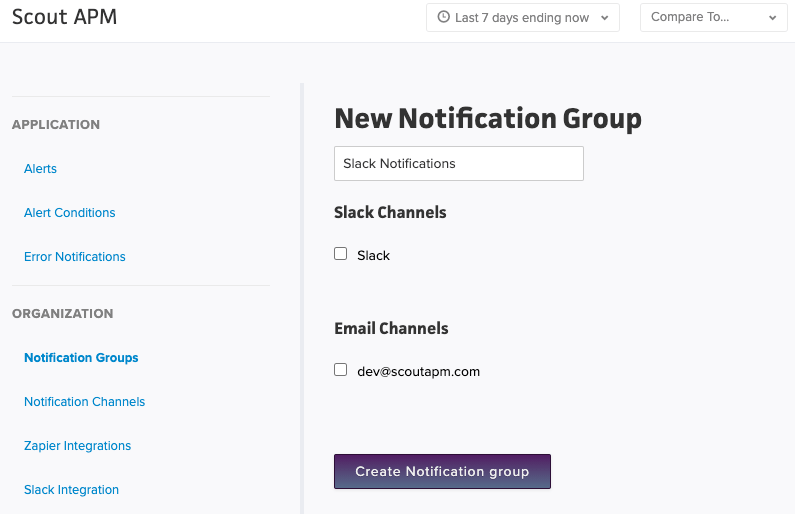
Once on the Notification Groups page, you can either add it to the default notification group, or create a new one:
Error Notifications
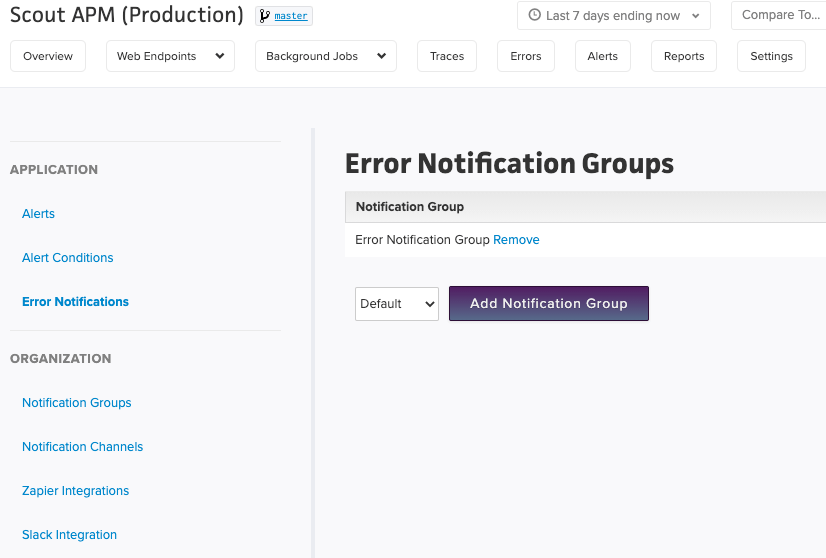
To use this integration for Error Notifications, once you have added the channel to a notification group (such as in the example above), you will then need to add this notification group to the app’s error notifications group.
To do so, head to the “Error Notifications” link on the left hand side on the Alerts and Notifications page, and add the recently created (or updated “Default”) notification group that contains the Slack integraiton channel.
Private Channels
If you are trying to send Slack notification to private channels, you will need to first invite/add the Scout APM @Scout APM app to the channel, then reload the notification channel page, and the channel should appear in the list.
Support
If you need help with this integration, please email us at support.
User Data
To review and understand how we use and protect our users data, please visit our privacy policy page.
PagerDuty
Integration key from PagerDuty
To integrate PagerDuty with Scout’s Alert Notification system, first head over to pagerduty.com, log in to your account, and head to Services > Service Directory
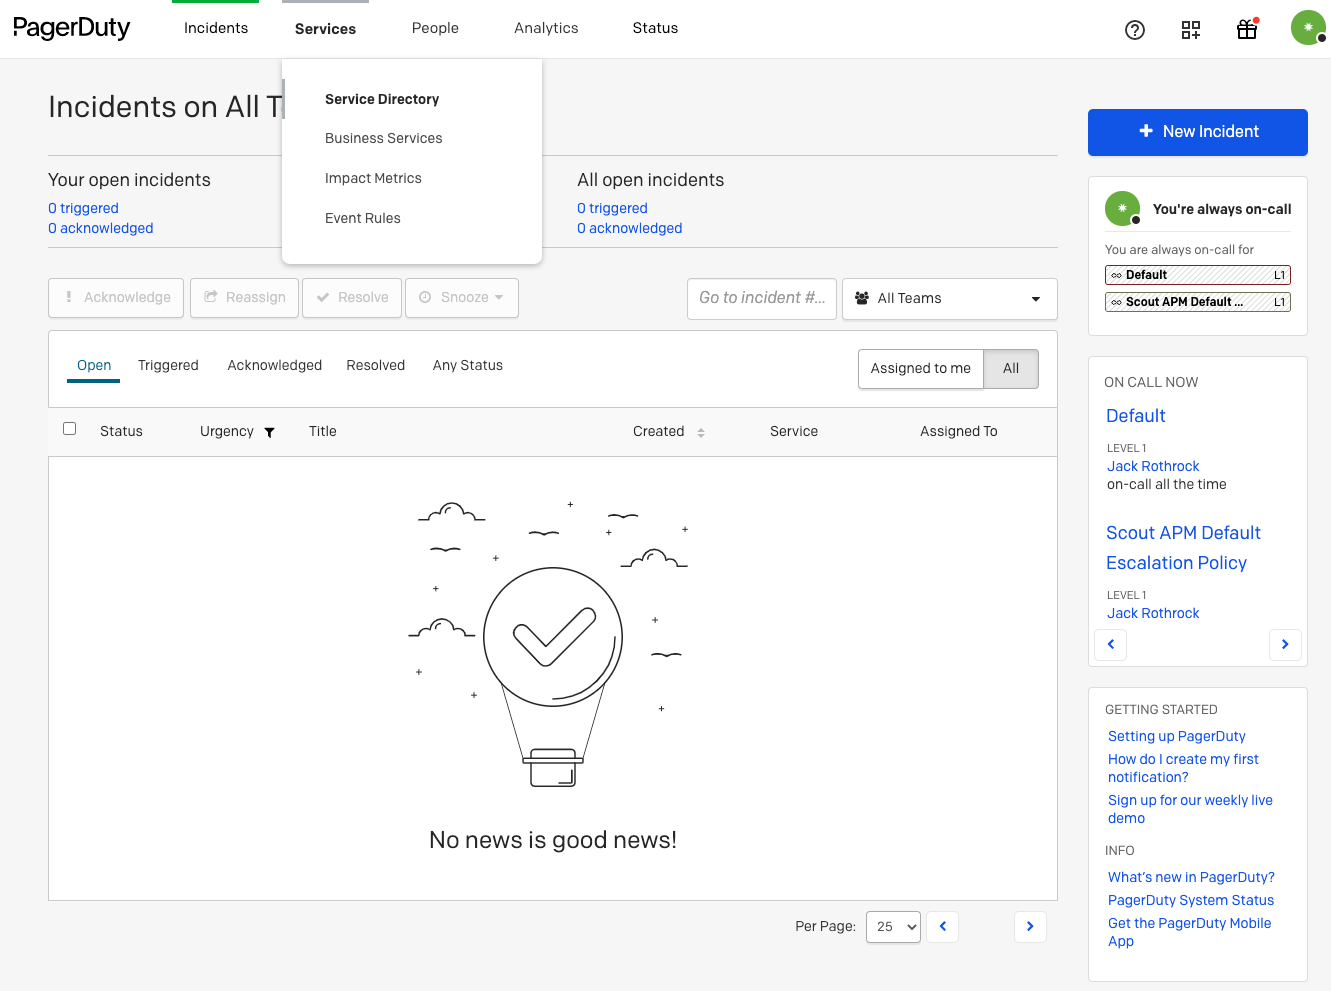
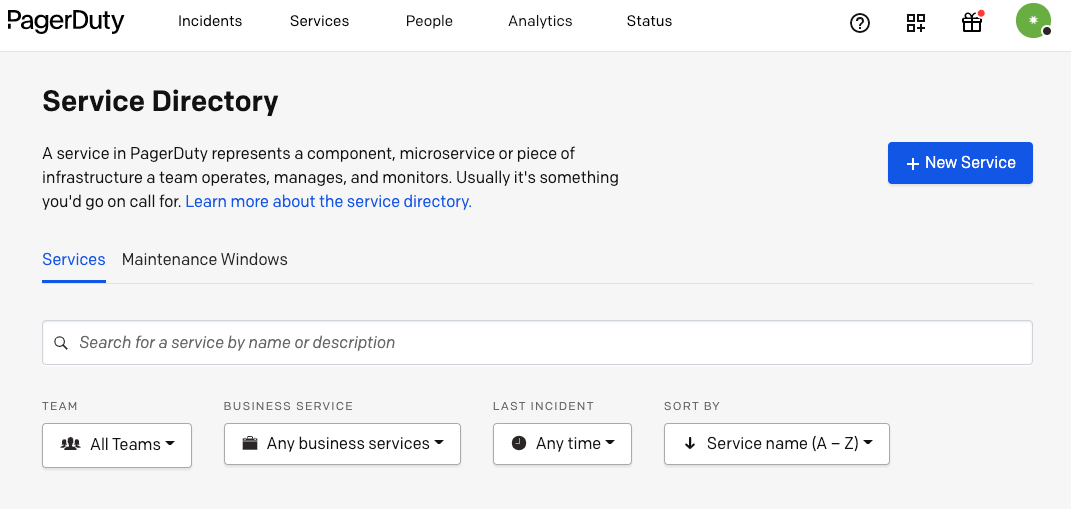
Once one the Service Directory page, use the button in the upper right corner to create a new service.
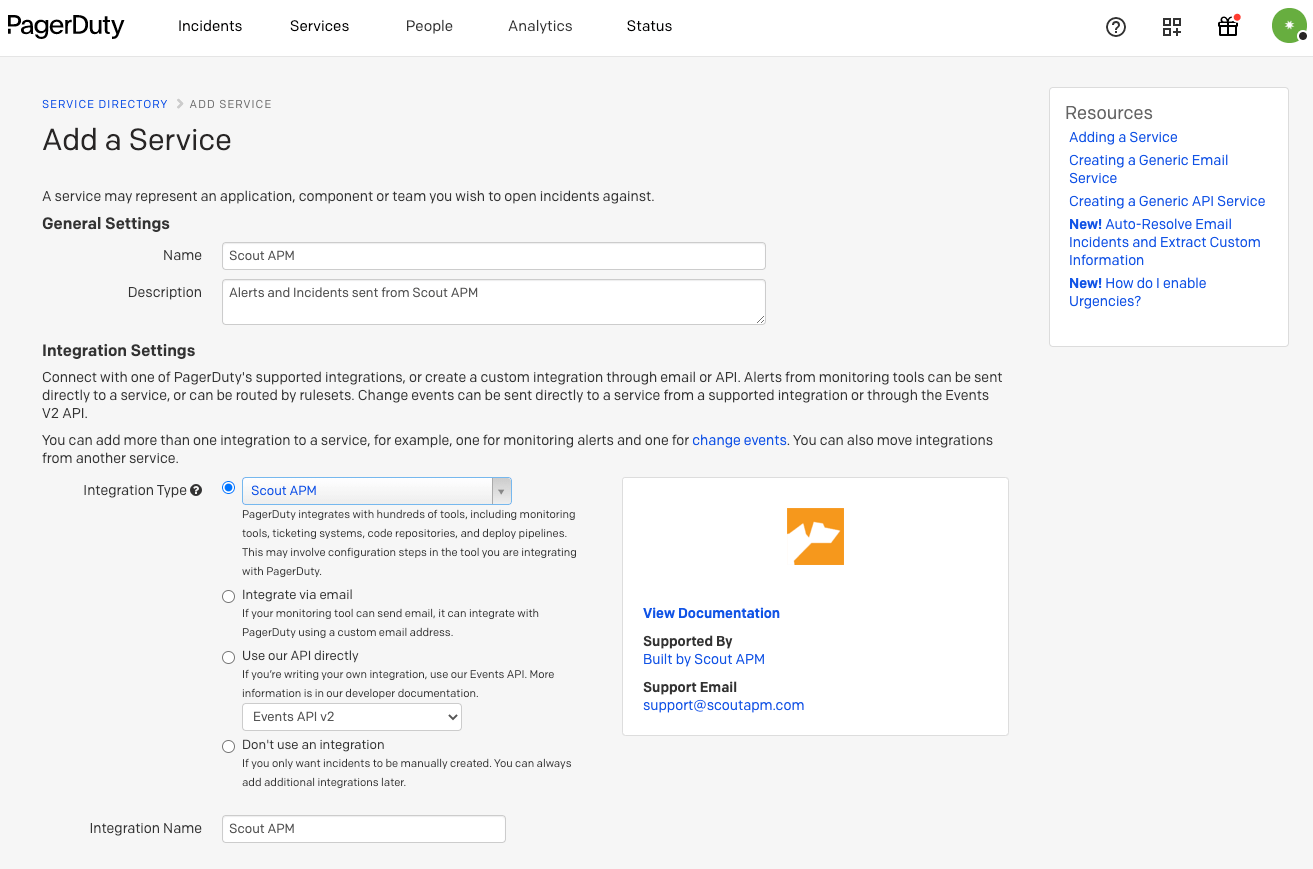
On the new Service page, search for the Scout APM integration in the Integration Type field. Fill in the below fields to your liking.
Once you have saved the service, you will be able to grab the integration key on the “Integrations” tab. Copy this key and headback over to scoutapm.com
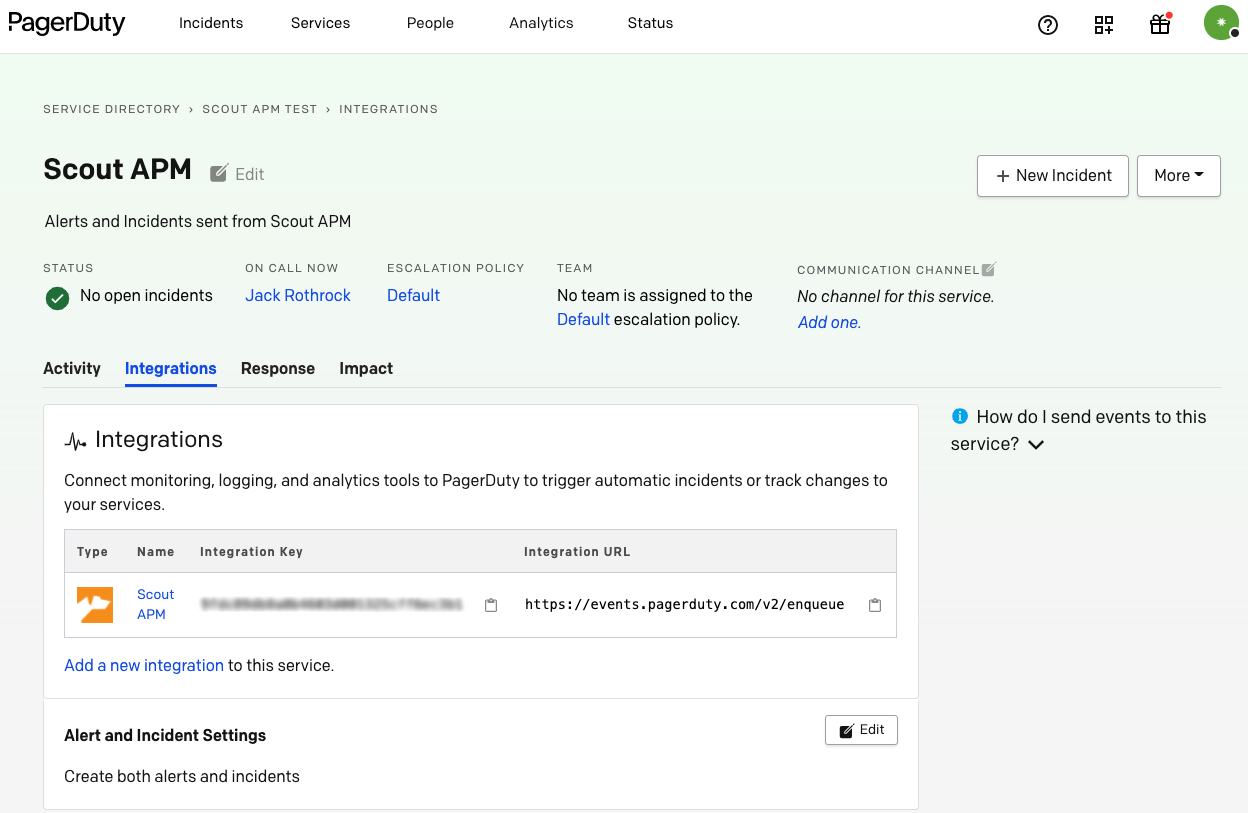
Adding PagerDuty to Scout
Head back to scoutapm.com, and head to the notification channels page via the following URL, or via heading to the Alerts & Notification dropdown tab and heading to Notification Channels on the left-hand sidebar:

To add a PagerDuty notification channel, click the “PagerDuty Alert” button in the bottom right:
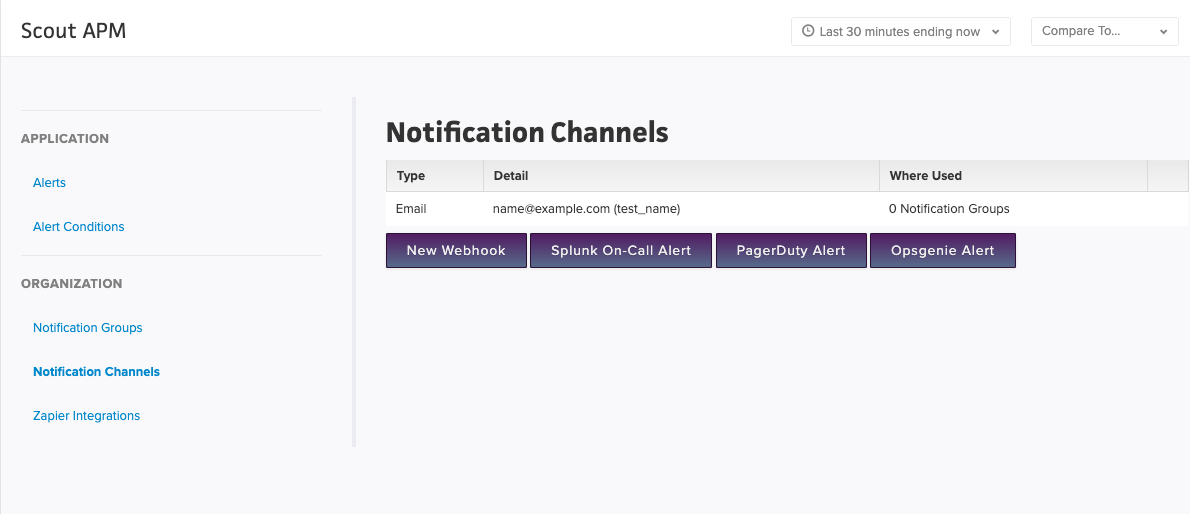
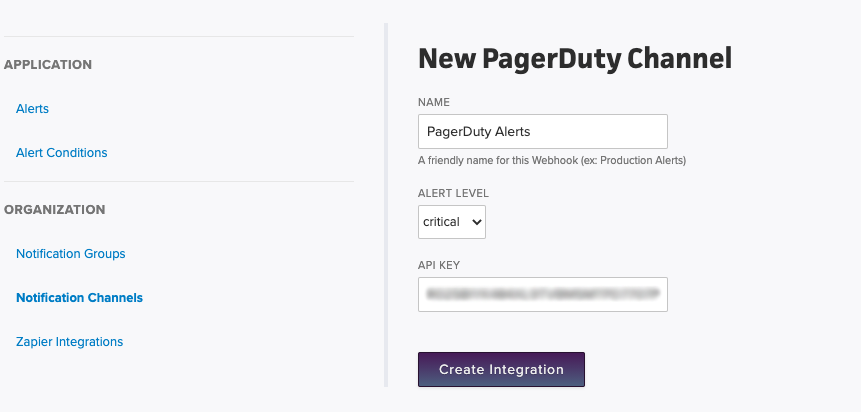
Add a name for the Channel, then add the integration key you got when creating the ruleset on pagerduty into the API key field, and set the alert level you’d like this notificiation channel to be at
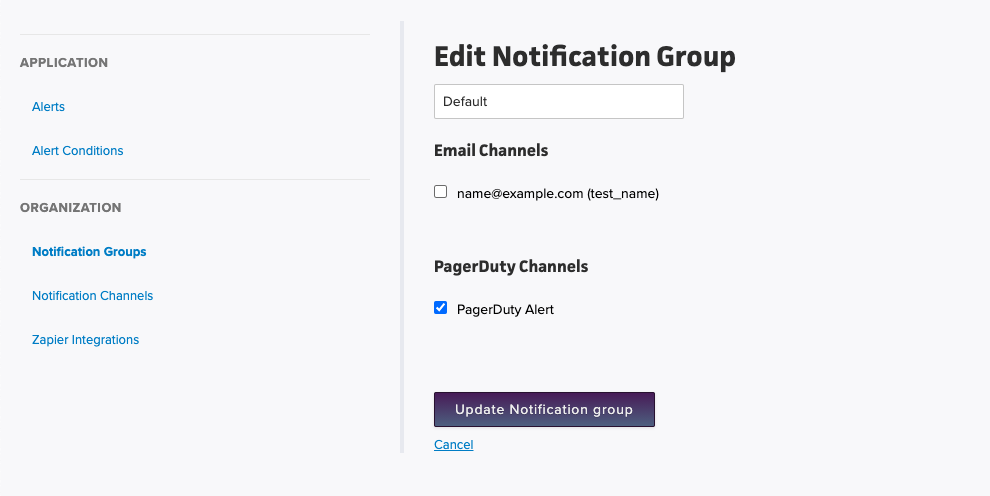
Once you have created the integration/channel, you can now add the channel to an (or multiple) notification group(s). When you create alerts, you assign a notification group to alert. That way when an alert occurs all of the channels in that group get notified:
Once on the Notification Group page, you can either add it to the default notification group, or create a new one:
Error Notifications
To use this integration for Error Notifications, once you have added the channel to a notification group (such as in the example above), you will then need to add this notification group to the app’s error notifications group.
To do so, head to the “Error Notifications” link on the left hand side on the Alerts & Notifications page, and add the recently created (or updated “Default”) notification group that contains the PagerDuty channel.

Support
If you need help with this integration, please email us at support.
Splunk On-Call
Formerly Victorops
Integration URI from Splunk
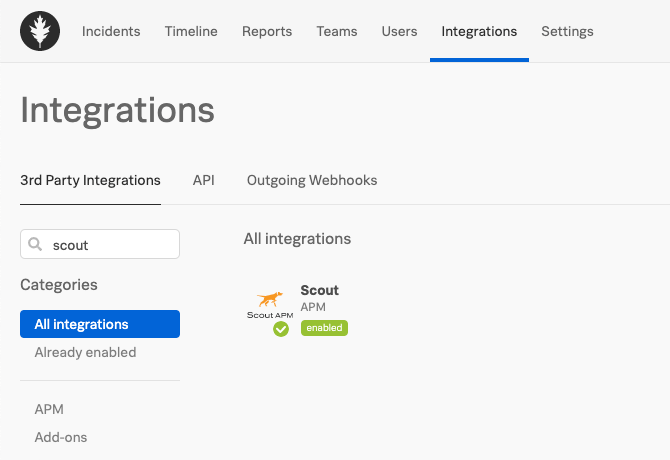
To integrate Splunk On-Call with Scout’s Alert Notification system, first head to integrations page on your account and search for the Scout integration and enable it
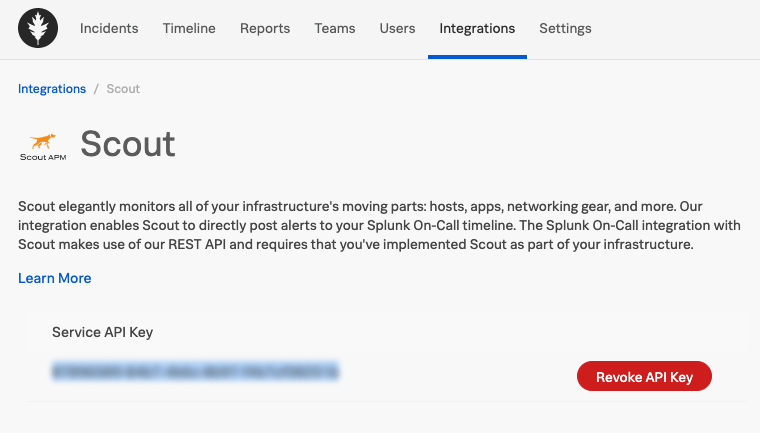
Once you have enabled the Scout integration, copy the Service API Key (such as 372b7111-casd-1234-5678-90cb1af0129f).
Adding Splunk to Scout
Head back to scoutapm.com, and head to the notification channels page via the following URL, or by heading to the Alerts & Notification dropdown tab and heading to Notification Channels on the left-hand sidebar:

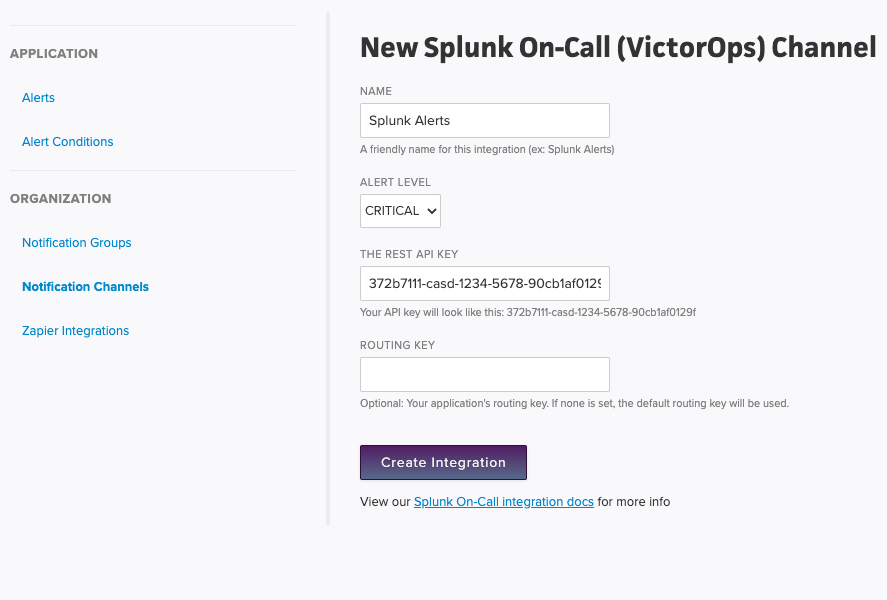
To add a Splunk On-Call notification channel, click the “Splunk On-Call Alert” button in the bottom right:

Add a name for the Channel, then add the Service API key that you were presented with on the integration page. If you have a routing key that would like to set, place it in the routing key area. Then set the alerting level that you would like
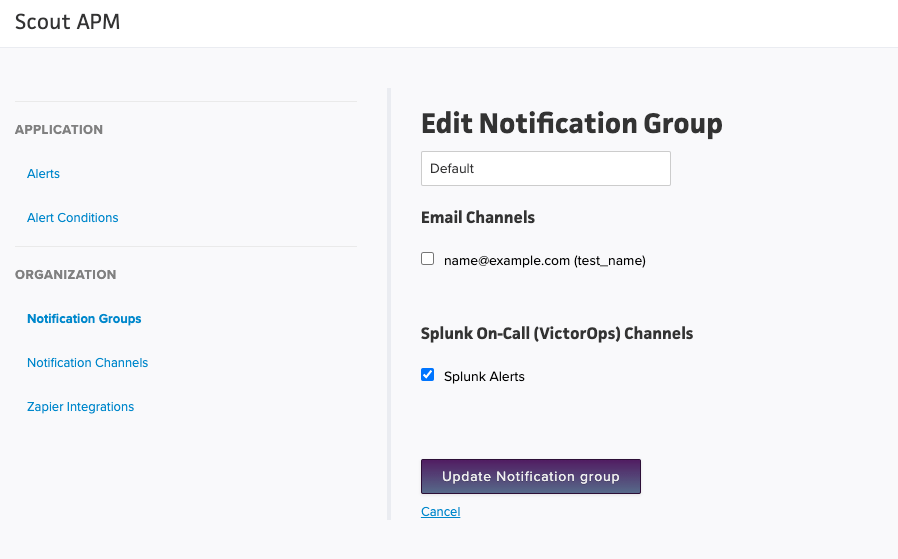
Once you have created the integration/channel, you can now add the channel to an (or multiple) notification group(s). When you create alerts, you assign a notification group to alert. That way when an alert occurs all of the channels in that group get notified:
Once on the Notification Group page, you can either add it to the default notification group, or create a new one:
Error Notifications
To use this integration for Error Notifications, once you have added the channel to a notification group (such as in the example above), you will then need to add this notification group to the app’s error notifications group.
To do so, head to the “Error Notifications” link on the left hand side on the Alerts & Notifications page, and add the recently created (or updated “Default”) notification group that contains the Splunk On-Call channel.

Support
If you need help with this integration, please email us at support.
Opsgenie
Integration key from Opsgenie
Note Requires a Standard plan or higher.
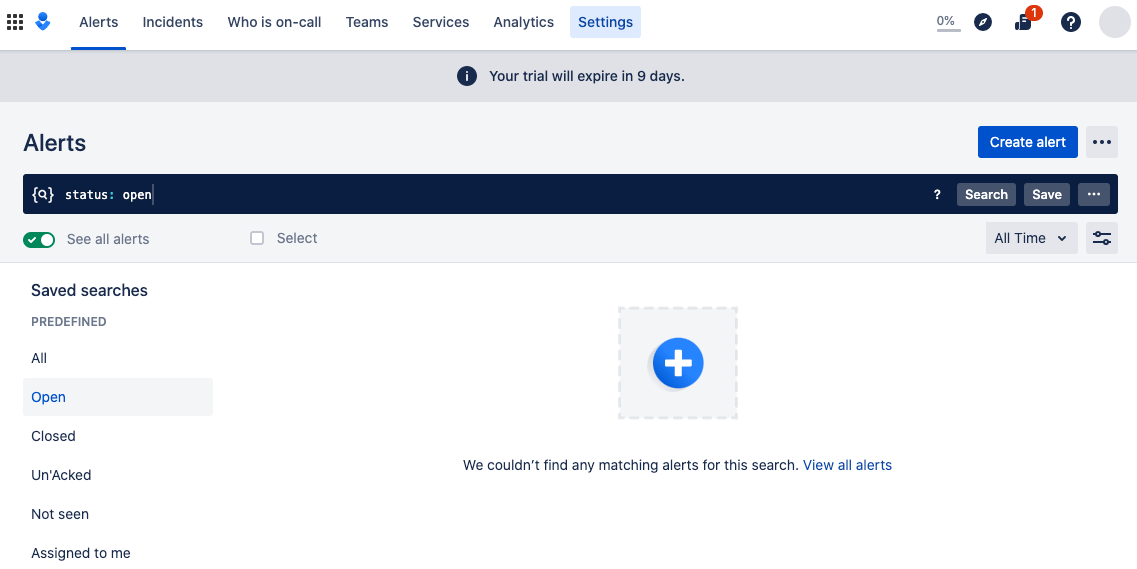
To integrate Opsgenie with Scout’s Alert Notification system, first head over to opsgenie.com, log in to your account, and head to the settings page
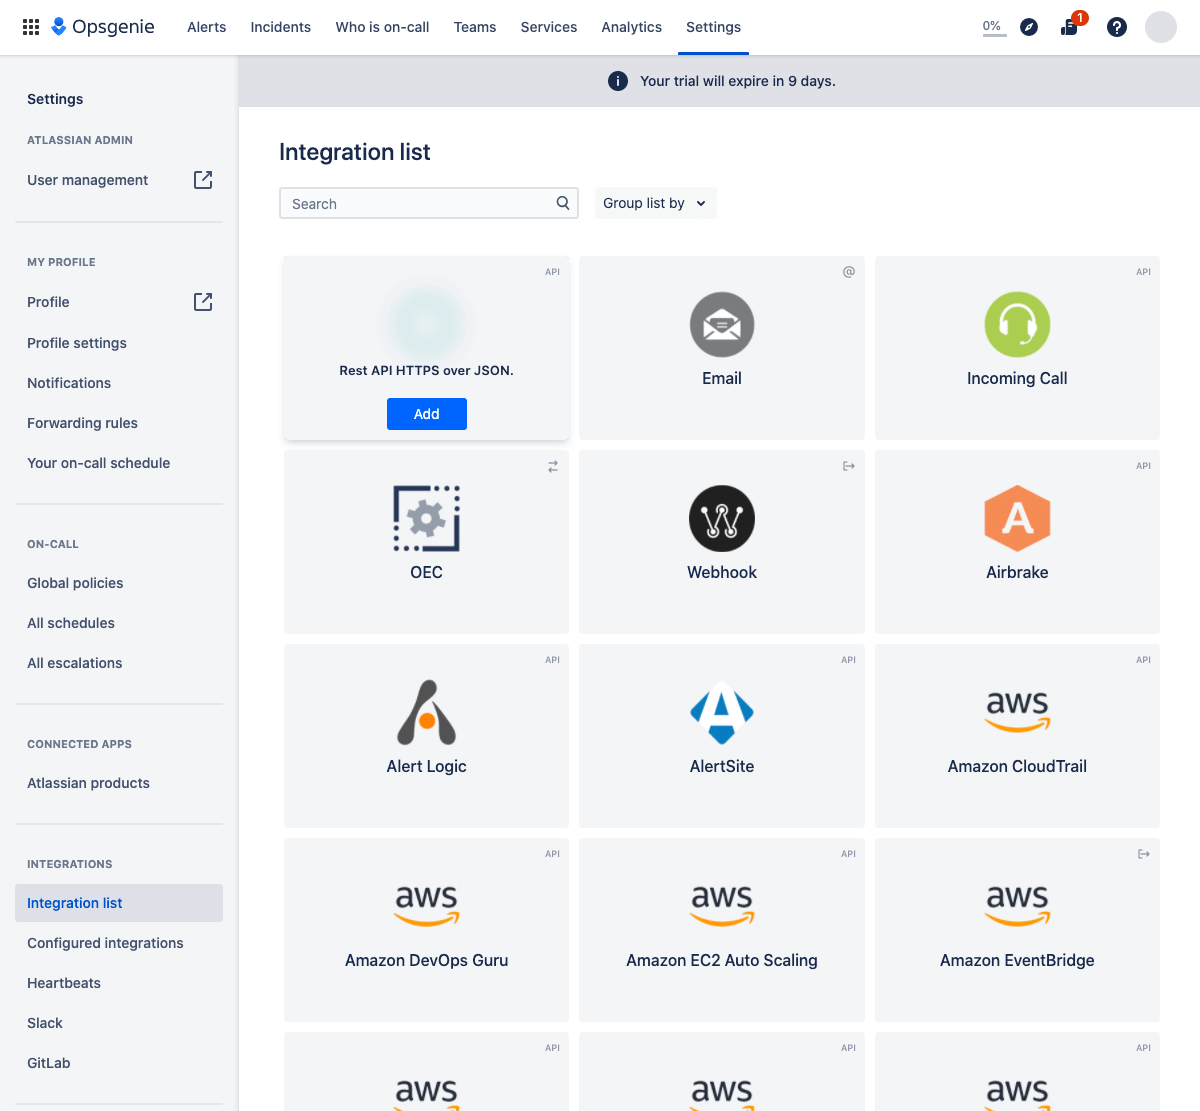
Once one the settings page, on the left hand sidebar find the integrations list. On the integration list page, add a new API Integration:
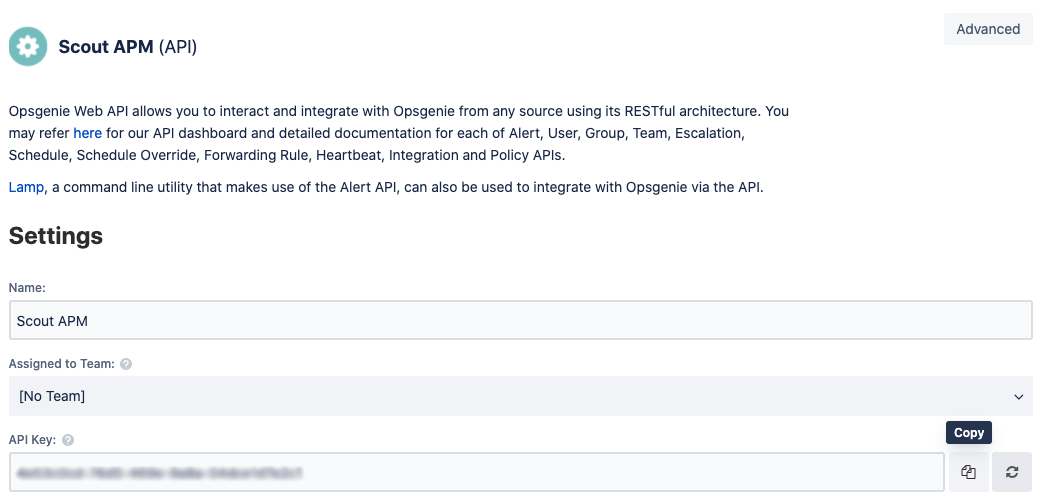
On the Add API integration page, set the name to Scout, and set the values you’d like. We will need Create and Update privileges. Then Copy the API key and save the integration:
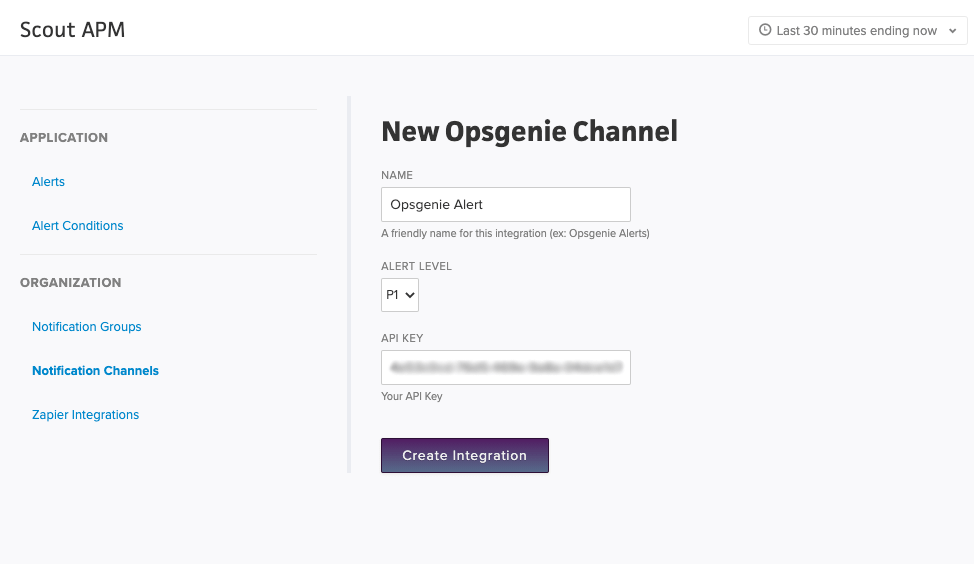
Adding Opsgenie to Scout
Head back to scoutapm.com, and head to the notification channels page via the following URL, or by heading to the Alerts & Notification dropdown tab and heading to Notification Channels on the left-hand sidebar:

To add a Opsgenie notification channel, click the “Opsgenie Alert” button in the bottom right:

Add a name for the Channel, then add the API key the API key field, and set the alert level you’d like this notificiation channel to be at
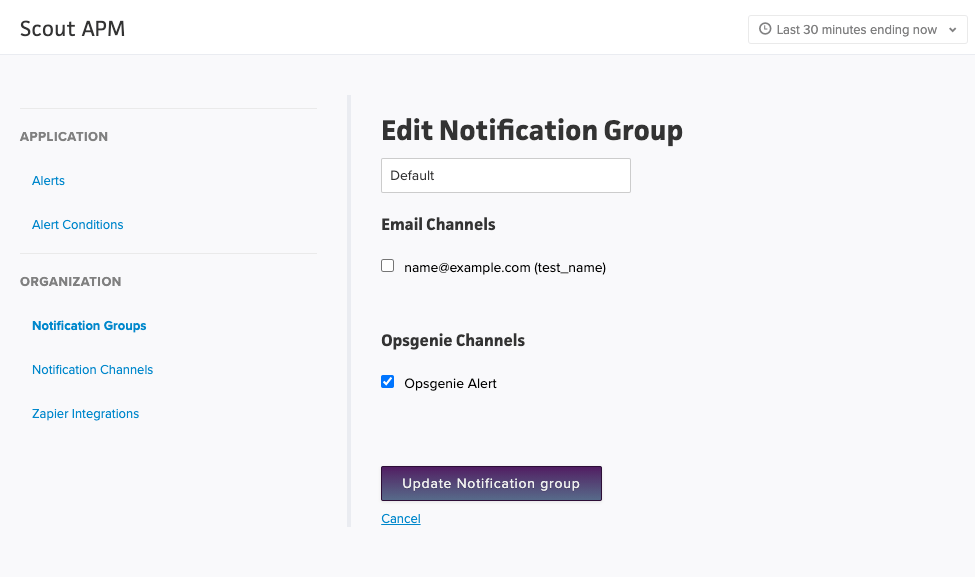
Once you have created the integration/channel, you can now add the channel to an (or multiple) notification group(s). When you create alerts, you assign a notification group to alert. That way when an alert occurs all of the channels in that group get notified:
Once on the Notification Group page, you can either add it to the default notification group, or create a new one:
Error Notifications
To use this integration for Error Notifications, once you have added the channel to a notification group (such as in the example above), you will then need to add this notification group to the app’s error notifications group.
To do so, head to the “Error Notifications” link on the left hand side on the Alerts and Notifications page, and add the recently created (or updated “Default”) notification group that contains the Opsgenie channel.

Support
If you need help with this integration, please email us at support.
Zapier
To integrate Zapier with Scout’s Alert Notification system, you can utilize the Webhook feature on the Application > Notification Channels page. In this example, we will show how to setup Slack using Zapier.
Zapier Configuration
First of all you will need to create an account with Zapier, and once you have done this, you can go ahead and create a Zap, by clicking on the Make a Zap! button on the top right-hand side of the screen, as shown in the image below.
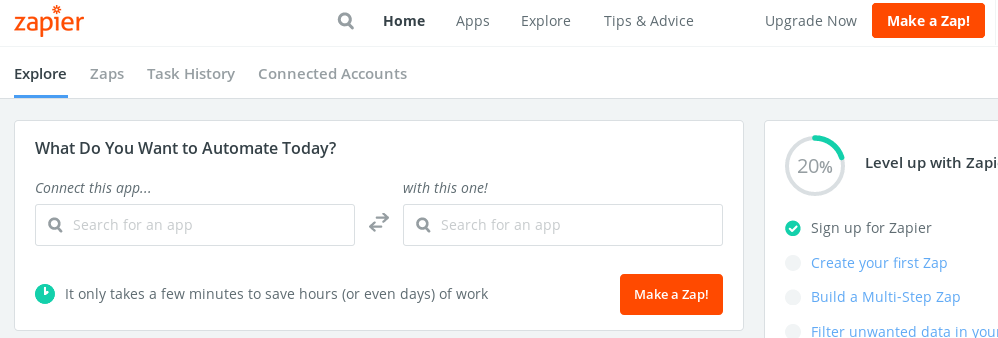
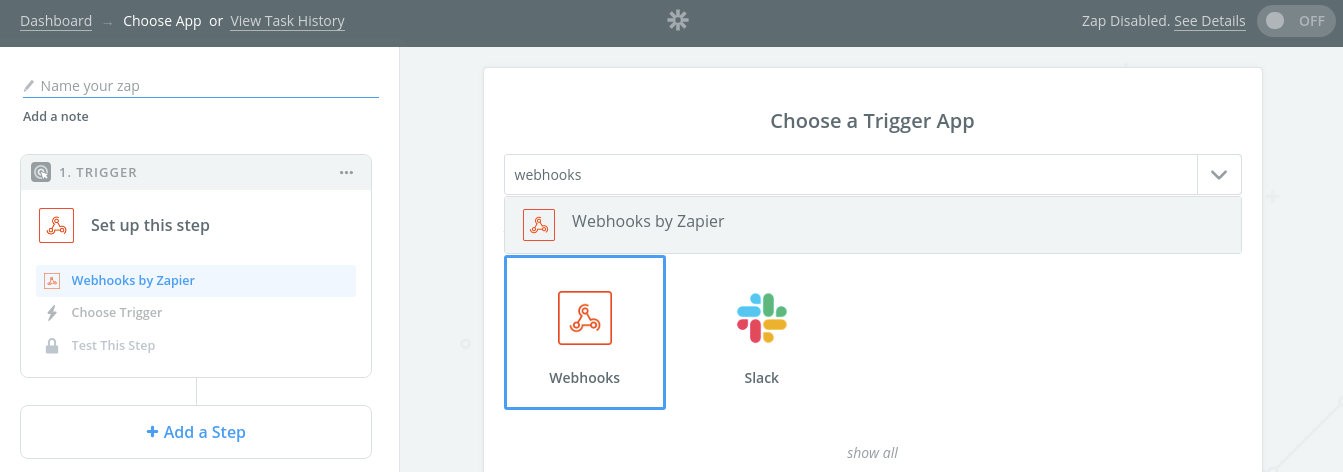
You need to create a Trigger (for Scout) and an Action (for Slack) in order to make the two systems able to communicate. First of all, create the trigger by selecting Webhooks by Zapier as the App you want to work with.
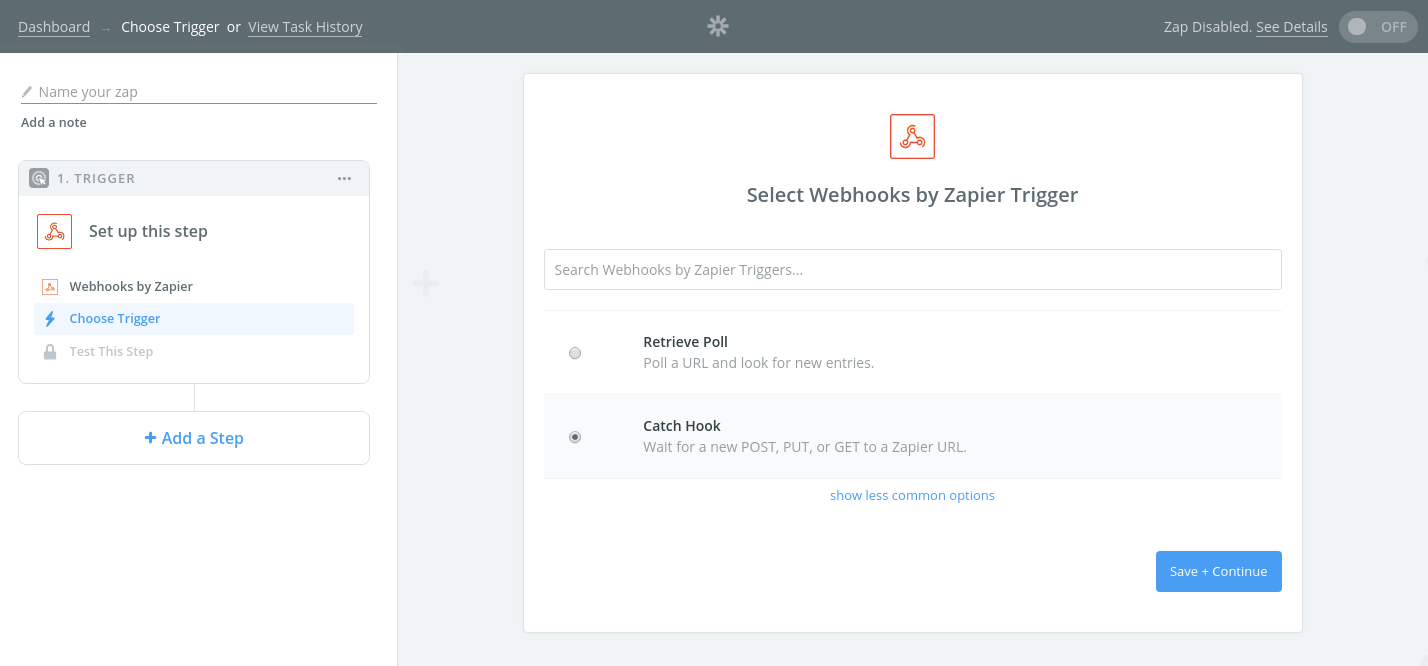
Next you will need to select the type of trigger that you want, select Catch Hook. Next you will be given a URL, which is the Webhook that we will use to link to in Scout. Copy this URL and then open up Scout.
Scout Configuration
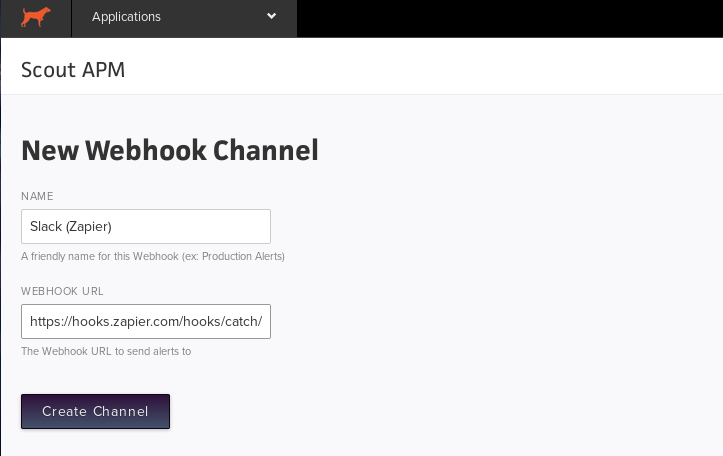
In Scout, navigate to Application > Notification Channels and create a new Webhook, like the picture below, copying in the Zapier URL.
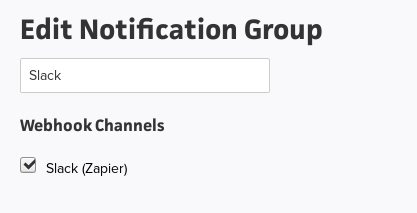
Next you will need to add or edit a Notification Group to include this new channel.
Create an Alert
At this point if you try to carry on creating the Zap in Zapier, it will try to pull a sample Alert from Scout using the Webhook that we set up. The reason it does this is that it requires sample data from Scout in order to understand the format of the trigger, and what fields are available from the Scout. However, at this point there are not going to be any Alerts it can use because this Webhook has only just been set up. So here you have two options:
- Create a quick Alert in Scout to generate this sample data.
- Click Skip This Step and then Continue Without Samples.
We strongly recommend the first option, because later on when you are specifying the message that you are going to send to Slack, if you do not have sample data, you will not be able to use data that came from Scout.
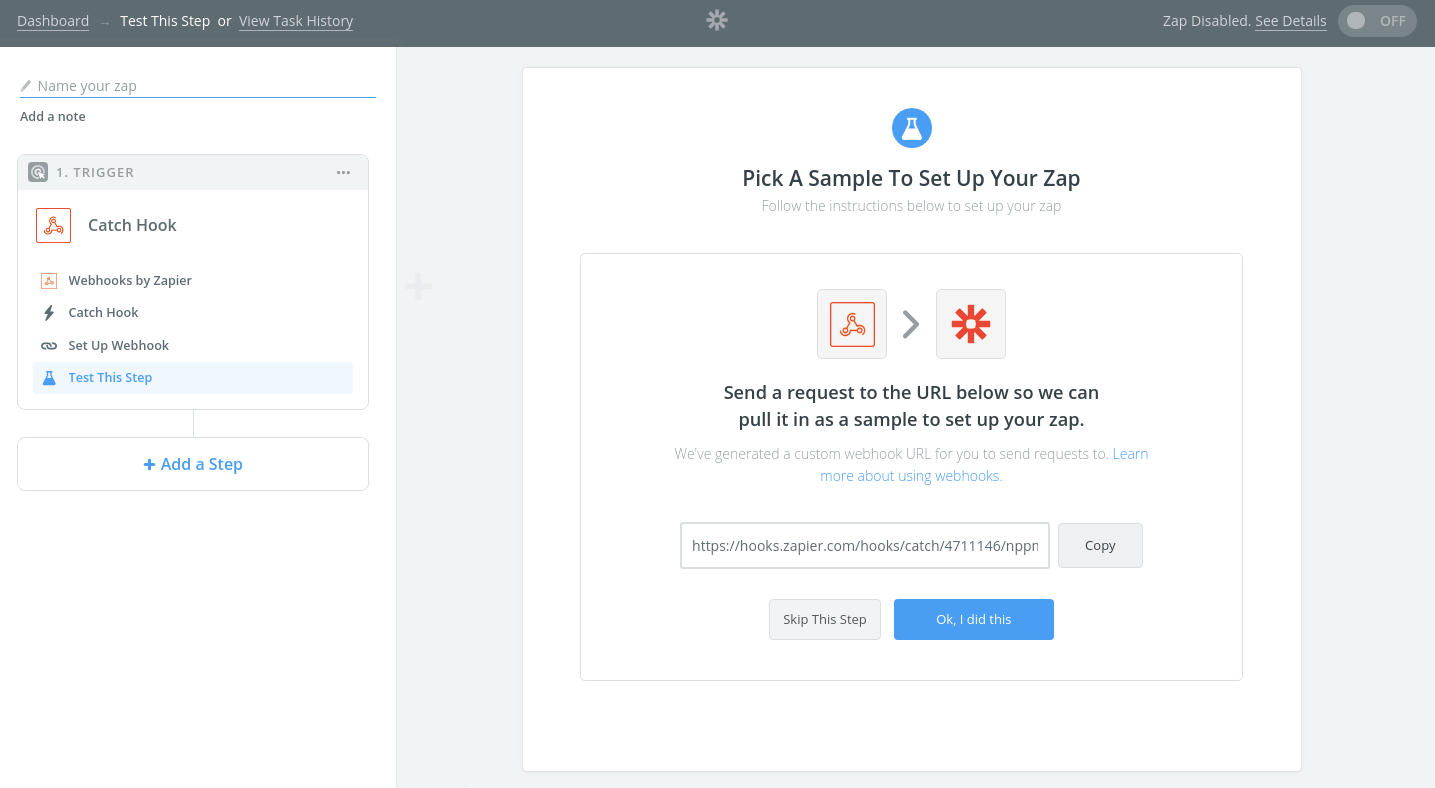
To create a quick Alert, open up Scout, go to Alert > Alert Conditions and create a simple condition that will alert, and choose the Slack Notification Group we set up earlier.

Choose the Alert in Zapier
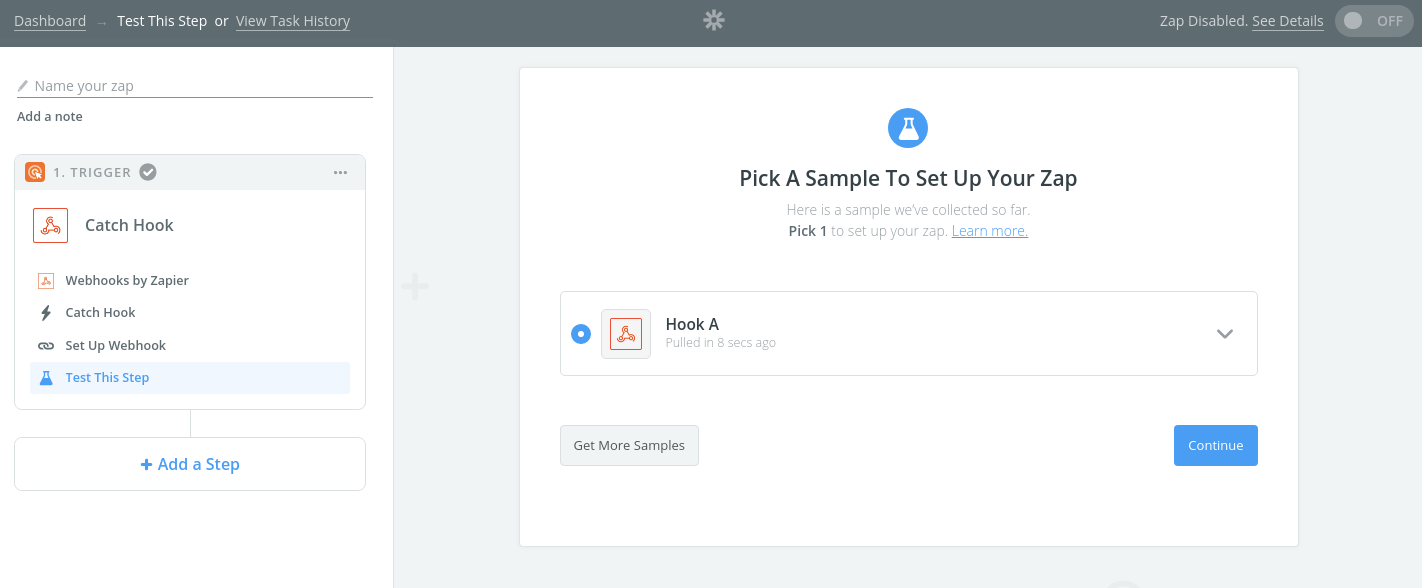
After the Alert has occurred in Scout, go back to Zapier and click the Ok, I did this button and it will connect with Scout and look for an Alert with this matching Webhook. Choose this as the sample you want to use and click Continue.
Create a Slack Action
Next you need to add an Action step to the work-flow, this is the part were we integrate Slack. Click Add a Step on the left-hand side of the page.
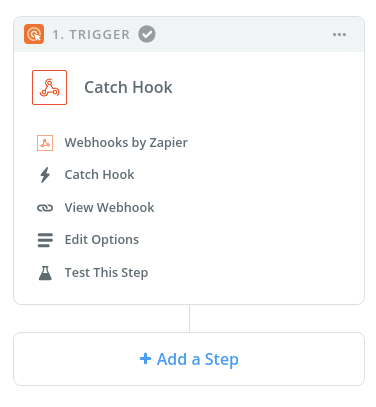
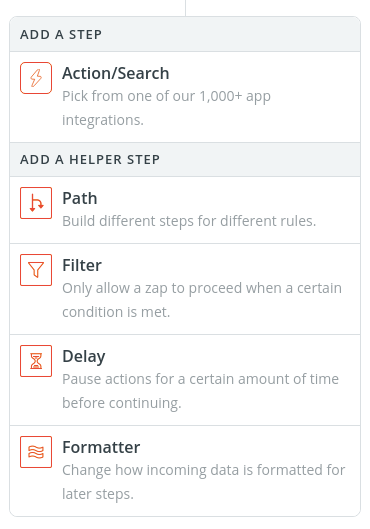
Next click the Action/Search option, and you will be given the option to choose an app to connect.
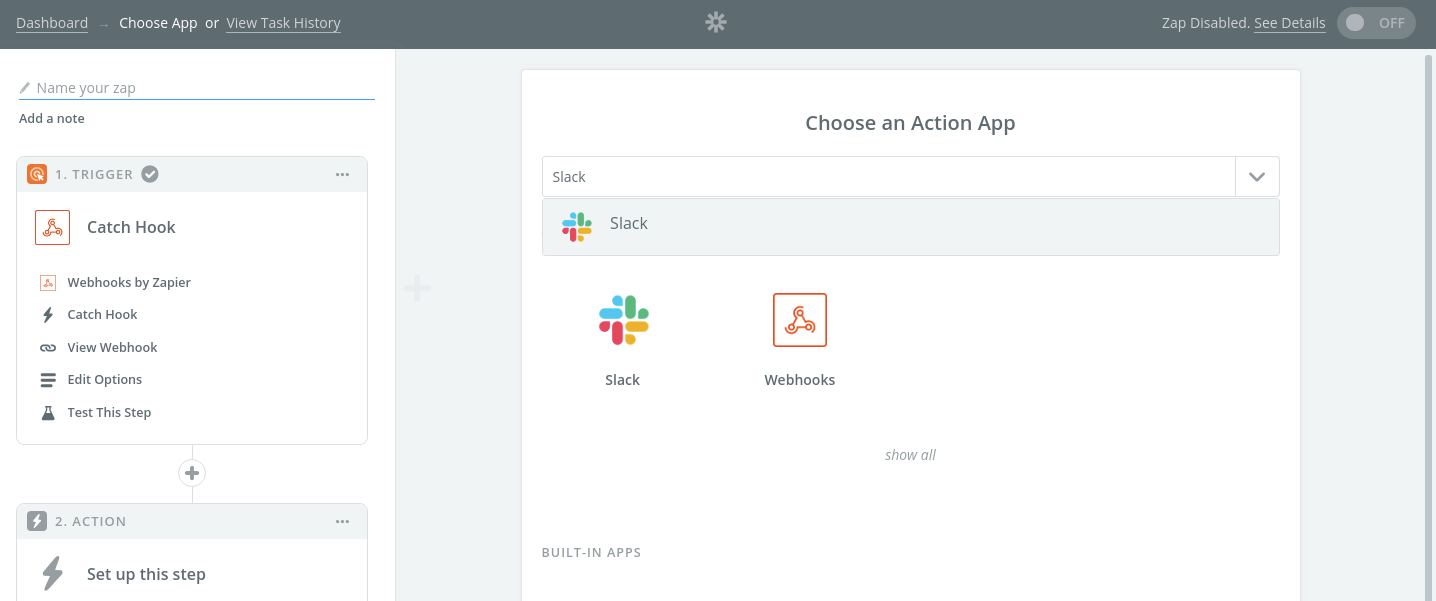
Choose Slack, and then a new Action will be created on the left-hand side of the screen.
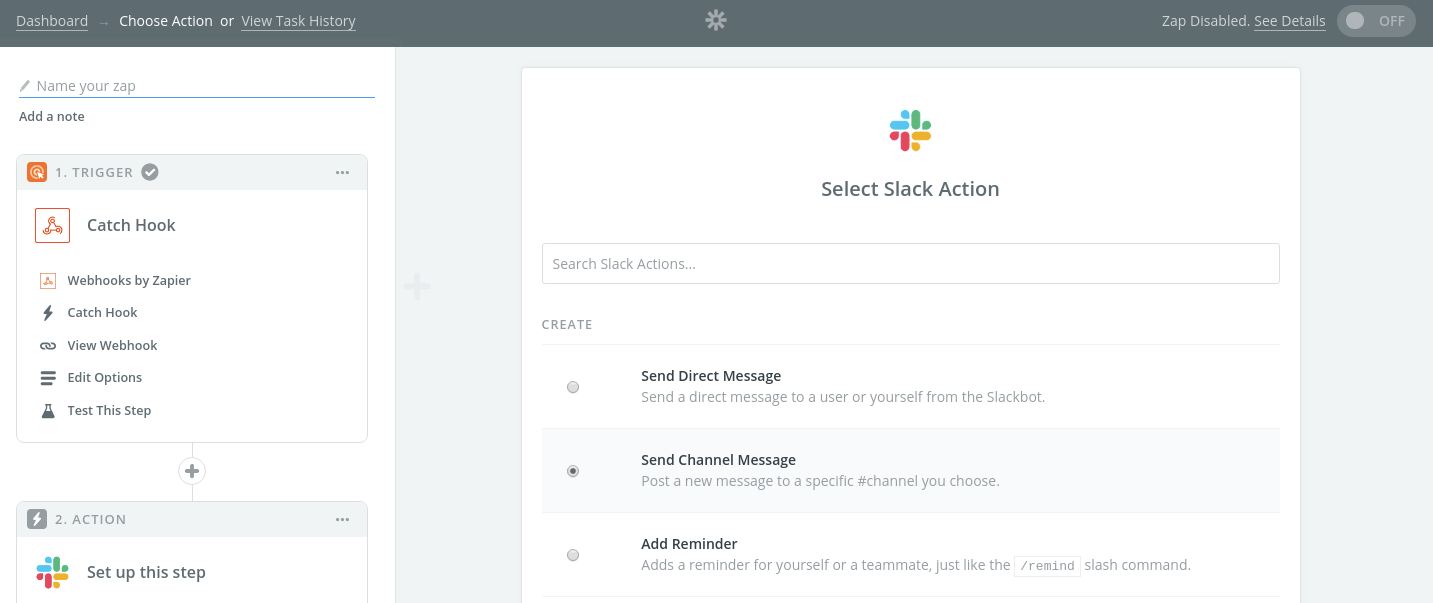
There are many different types of Slack Action that you can choose to perform, but let’s choose Send Channel Message.
Next you can configure many aspects of the message that will be sent, such as which channel to send the message to and what particular data comes from the Scout Alert (shown in green). It is only possible to pull this data from Scout here if you created an Alert earlier like we advised.
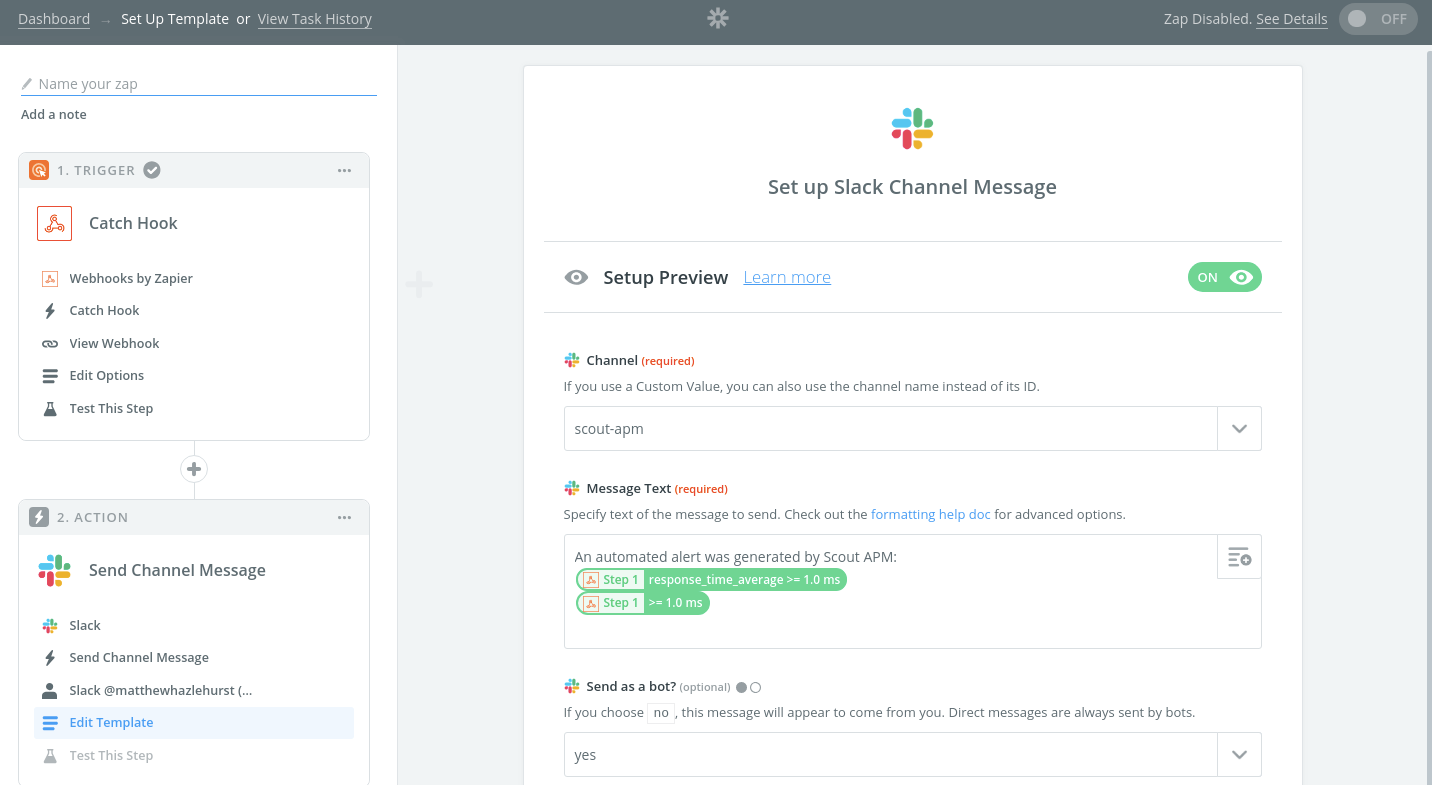
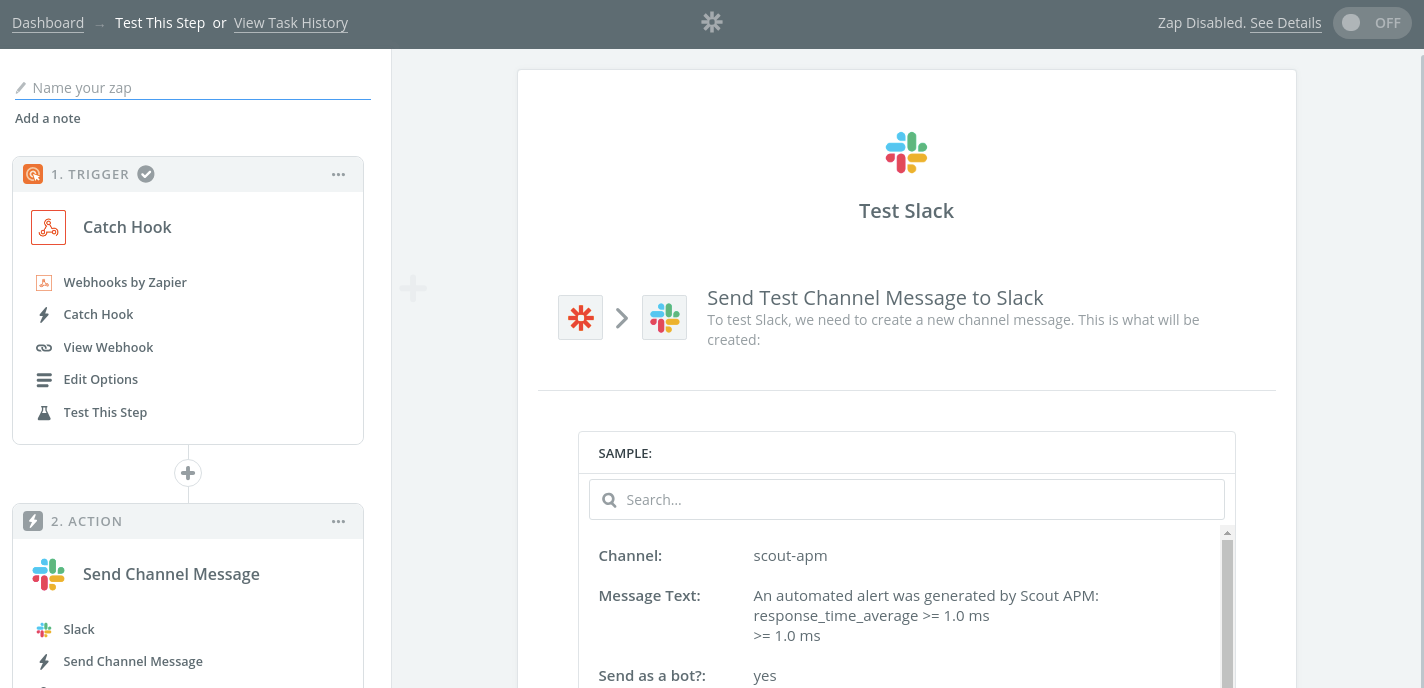
Then you can send a test message to Slack to preview how it will look.
Then all that’s left to do is to give your Zap a descriptive name and enable it.
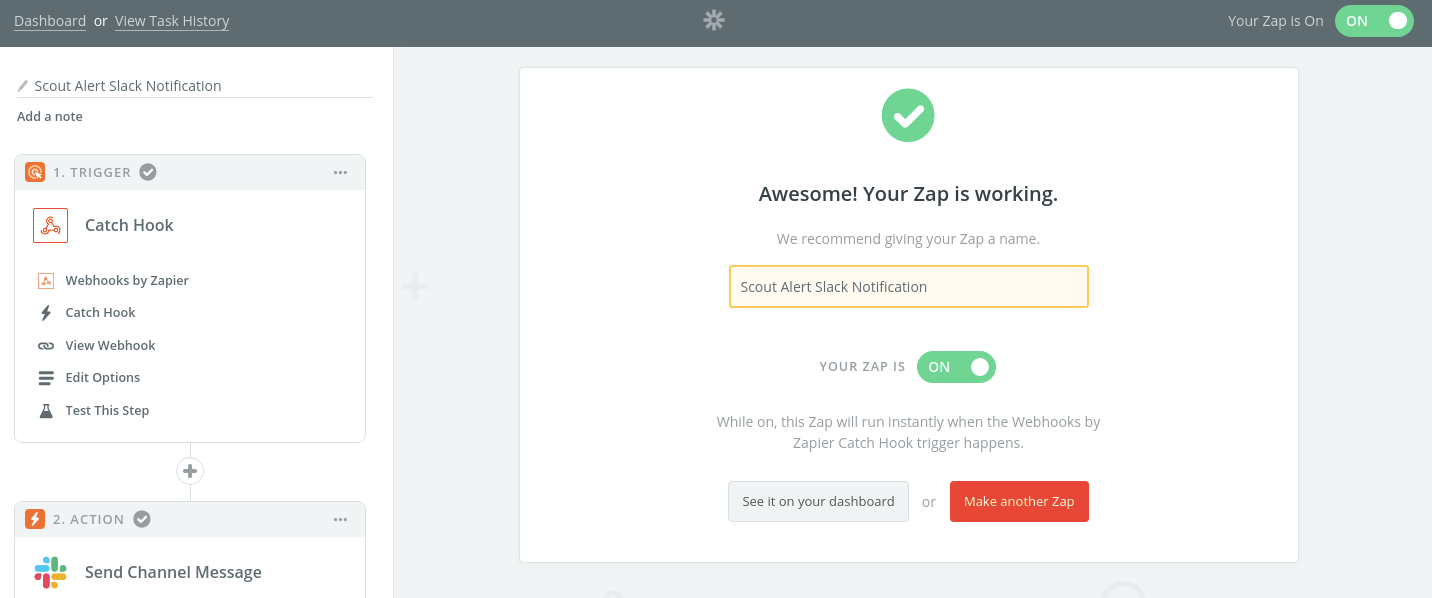
Now everything is set up so that whenever an Alert occurs in Scout which is linked to this Notification Channel, you will see a message in Slack.
