How to Deploy a Rails App to Amazon AWS Using Fargate (Part II)
What's the 2018 approach to deploying a Rails app to AWS? We've partnered with DailyDrip on a series of videos to guide you through the process. We'll be covering how to Dockerize a Rails app, AWS Fargate, logging, monitoring, and CDN support.
Today's video is the next in the series of setting up our
Introduction to AWS ECS and Fargate
So, what are Amazon's Elastic Container Service and Fargate?
Here are some quick snippets from Amazon's website:
- ECS: "a highly scalable, high-performance container orchestration service that supports Docker containers and allows you to easily run and scale containerized applications on AWS"
- Fargate: "a technology for Amazon ECS and EKS* that allows you to run containers without having to manage servers or clusters"
What does this mean?
The Elastic Container Service is a container orchestration service much like Kubernetes or Swarm. Where the magic happens is when ECS is connected to Fargate. Fargate abstracts the idea of managing the instances, so your only concern is setting up containers,
Prerequisite
- AWS Account
- AWS CLI (install instructions)
Getting Started
Setting up our Repository
The first thing we're going to do is set up a Repository so that we can push our Docker image up to Amazon. In order to do that, we need to have
- AmazonEC2ContainerRegistryFullAccess
- AmazonECS_FullAccess
You should now have a user that looks similar to this:
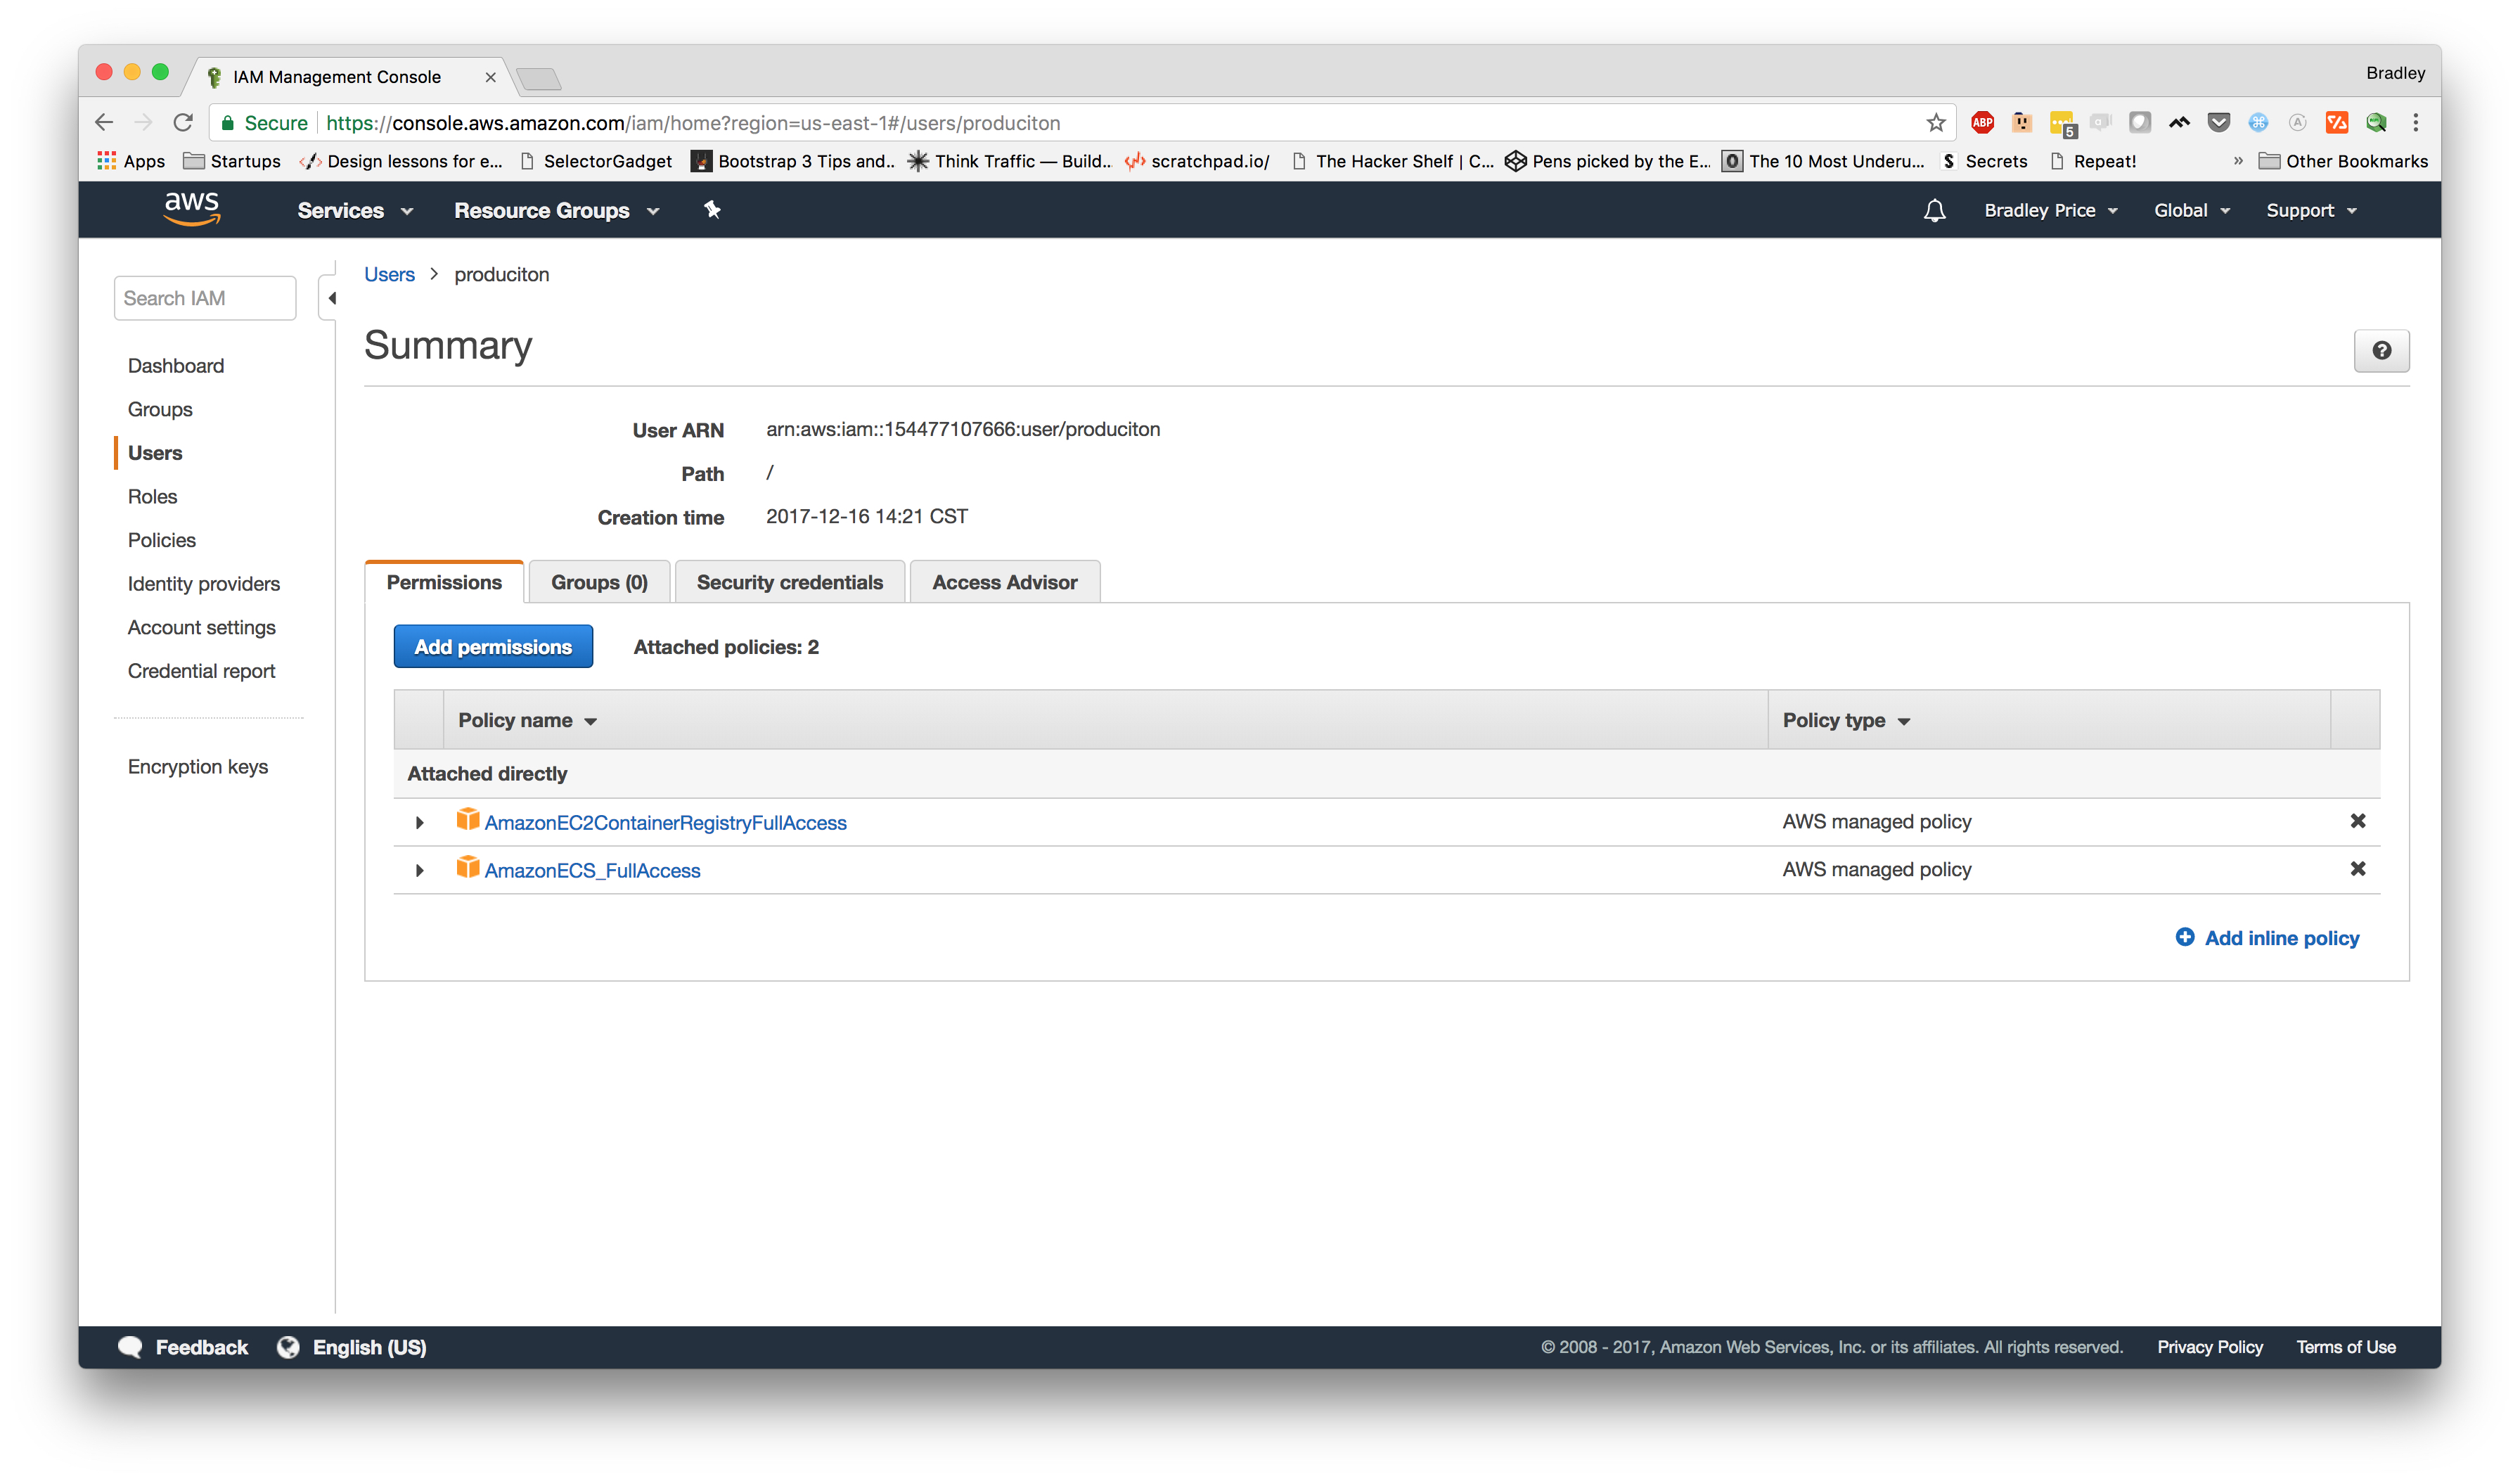
Note: You don't necessarily need to add the FullAccess permissions, but we've done that to simplify this tutorial.
Next, we need to go to the "Security Credentials" tab and create an Access key. Clicking this button should pop up a modal and give us an Access Key ID and Secret Access Key. We'll need to add these to the AWS CLI.
Armed with these keys, let's switch over to the console and aws configureaws configure
Now, we can use the AWS CLI to create a repository:
Note: Take note of repositoryUri
Our next step is to get an authentication token to allow Docker to authenticate to our repository.
Note: aws ecr get-login$()
Now that we have Docker authenticated, we can tag our image and push it to our repository.
If we go back to the AWS Console for Repositories, we should see our newly dailydrip/produciton
Setting up RDS
The next step we are going to take is setting up our Postgres InstancesLaunch DB InstancePostgres
Now, we should be on the "Choose Use Case" page. We're going to make sure the "Production" use case is selected and click Next.
We should now be on the "Specify DB Details" page where we can select the engine version, instance size, multi availability zones, and database name, user, and password. For this app, I'm going to choose db.t2.mediumproduciton
On the last pageConfigure advanced settingsproduciton_production
Now, if we go back to Instances

Once our database is provisioned, we are going to run our migrations on our database from our local box. This is why we chose the publicly accessible option earlier.
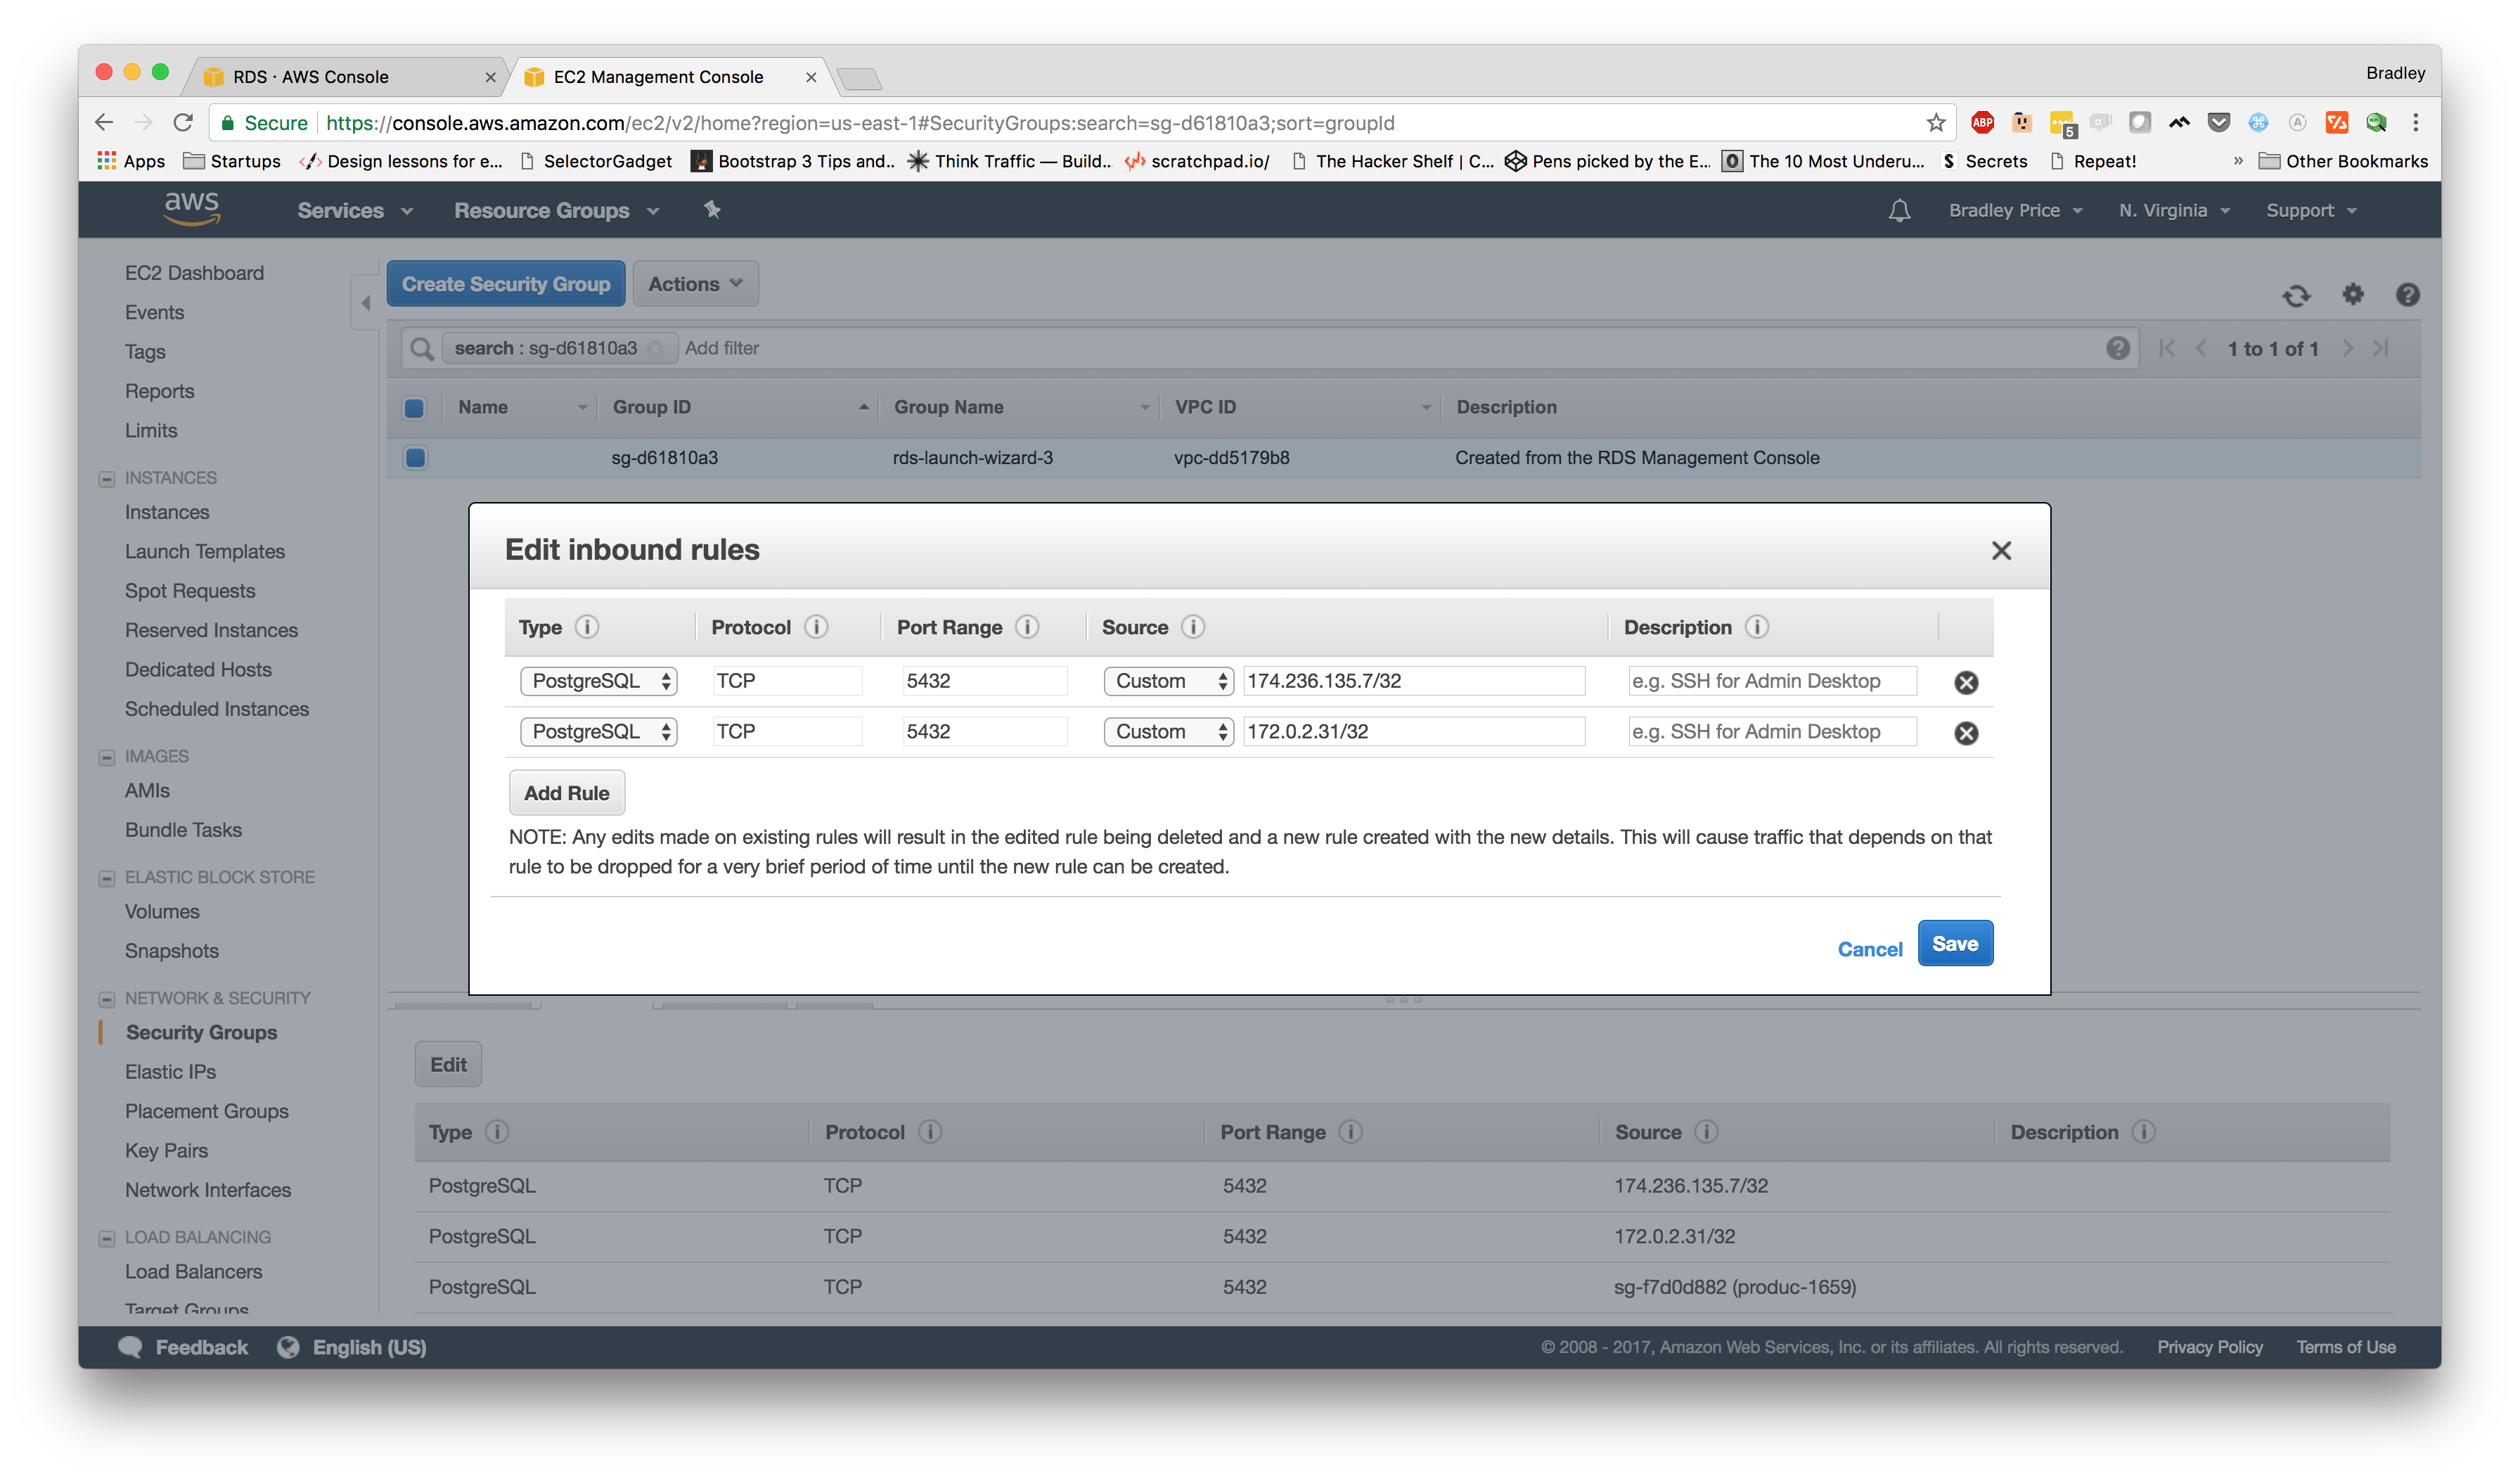
We should now be on the Security Groups page. Toward the bottom, there should be a set of tabs, the second one being "Inbound." Let's select that tab and click "Edit." Now, we're going to click "Add Rule" and for the "Source"
Now, we should be able to connect to our database locally and run our migrations via a command similar to this:
SECRET_KEY_BASE=DATABASE_URL= RAILS_ENV=production bundle exec rake db:migrate
NOTE:
There are a few ways to handle running migrations for our rails app. This is the easiest method, but not the best solution. For a more involved solution, we could write a script that would be our
Another option that seems to be more appropriate in this case would be to create a separate task definition that is used for solely running migrations. Then, once you pushed up your Docker image changes, you could run the migrations task before restarting your application. This could be done from the AWS console or from the AWS command line aws ecs run-task
Setting up ECS and Fargate
Let's start by going over some terminology: We will be introducing a few different resources over the next few minutes.
- Clusters
- Clusters are a logical way to group resources (services and tasks).
- Services
- Services are used to run a load
balance in front of a group of tasks. - This is also where you will specify how many instances of a task should be running. The service
scheduler is in charge of starting new instances in the case of an instance failing.
- Services are used to run a load
- Tasks
- Tasks are the running instances of a task definition.
- Task Definitions
- Task Definitions are where you specify the resources for a Docker container or group of containers.
- It is also where you specify the Docker image, any volumes, environment variables, and more.
Creating a Task Definition
We're going to start by creating the base resource, a task definition.
From the navigation pane on the left, let's click on "Task Definitions." From here we can create and manage the Task Definitions we’ll be using. Let's click on "Create new Task Definition," which should take us to the first step of creating a Task Definition.
At this step, we need to choose the launch type for our Task Definition. Let's choose "Fargate" and click "Next Step."
Now, we're on step 2, which is where we configure the name, roles, memory and
Let's start by setting the "Task Definition Name" to "Web," "Task Role" to "
Next, we're going to click "Add Container" to
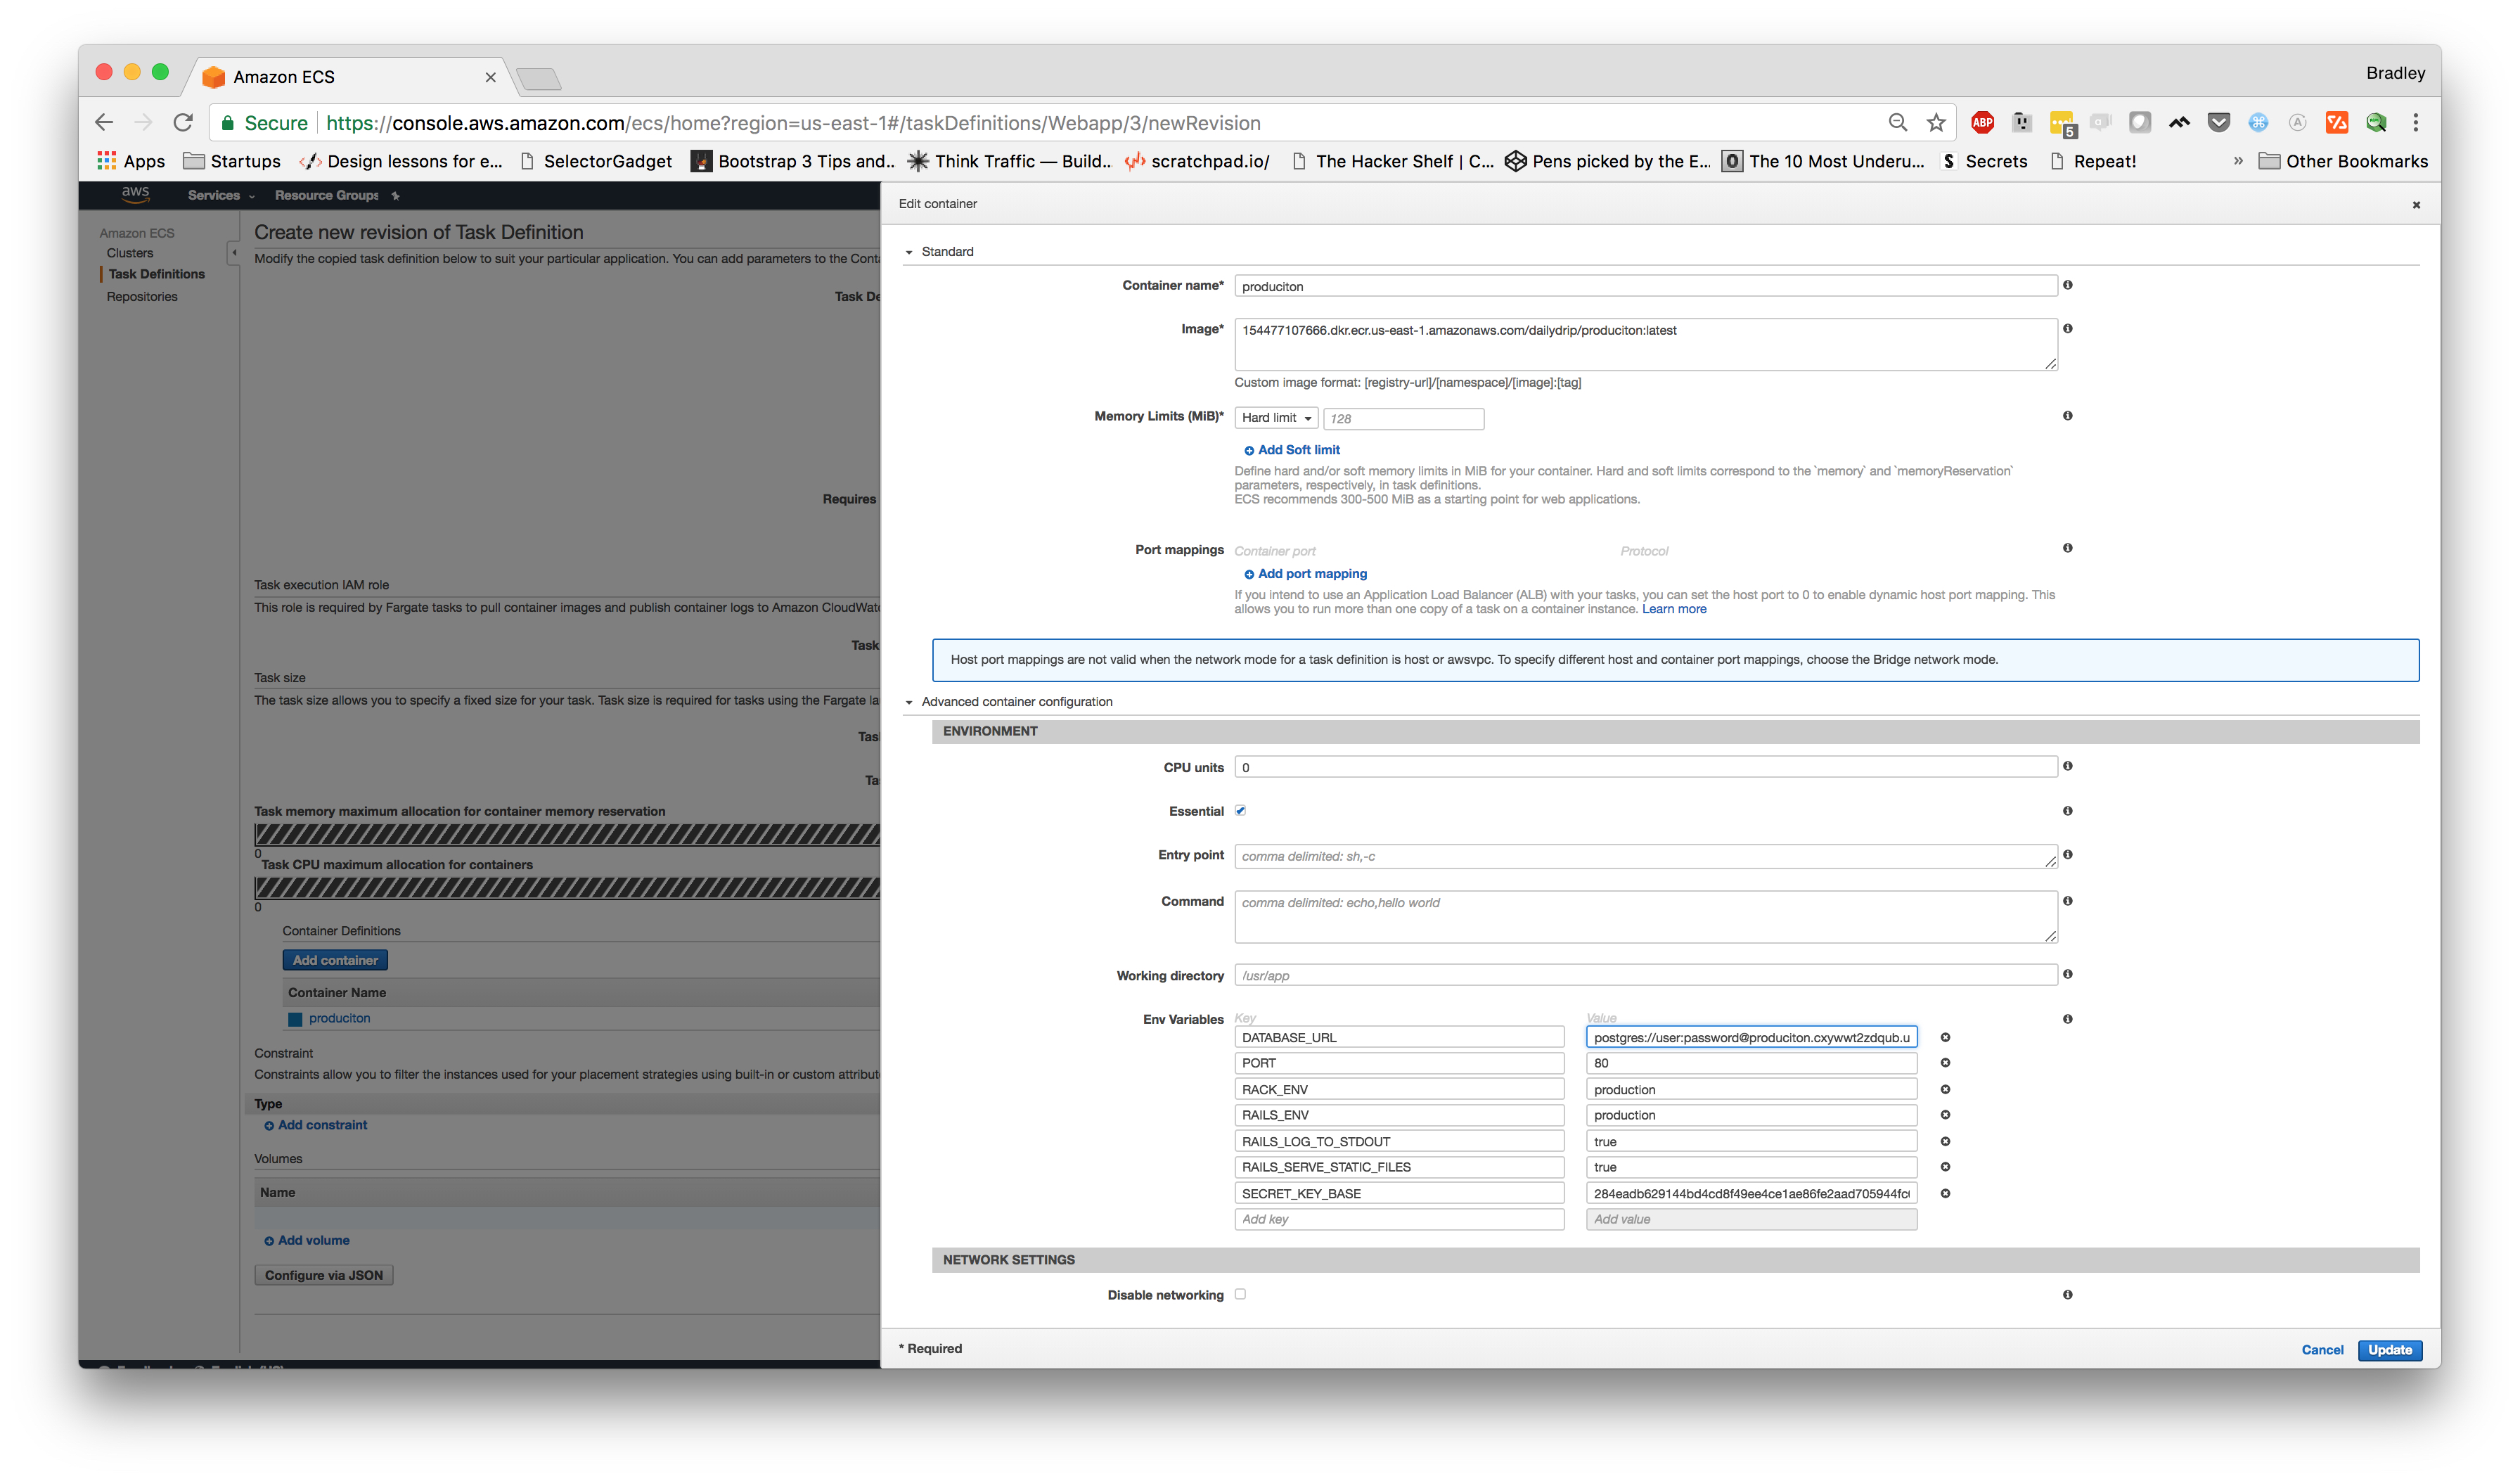
In this modal, we're going to set the container name to "
Next, in the "Advanced Container Configuration" section, we're going to make sure "Essential" is selected. Now, we're going to add a few environment variables. We're going to add these:
- RACK_ENV: production
- RAILS_ENV: production
- PORT: 80
- RAILSLOGTO_STDOUT: true
- RAILSSERVESTATIC_FILES: true
- DATABASE_URL:
(it might be easier to open a second window to look at your RDS instance settings) - ours will look something like:
postgres://user:password@endpoint:5432/produciton_production
- ours will look something like:
- SECRETKEYBASE:
You should now have something that looks similar to this:
Now, we can "Add" at the bottom of the modal and "Create" at the bottom of the page. Clicking “Add†should take us to a page that gives the status of our task definition. We can click the "View Task Definition" to go back to the page and review all of our changes.
Creating a Cluster
Now, let's go to the Clusters console and click "Create a Cluster". This should take us to a page to choose a few different cluster templates. Let's choose "Networking Only" and click "Next Step."
On the next page, we can name the cluster and choose to create a VPC. Let's name it "
Now, we can click "View Cluster," which should take us back to the overview of our cluster.
Creating a Service
The next step is to create a Service that will house our tasks. If we're not there, we can navigate to the Clusters section, and choose our cluster, which should take us to the overview of our cluster. From here, we can choose the "Services" tab and click "Create."
On the first page, we will choose our configuration for the service; we want to select "FARGATE" for our "Launch Type." Next, we want to select the Task Definition that we just created. In our case, we named Web:1
NOTE: The 1 in the name is the revision. As you make edits to your task-definition, you will need to make sure you update the service to point to the new version, Web:2
While on this page, we're also going to set the "Service Name" and "Number of Tasks" to "
Now, we should be on the VPC and Security Groups page. Here, we're going to set the Cluster VPC to the VPC you have available, which will probably be the default one that was created. For subnets, you can choose the first one
We should now be on Step 3. This is where we would configure
Now, we should be on the 4th and final step. This is just to review the service settings before we create the service. Look over the configuration settings and, if you are okay with them, click "Create Service."
Now, we can click on the "View Service" button and we should see a page similar to this:
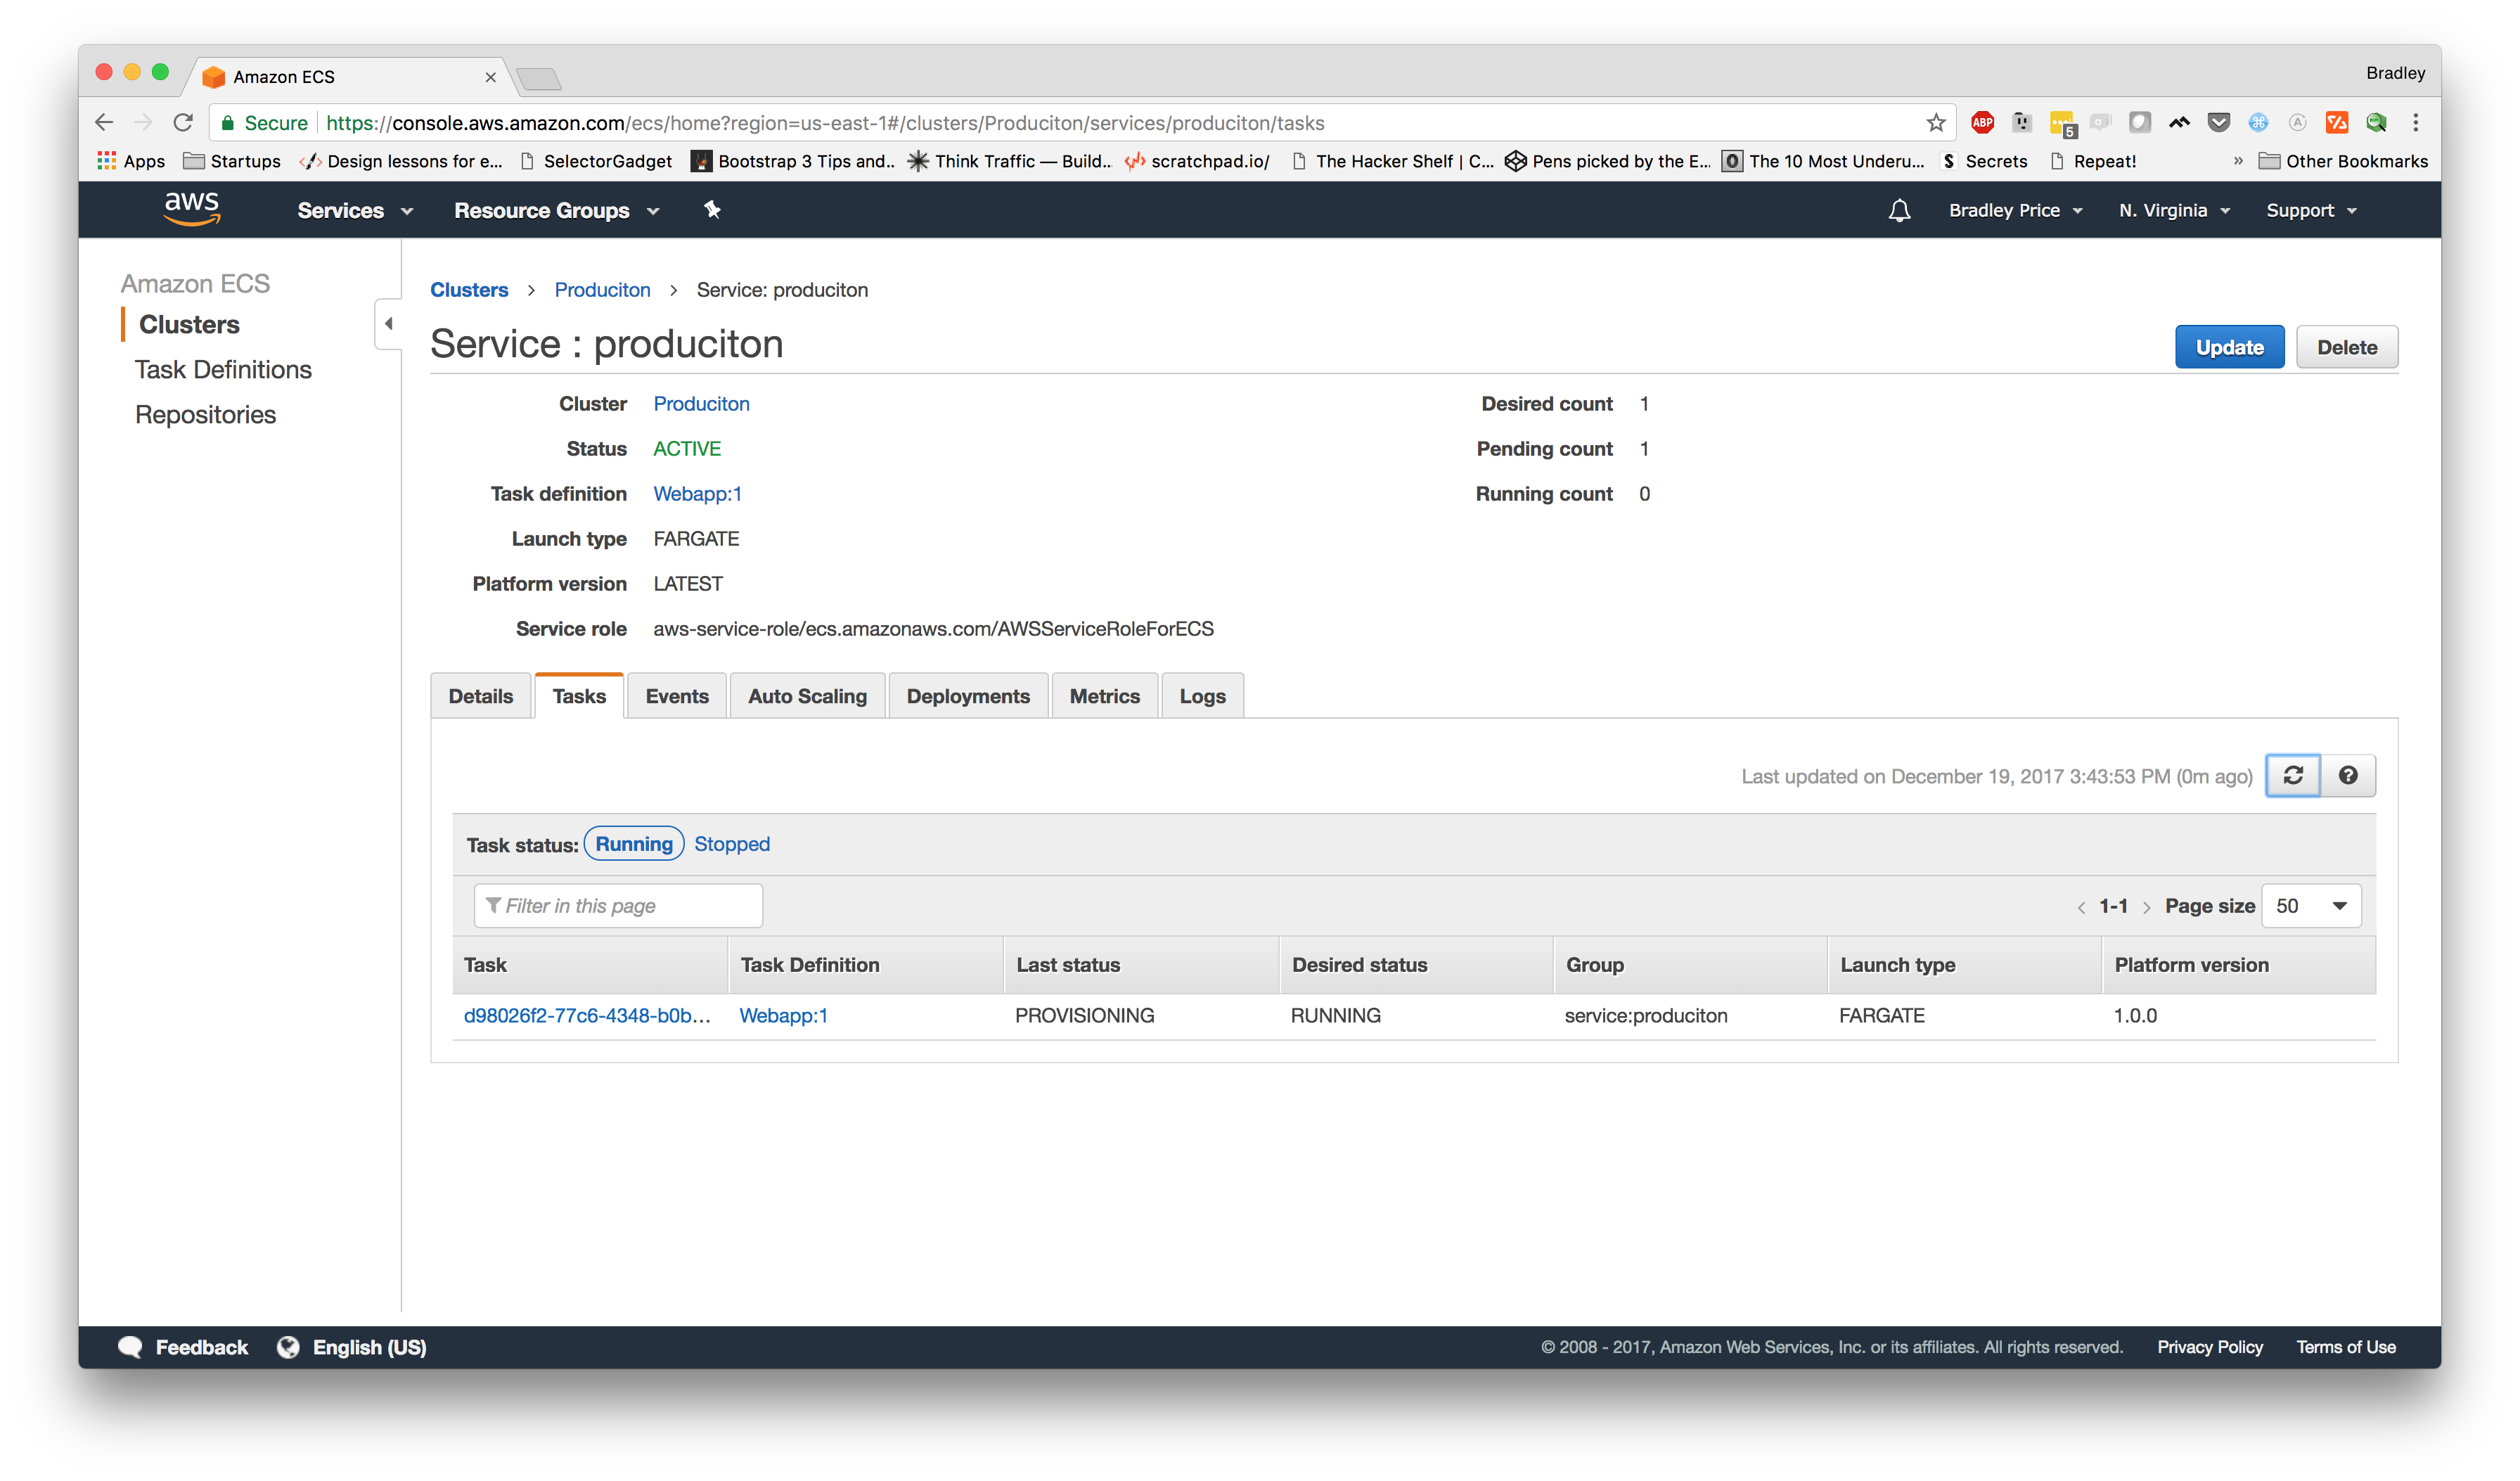
NOTE: If you don't see the task right away, you might need to click the refresh button.
Now, we've set up everything and our app should be running in a moment. Once the "Last Status" of the Task says "RUNNING," we should be able to hit the site.
Viewing the site
If we click on the task id, we should be looking at the details of the running Web task. If we scroll down a bit, we see the Network section; there, we should see an "ENI ID" that we can click on. Once we click on that, we should see a page similar to this:
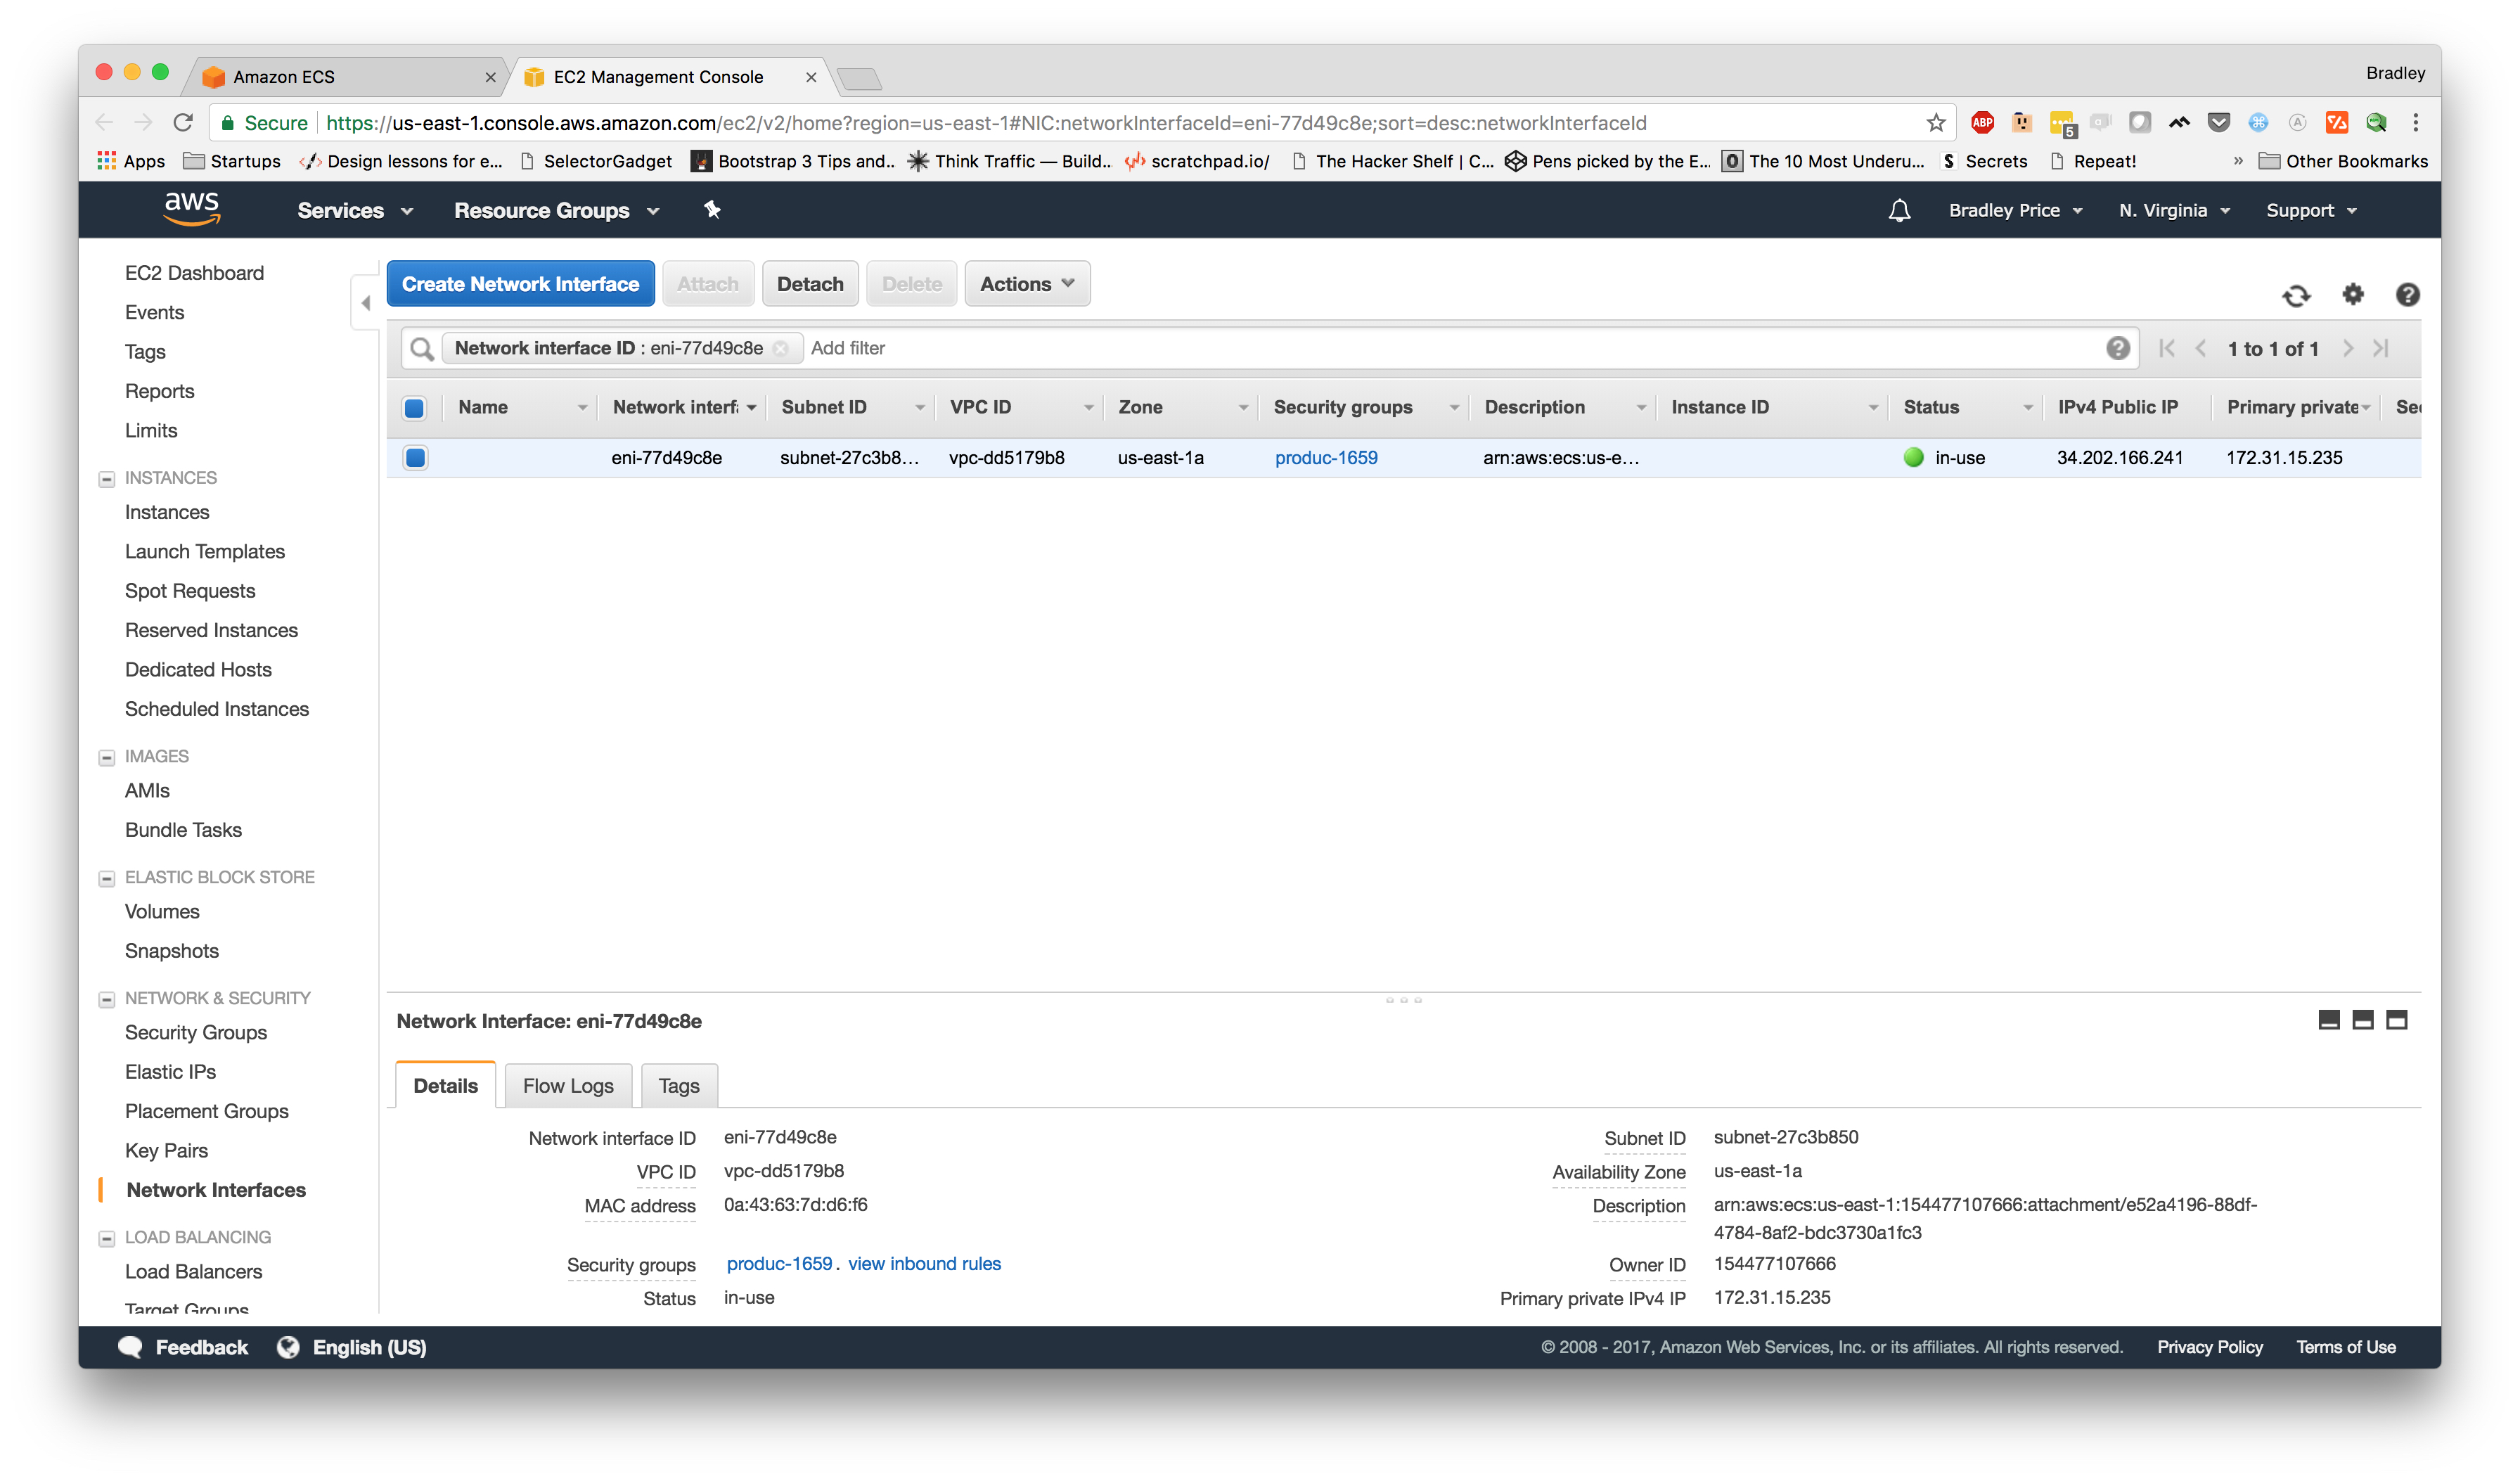
Once here, we can see the "IPv4 Public IP" column and an IP address for our ENI. We can use this IP address to hit our service. Now, let's take a look.
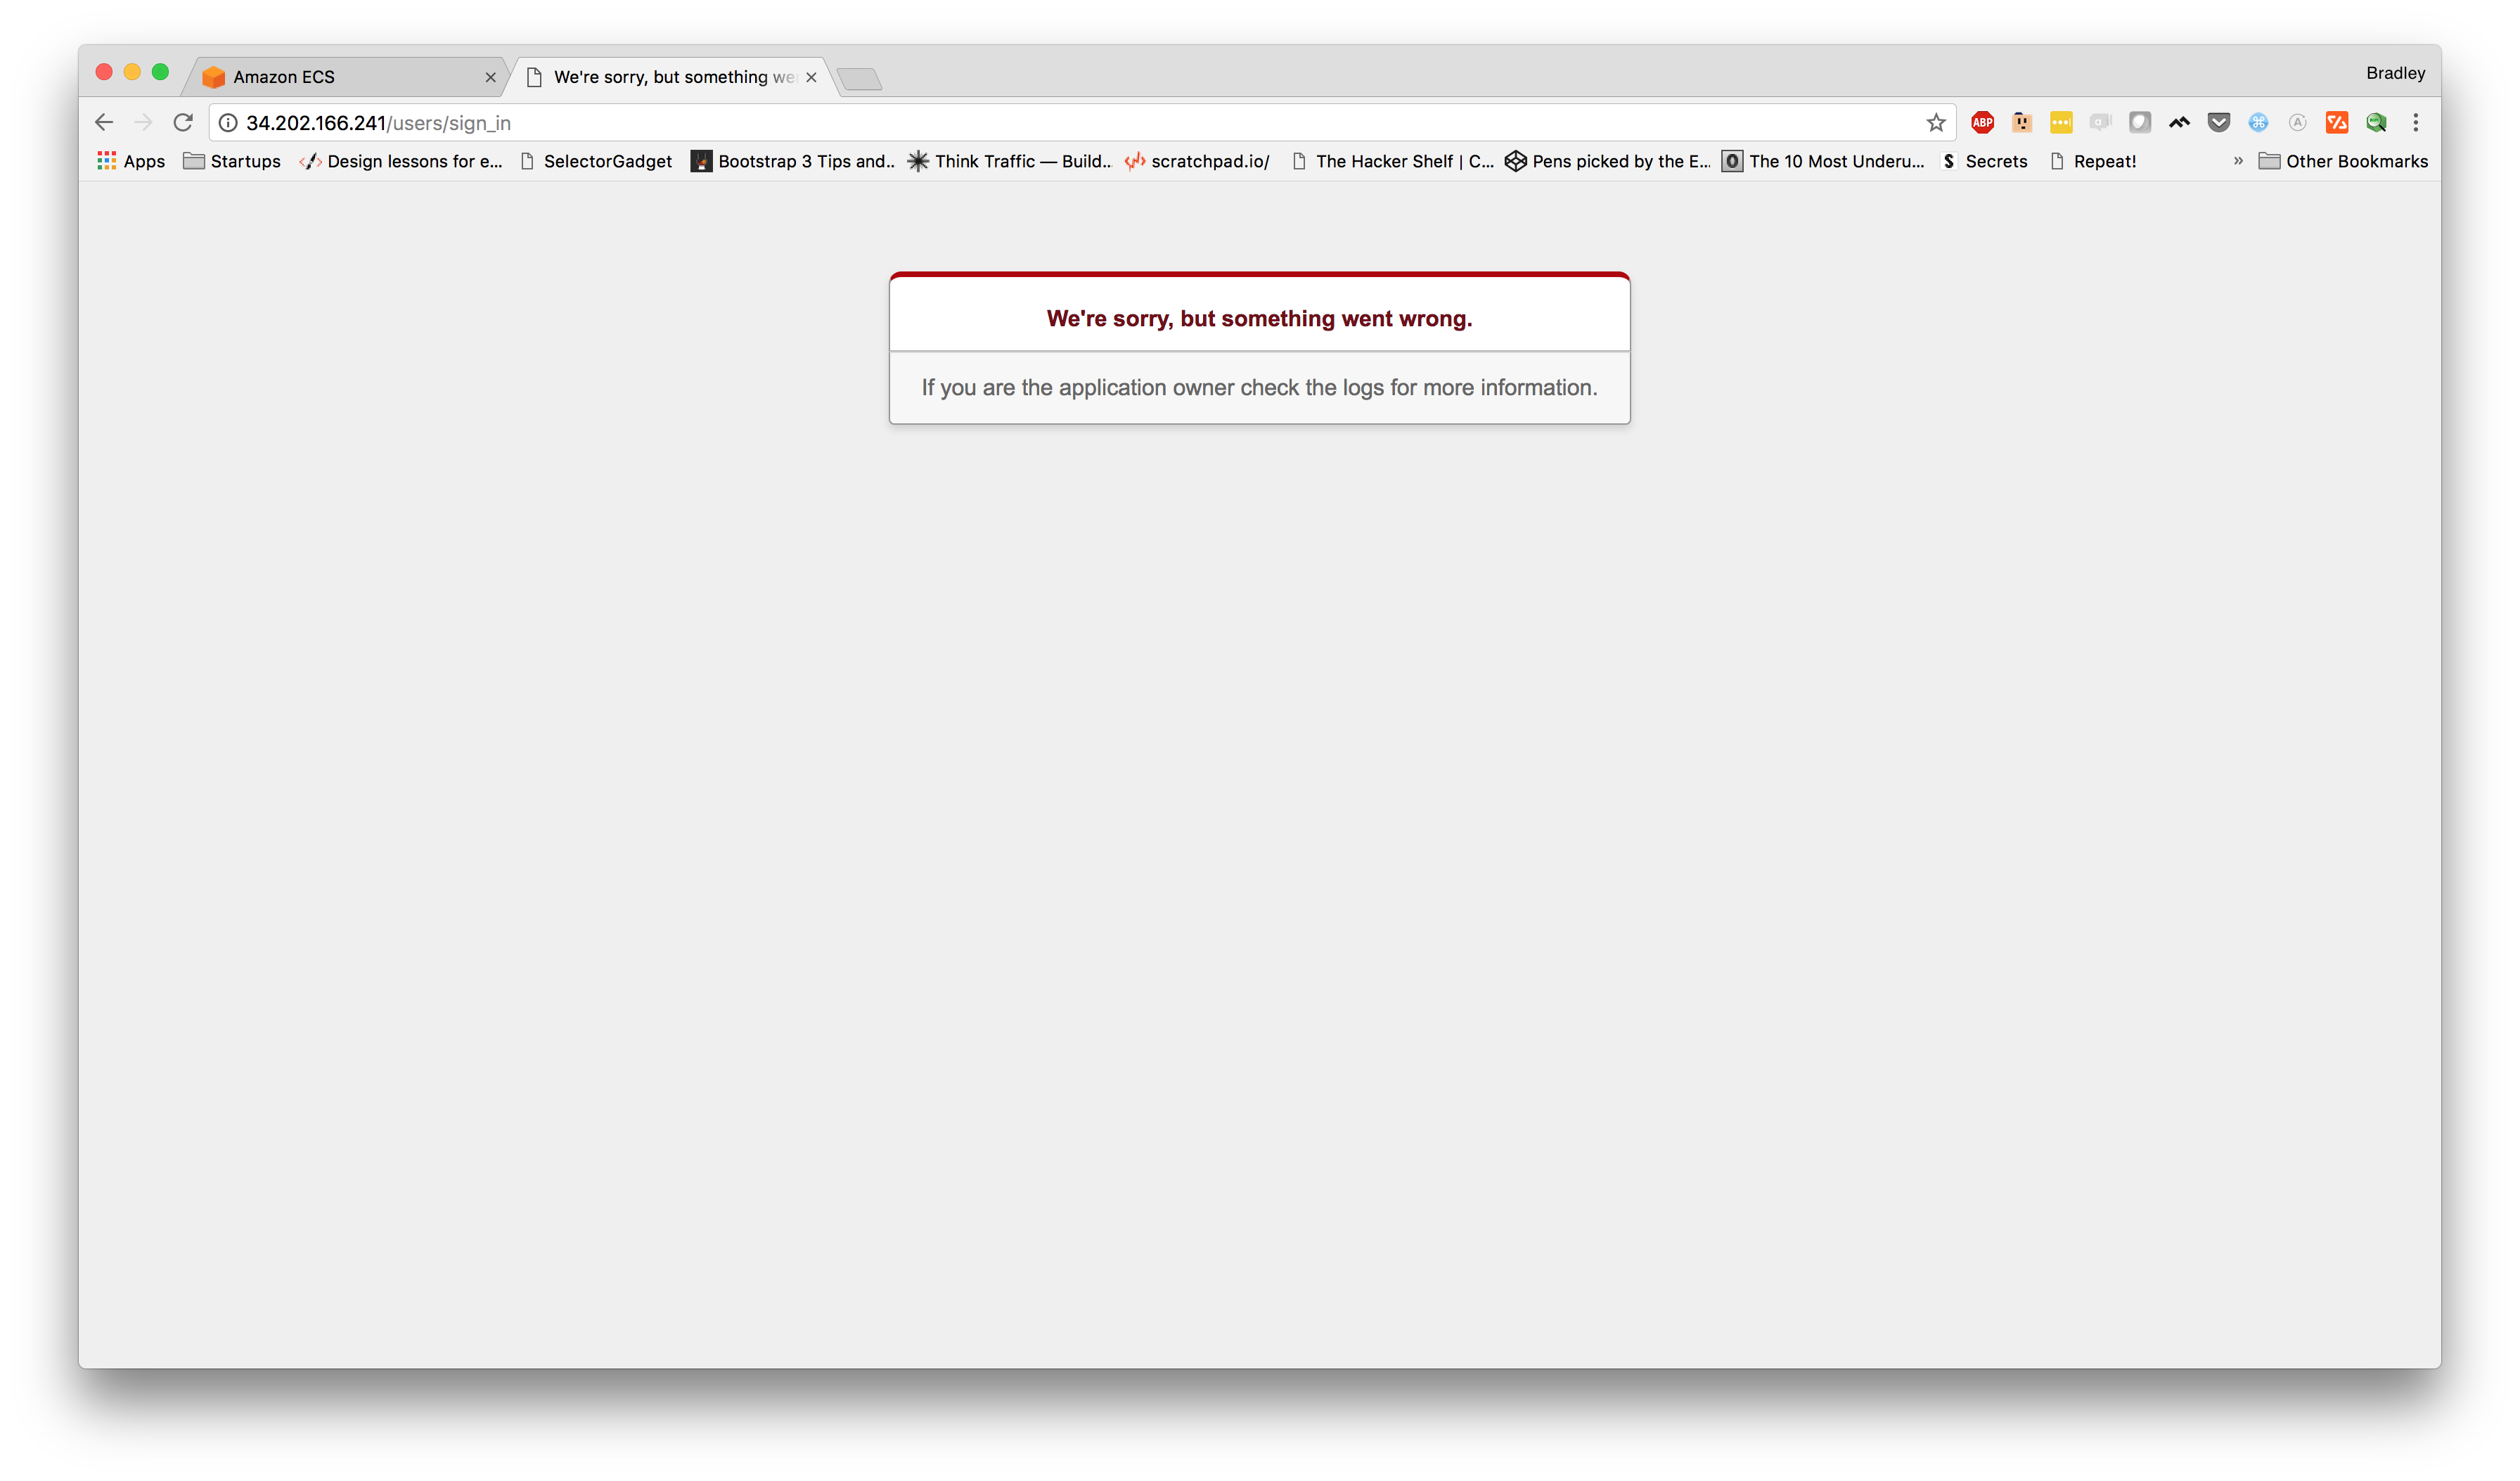
Hmm... This is embarrassing... What happened?
Let's take a look at our logs for the running task. To do this, we'll switch back over to our AWS Console and go back to the
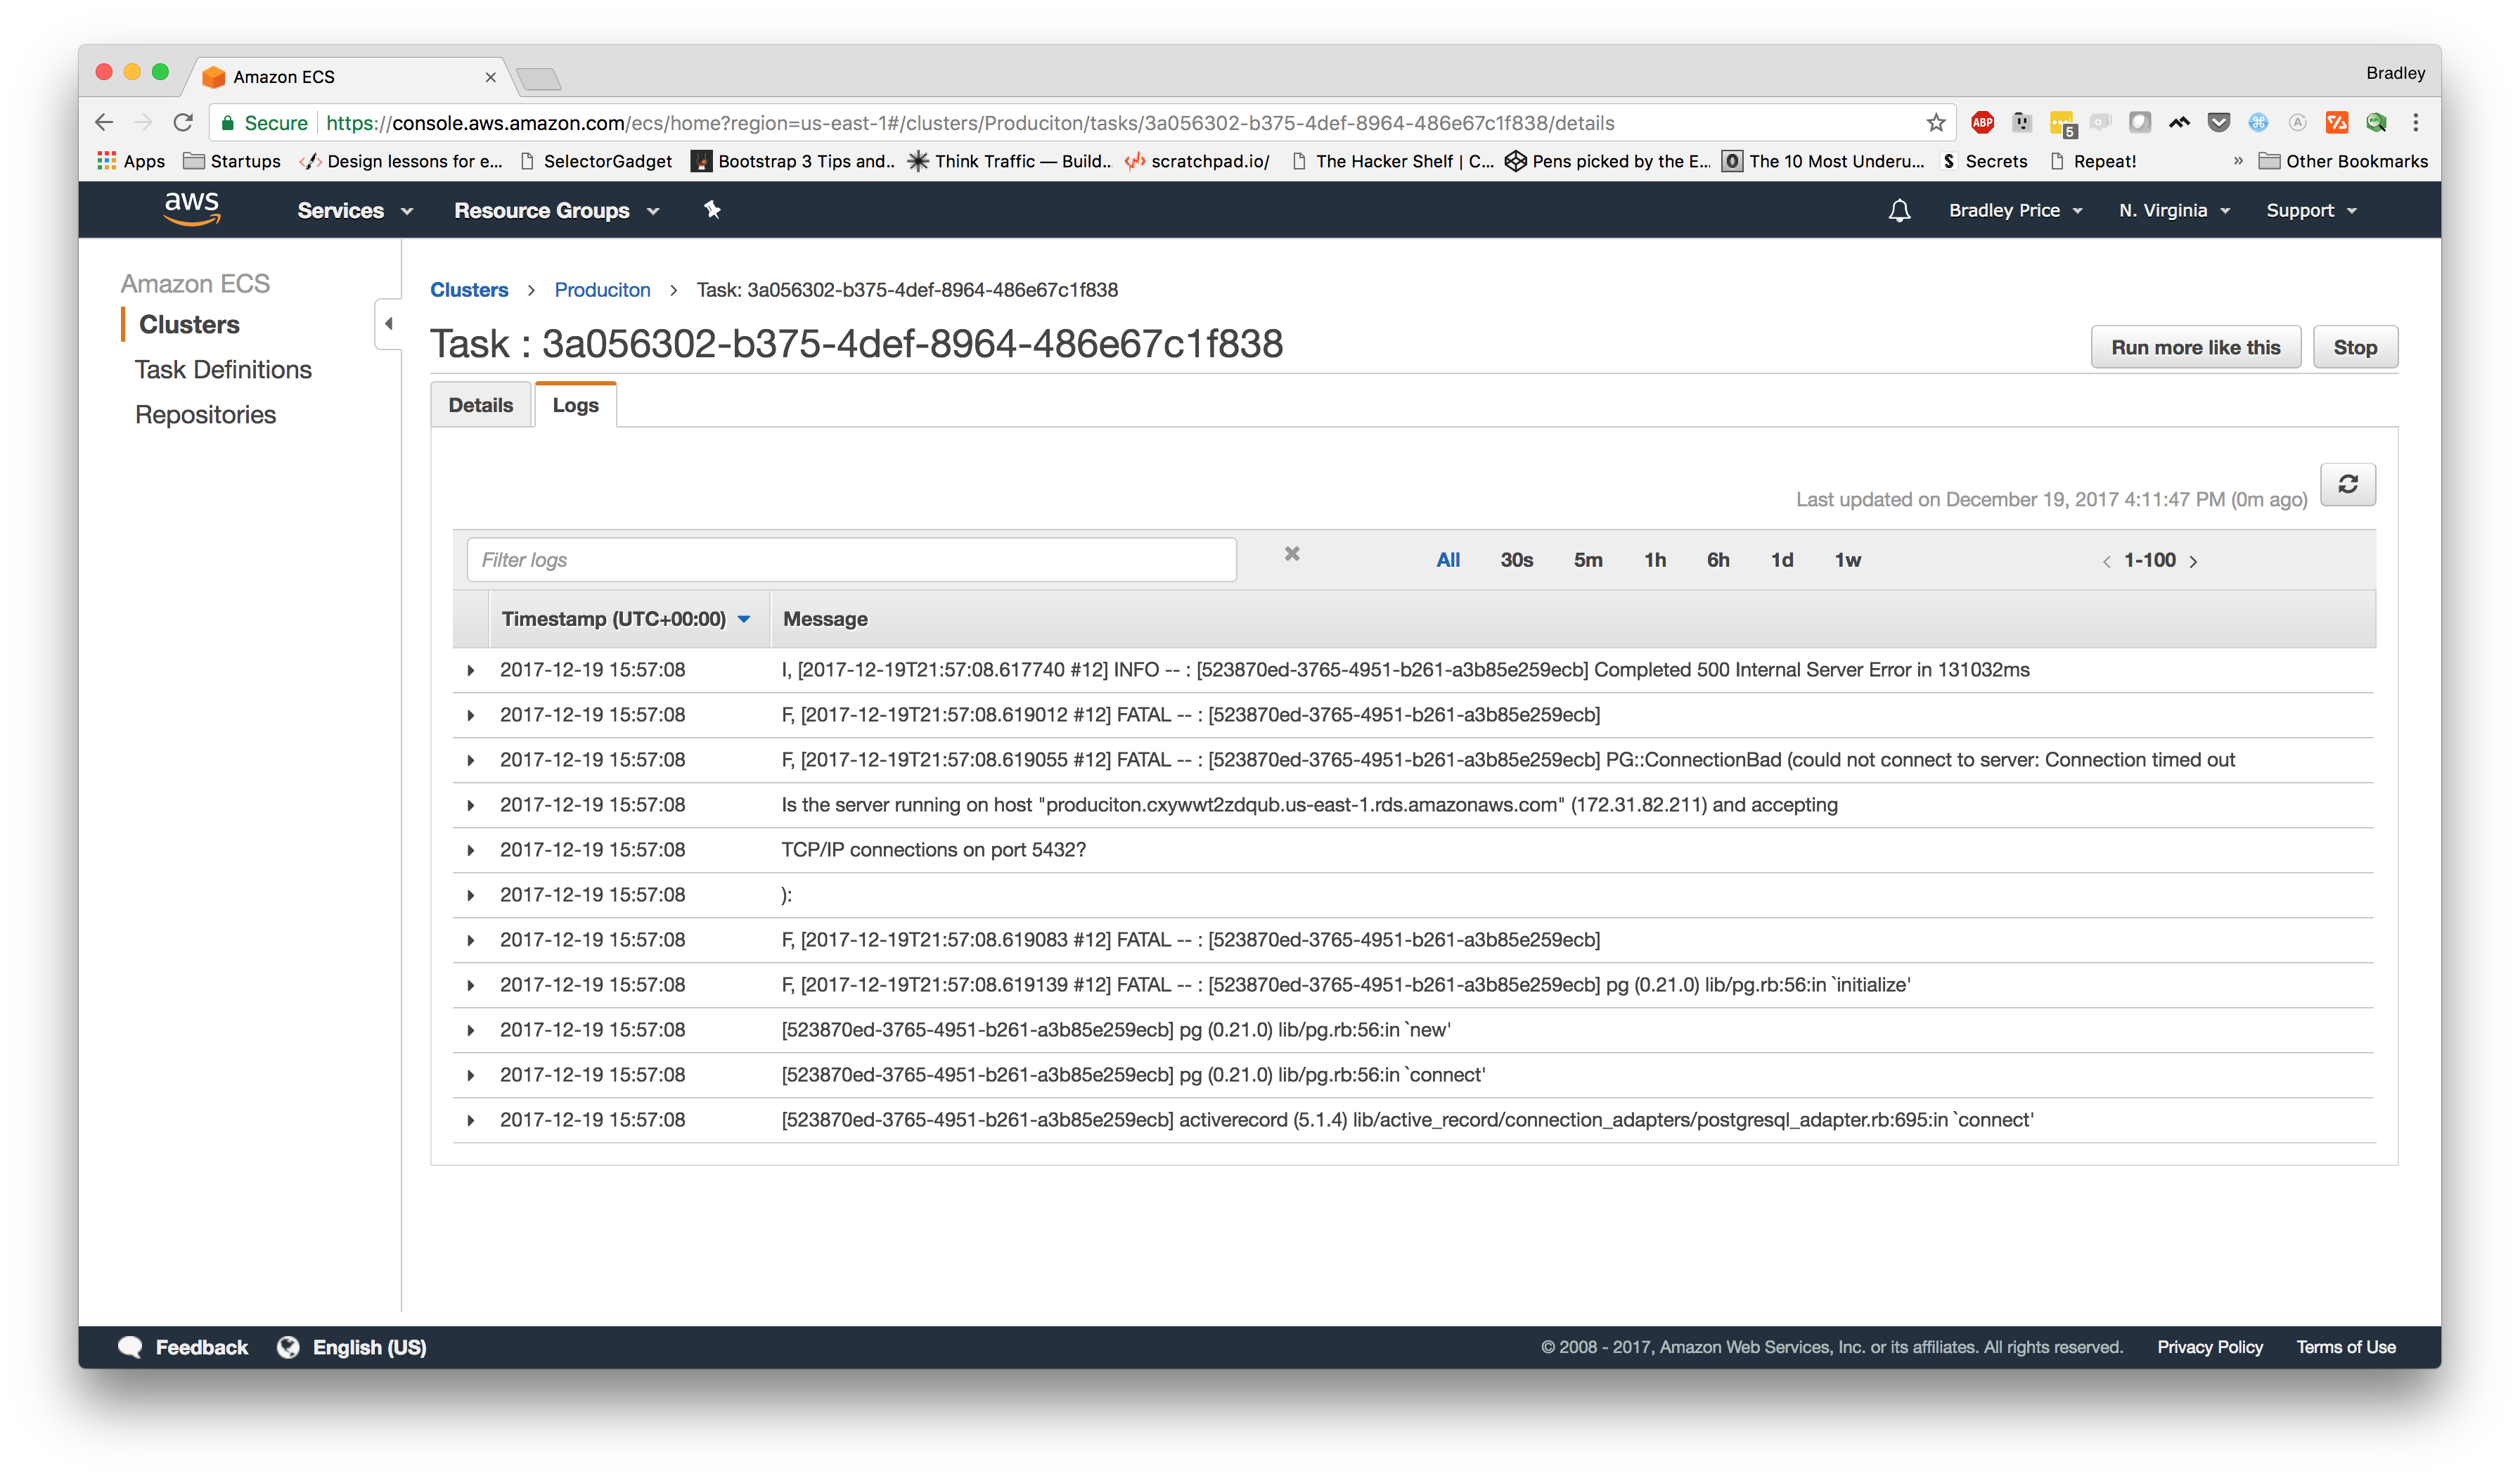
Aha! Now, we can see that it looks like our rails app can't connect to the database. First, we want to make sure that we used the correct database URL in our config. In our case, we have. So, let's make sure our service has access to our RDS instance.
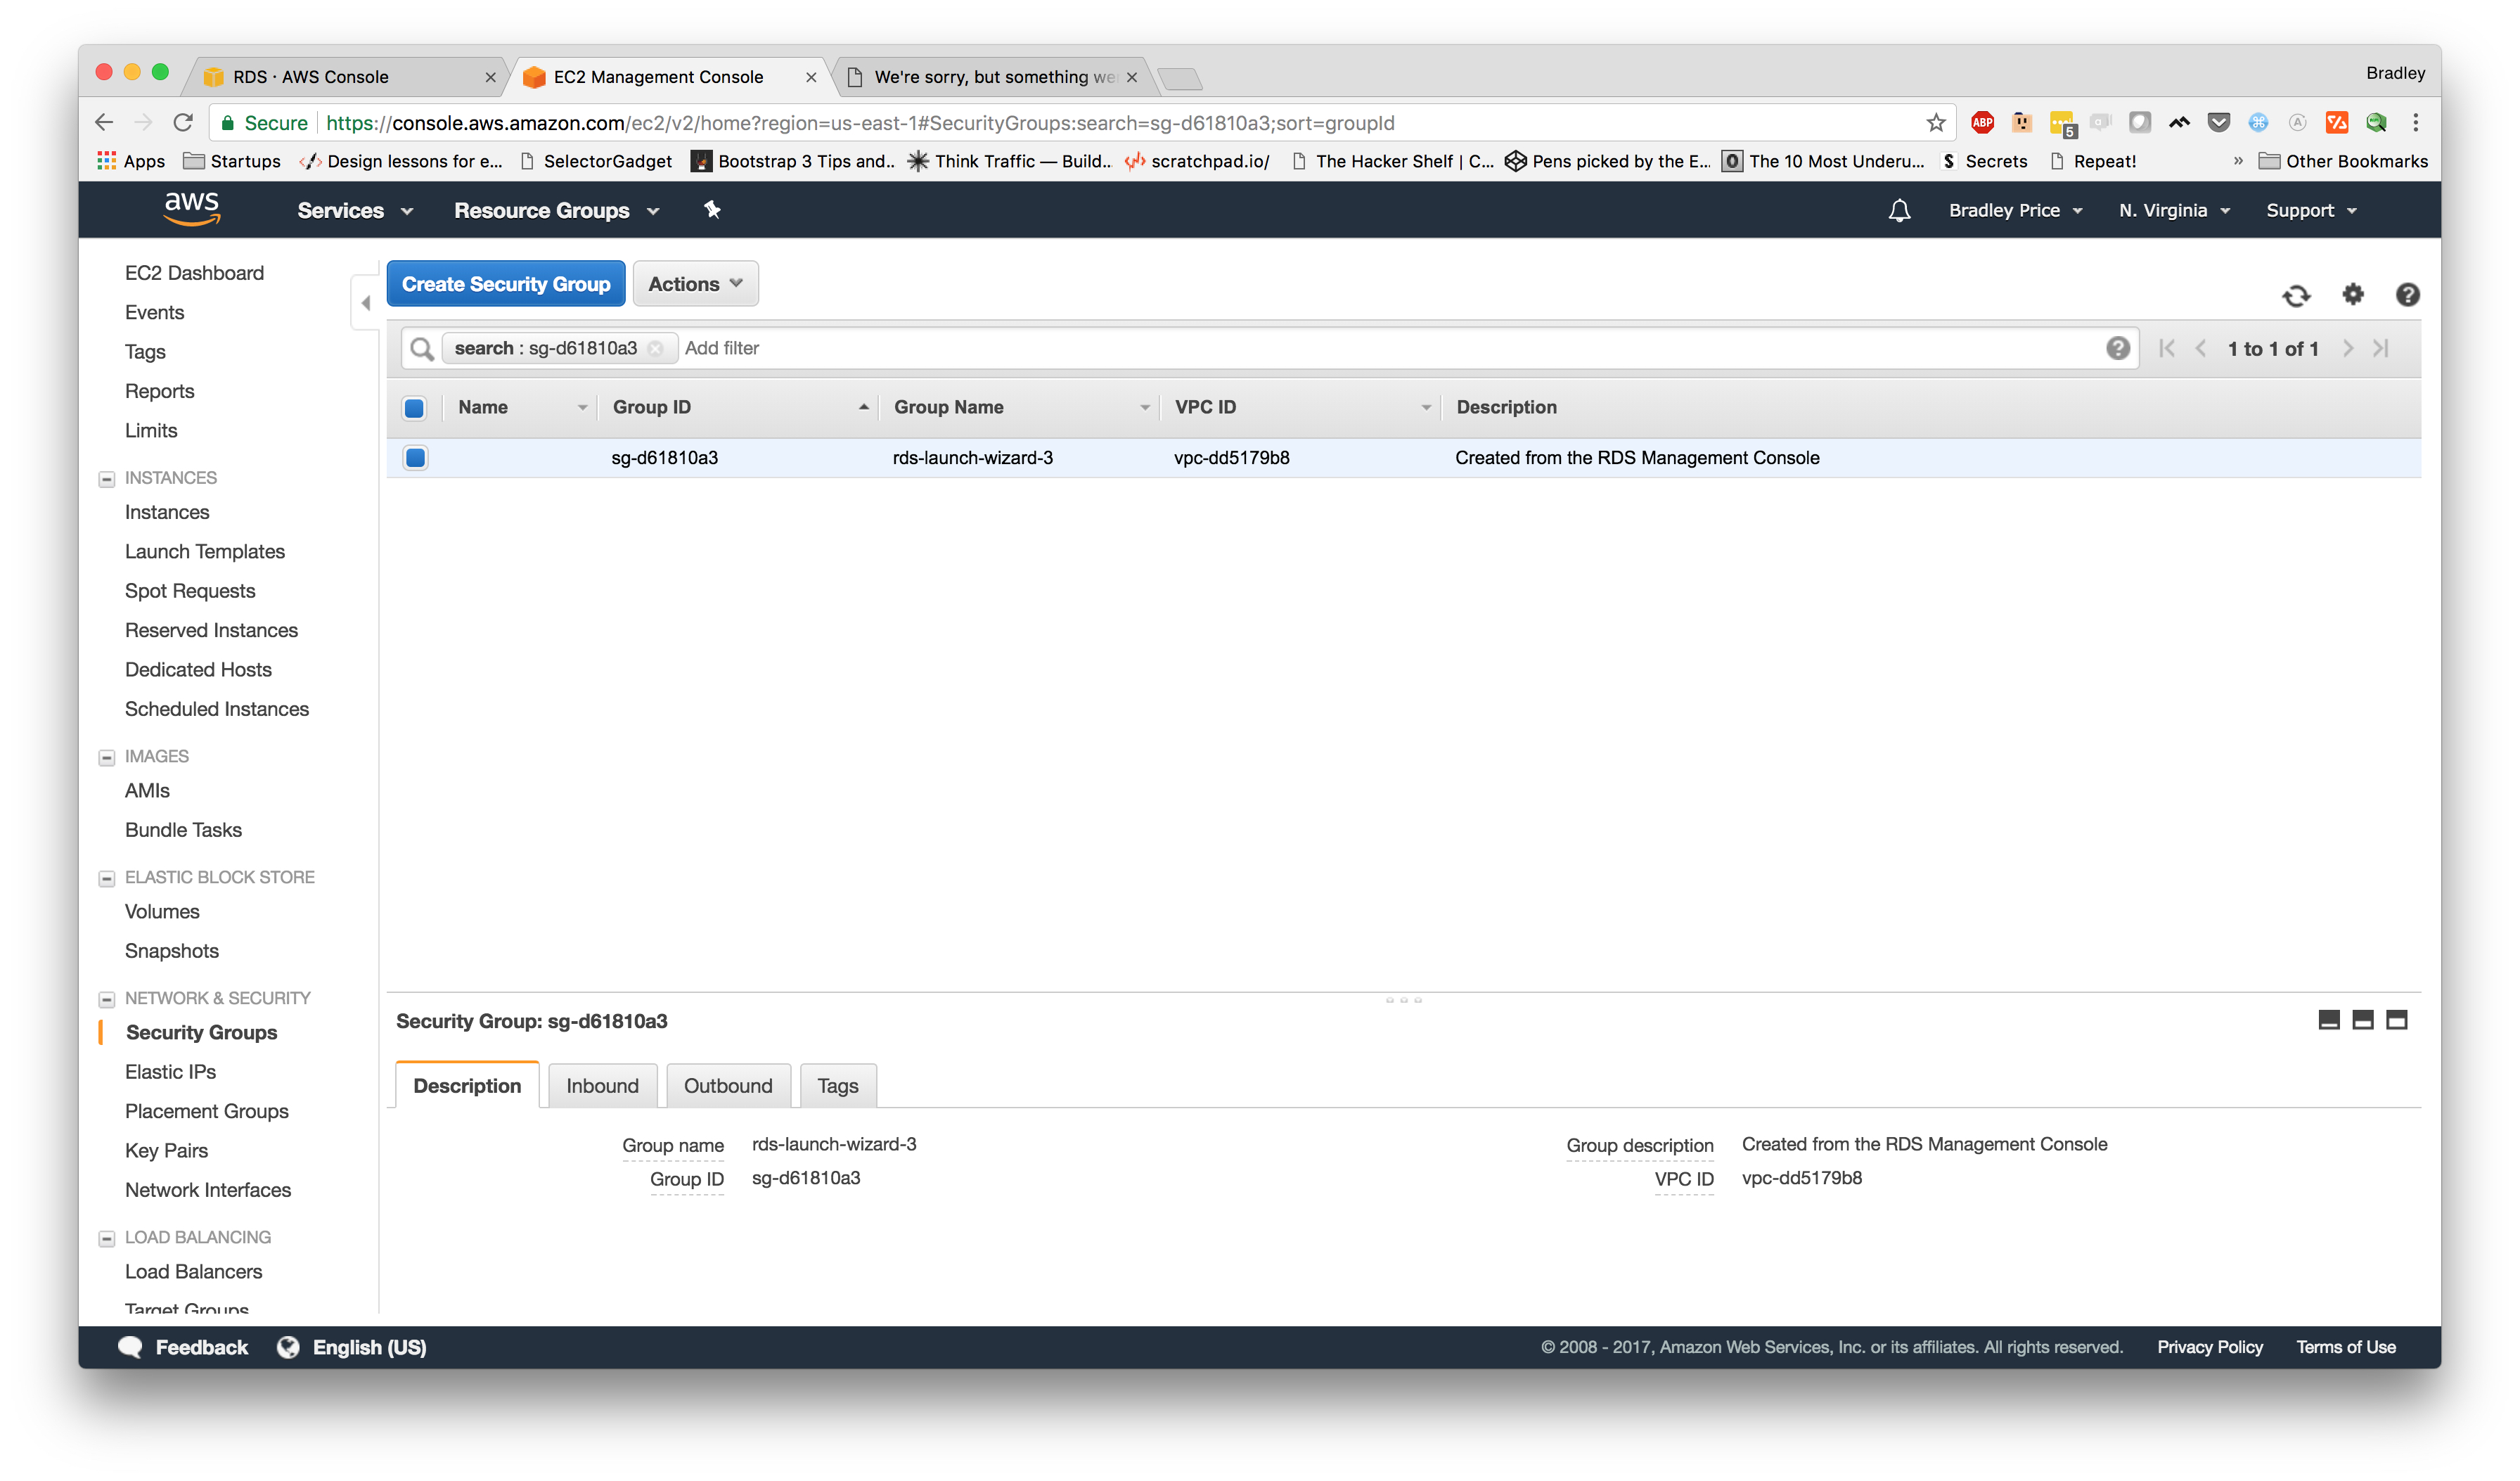
Let's go back to our services page and click on our "sg-f7d0d882
Let's move over to the "Inbound" tab at the bottom of the page and click "Edit." Now, we want to click "Add Rule" and add a Custom Rule with a Custom Source which we can search for our security group from the service. Now, our rules should look similar to this:
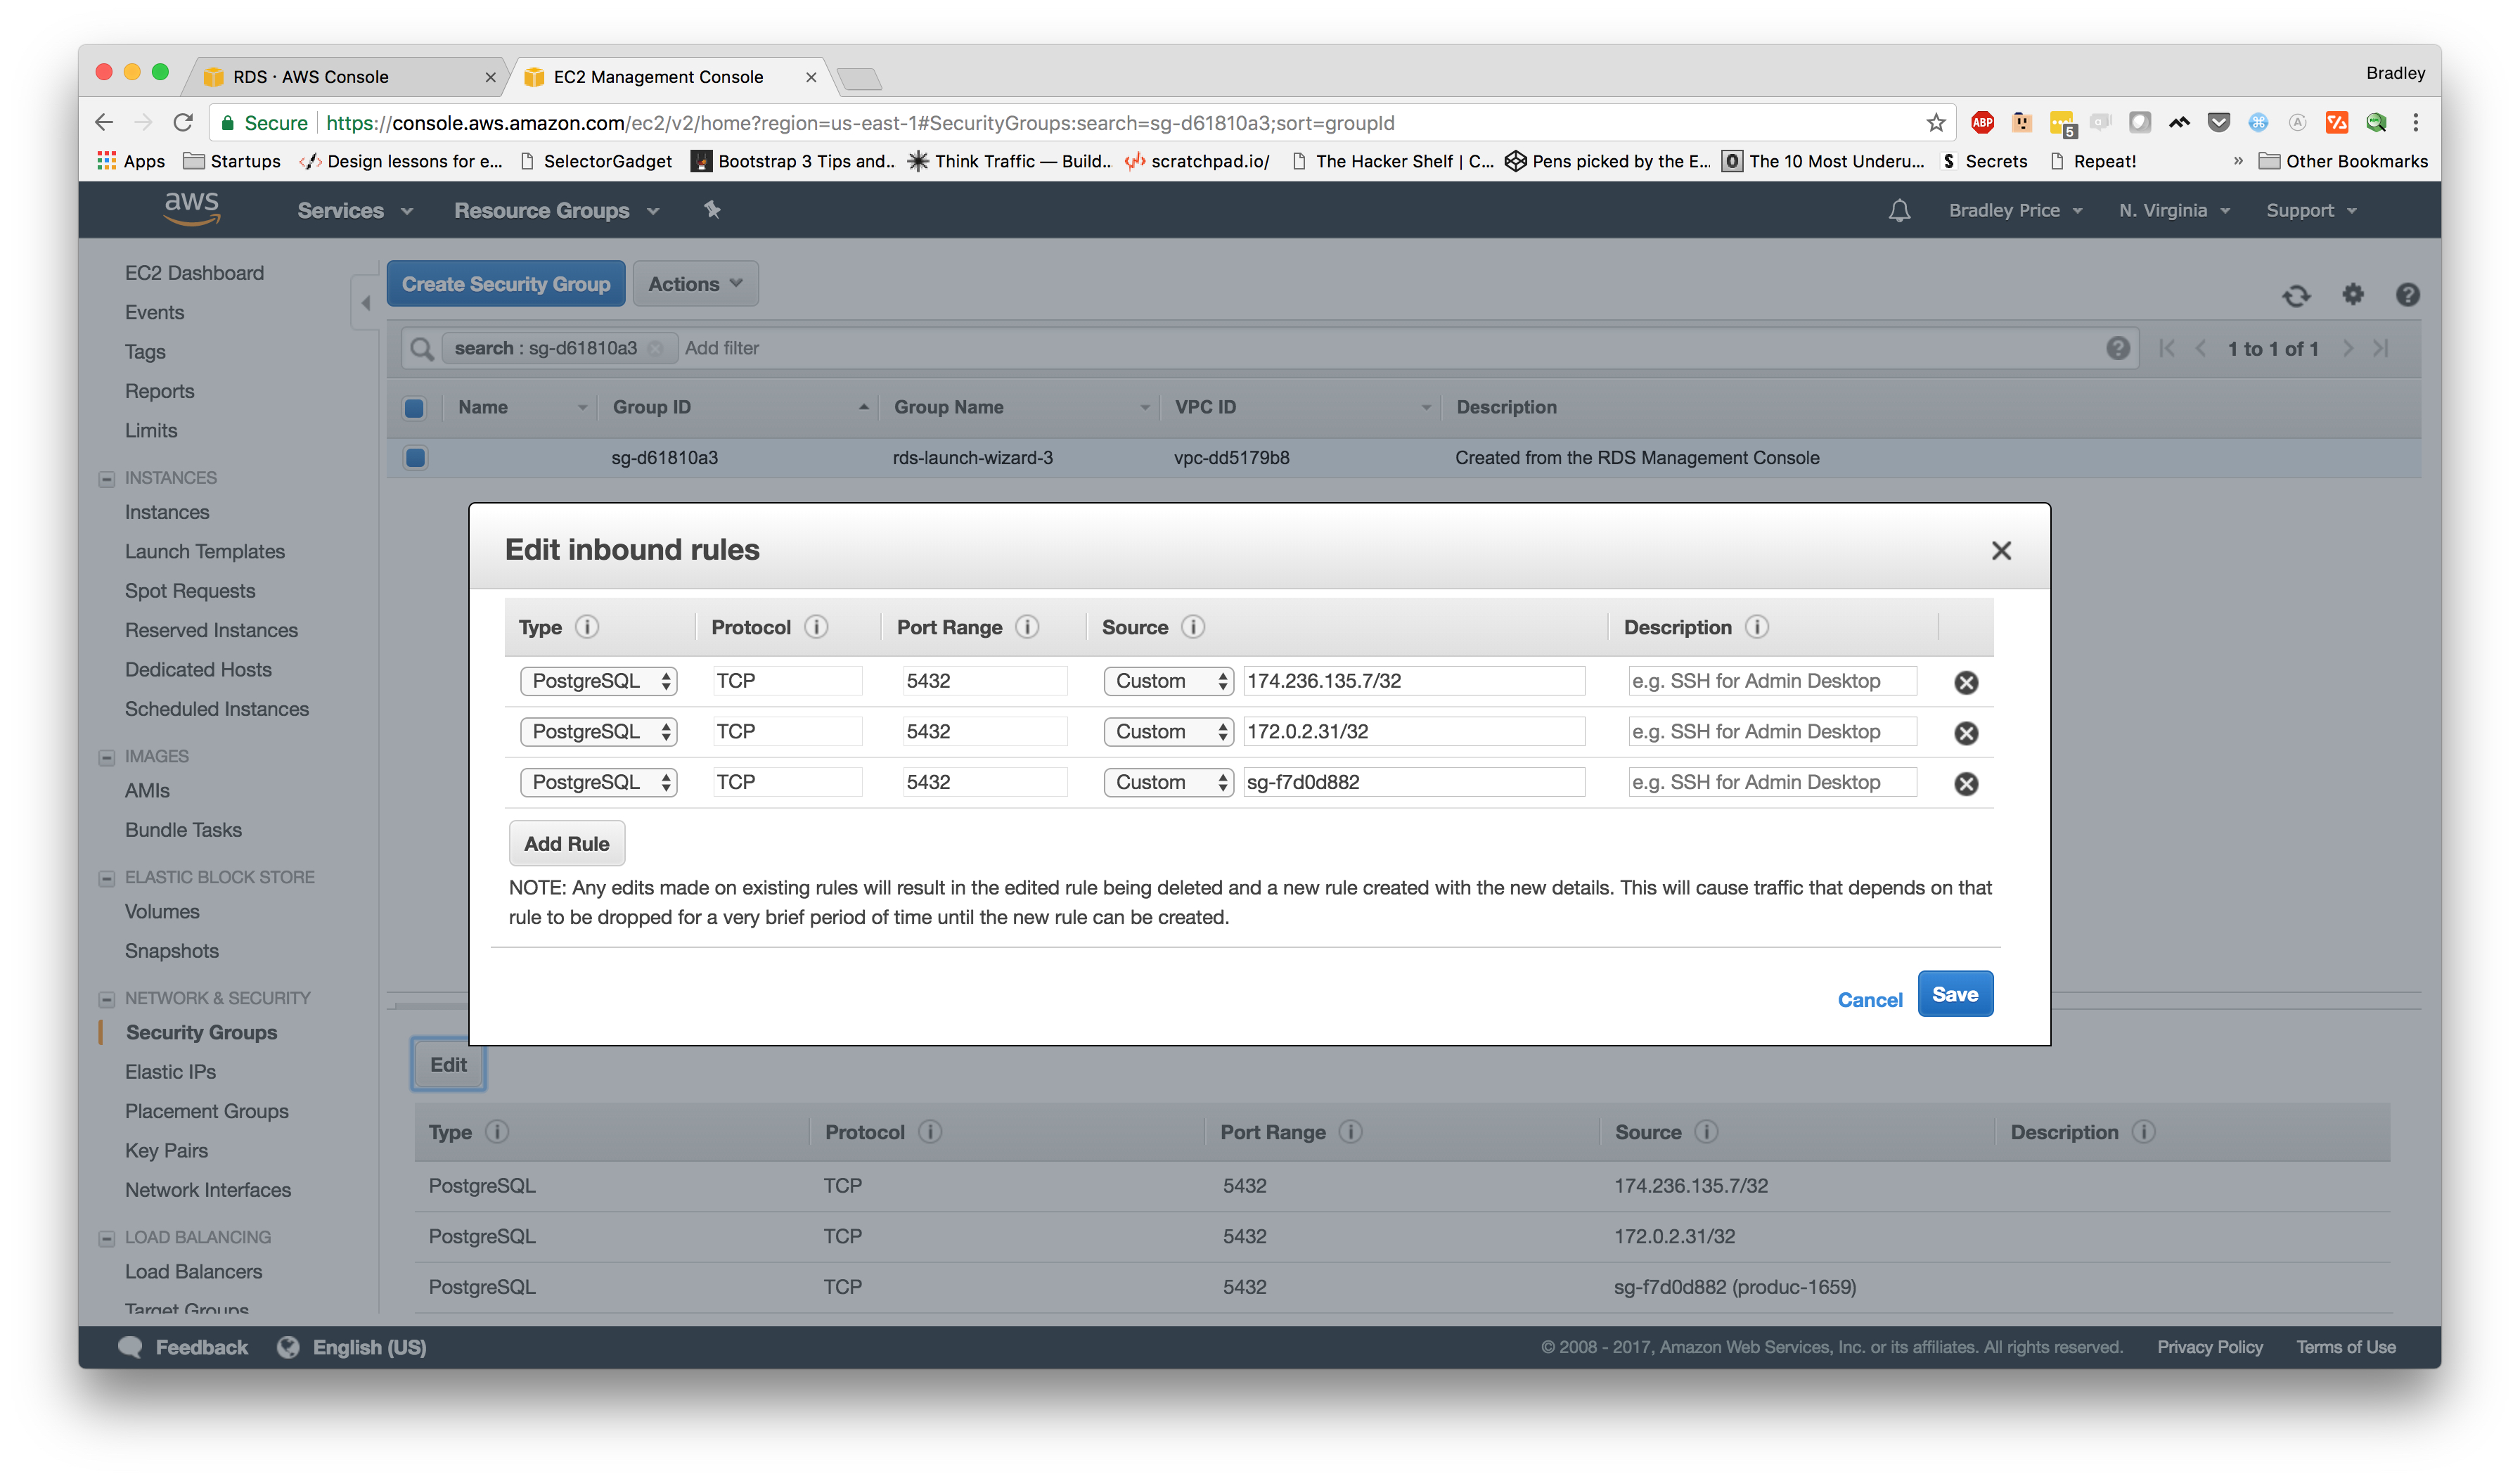
Now, we've updated the rules which should allow our service to communicate with our database. So, let's check our application again to see if it's working.
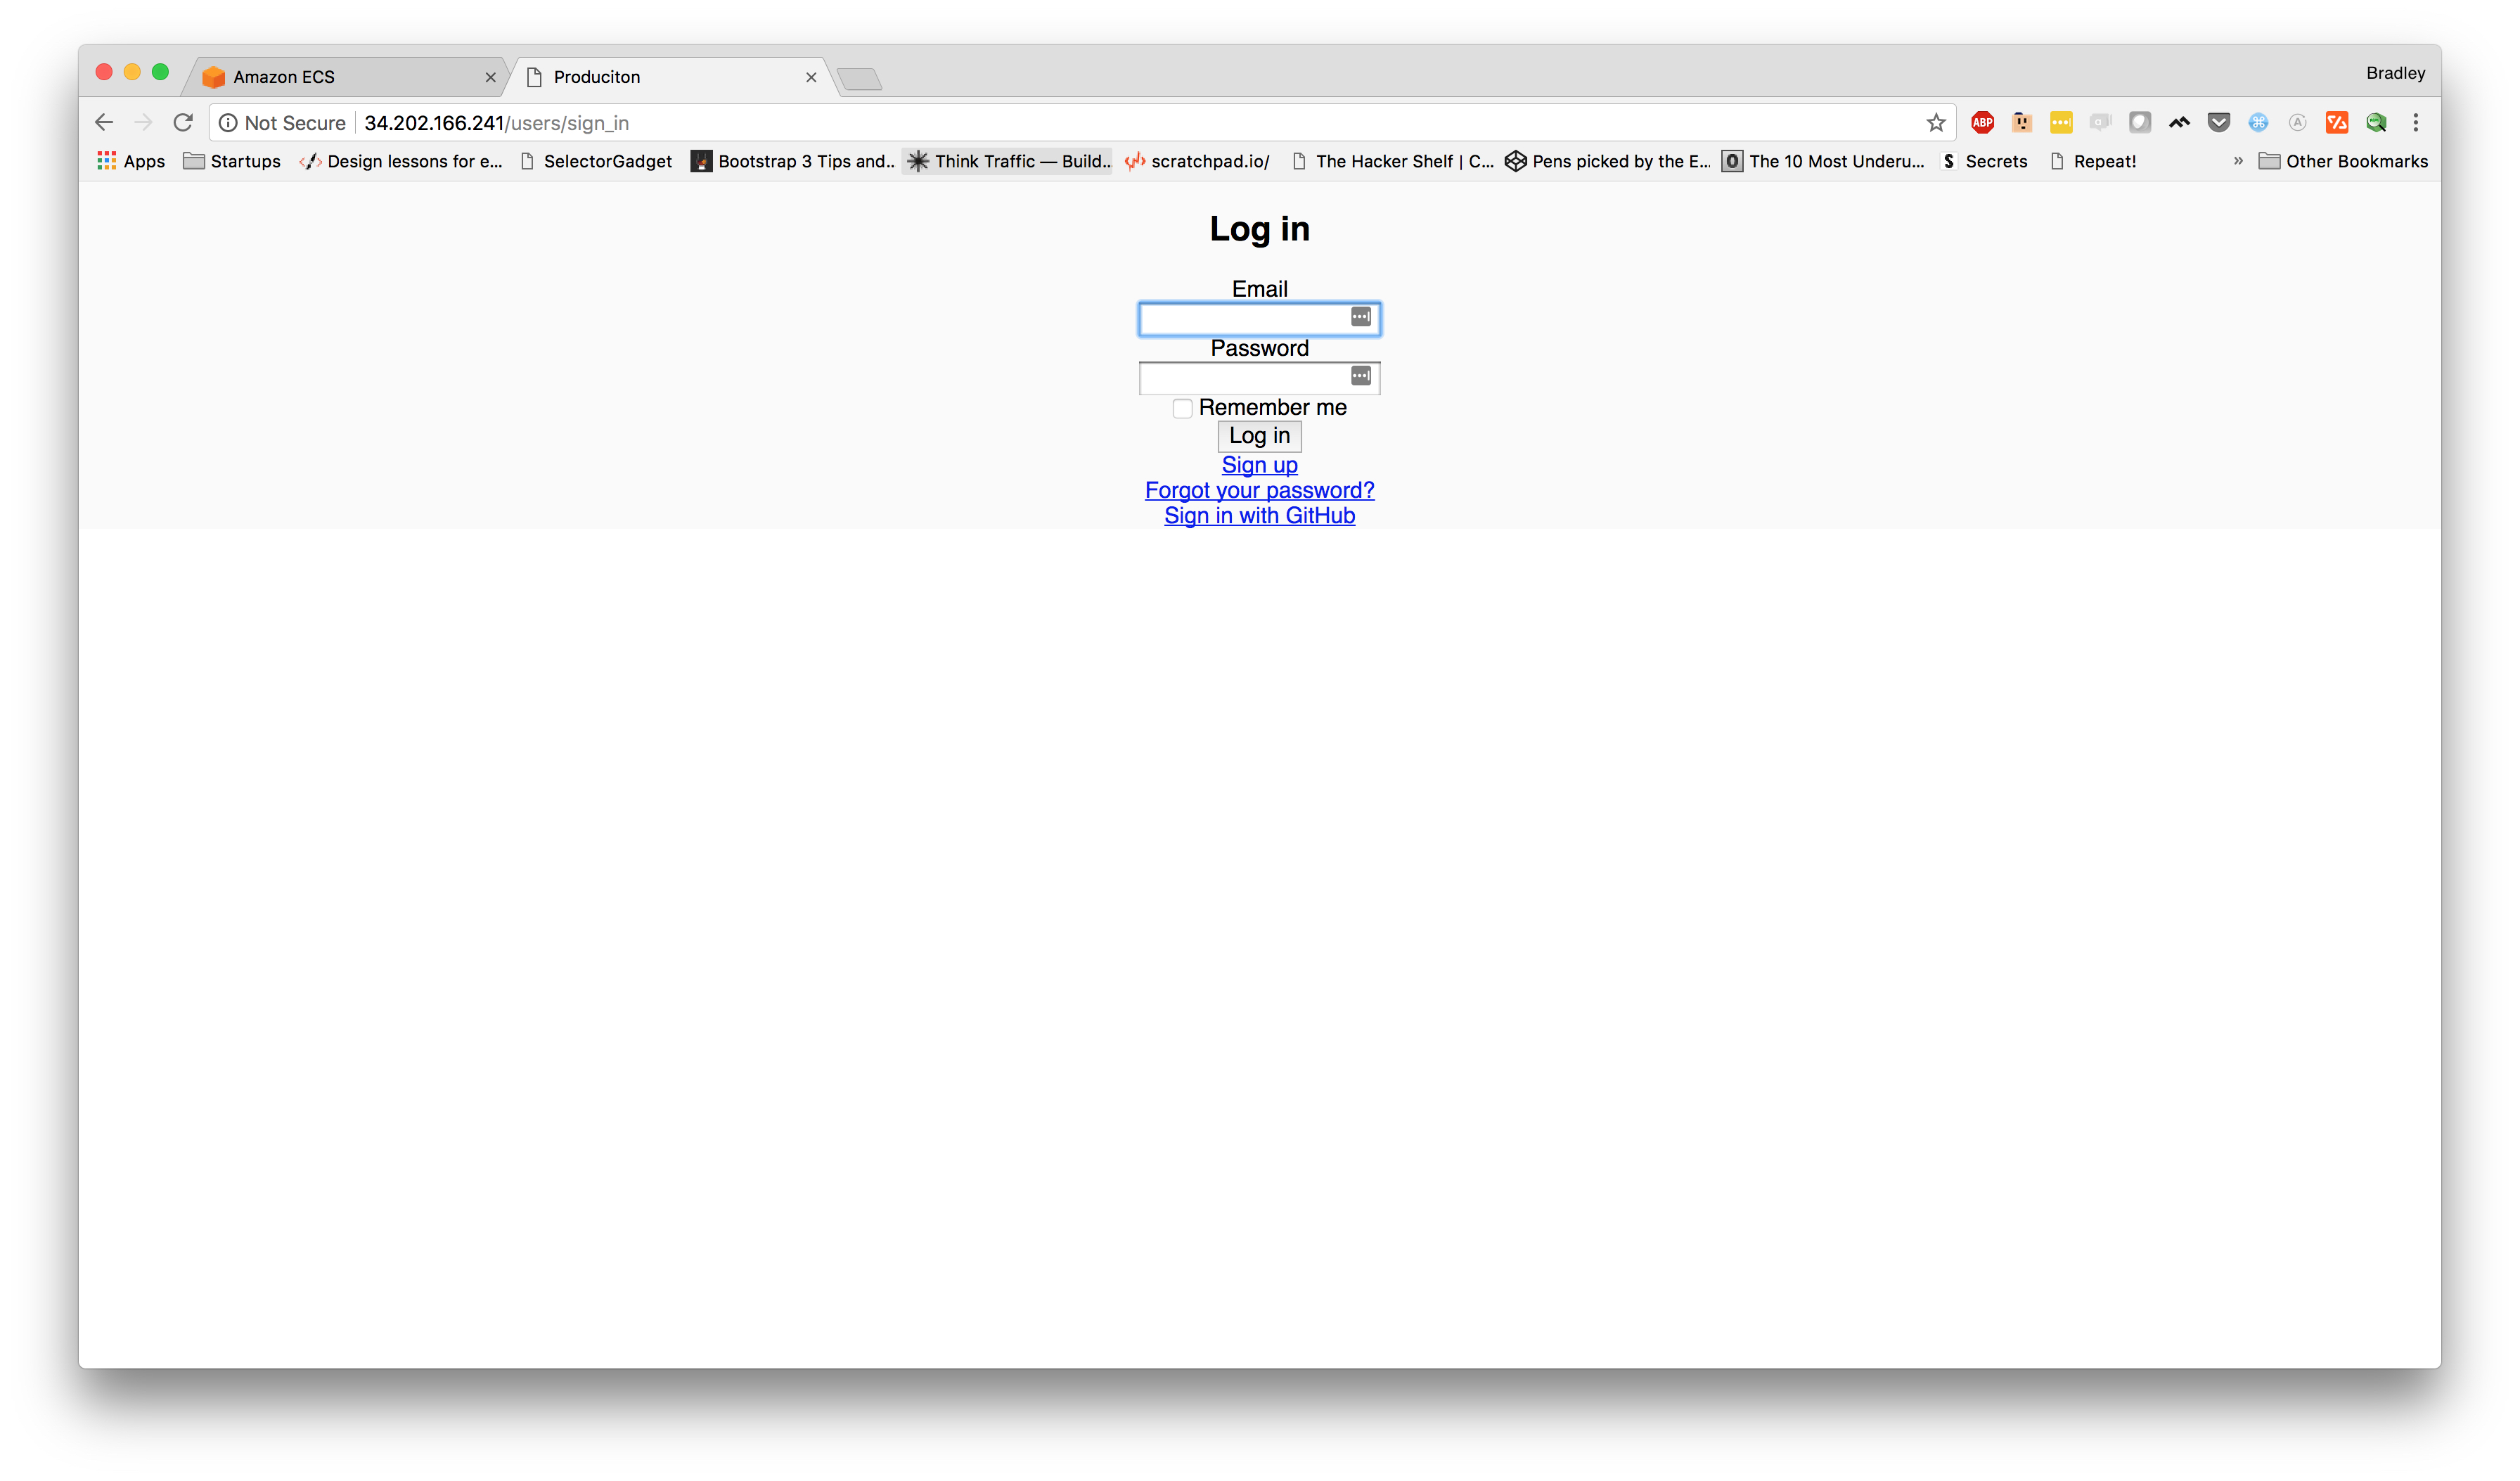
Voila. Now we have our app successfully running on AWS using the ECS and Fargate stack.
Summary
We've actually done quite a few things in this video. We've set up an elastic container repository (ECR) to allow us to push our Docker images up. We set up a
Even though we have our production application running on ECS now, there are still many things left to handle. We are not hosting our assets correctly, and we have not set up logging or application performance monitoring. Over the next few videos, we will be working toward a more "production-ready application."